
Table of Contents
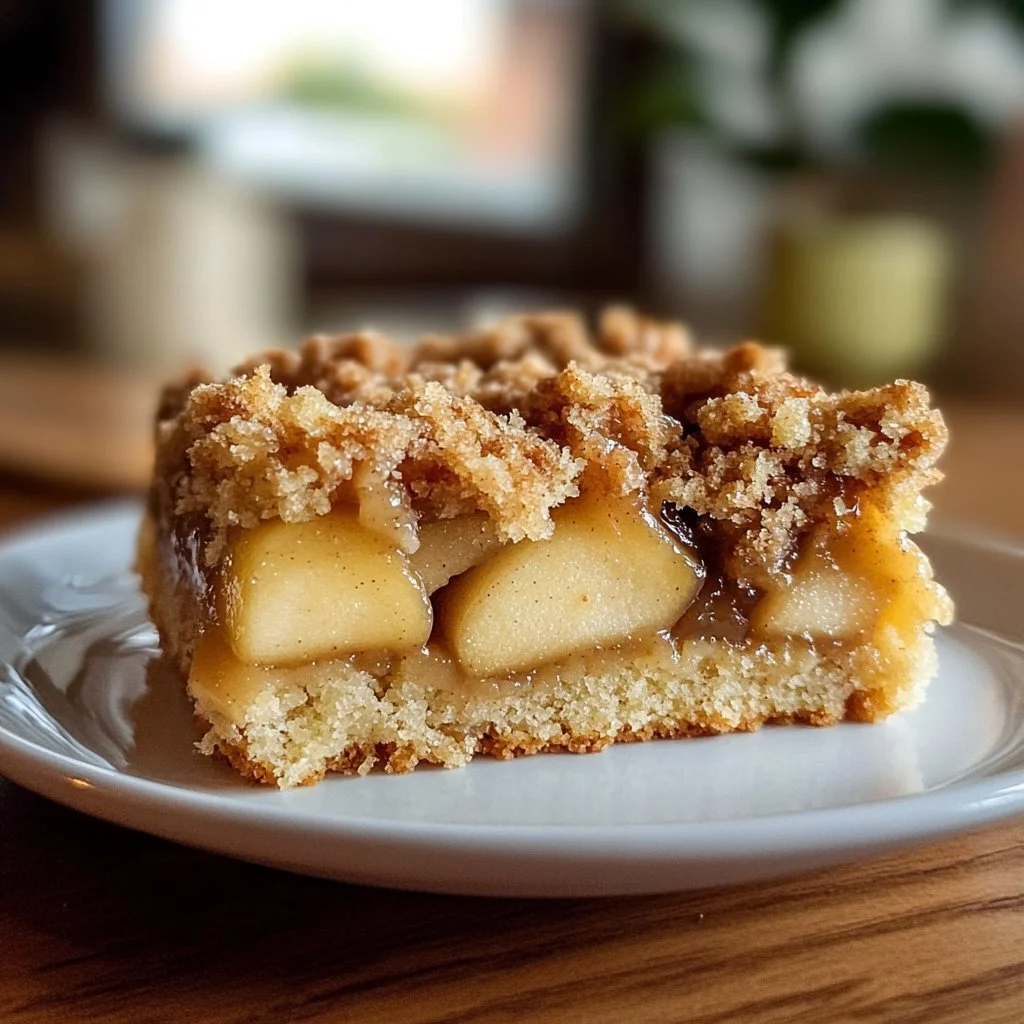
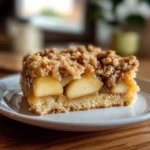
Are you ready to indulge in something irresistibly delicious this fall? Look no further than Salted Caramel Apple Crumble Bars Fall Treat. This delightful dessert combines soft, tender apples, a luscious salted caramel drizzle, and a crispy, buttery crumble topping. Every bite is a harmonious blend of flavors and textures that will remind you of cozy autumn days spent picking apples and savoring joy. Who can resist that?
What makes this recipe truly special is how easy it is to whip up in just 45 minutes. Yes, you read that right! With simple ingredients and straightforward steps, you’ll have a warm treat that’s perfect for sharing. Whether it’s a family gathering, a potluck, or just a cozy night in, these crumble bars are the ideal dessert to satisfy your sweet tooth.
Key Benefits of Salted Caramel Apple Crumble Bars Fall Treat
Why you’ll love this recipe
- Quick and Easy: Preparing this delight takes just 45 minutes from start to finish.
- Seasonal Flavors: The apples and spices create a fall-inspired treat that’s perfect for the season.
- Customizable: You can tweak the ingredients according to your preferences or dietary needs.
- Perfect for Sharing: Cut them into bars, and they’re easy to serve at any gathering.
- Satisfying Texture: The combination of a soft apple filling and a crunchy crumble will satisfy any dessert lover.
What makes it stand out
These Salted Caramel Apple Crumble Bars are not just another dessert—they encapsulate the essence of fall with their warm spices and seasonal fruits. The use of salted caramel sauce elevates this recipe from a simple apple dessert to something truly luxurious and satisfying.
What’s fantastic about this recipe is your ability to customize it. Whether you love adding nuts for crunch or mixing in different spices like ginger or clove, the options are endless. Plus, the balance of sweet and salty is unmatched, giving you a reason to go back for seconds—or thirds!
Ingredients for Salted Caramel Apple Crumble Bars Fall Treat
Complete ingredient list with measurements
- 1 cup (2 sticks) unsalted butter, melted
- 1 1/2 cups granulated sugar
- 1 teaspoon vanilla extract
- 1/2 teaspoon salt
- 2 1/2 cups all-purpose flour
- 3 cups peeled and thinly sliced apples (about 3 medium)
- 1/2 cup salted caramel sauce
- 1 teaspoon ground cinnamon
- 1/4 teaspoon ground nutmeg
Substitutes and alternatives
If you’re wondering about substitutions, here are some great options to consider:
- Butter: Use coconut oil or a vegan butter for a dairy-free version.
- Sugar: Brown sugar can be used for a richer flavor.
- Flour: Gluten-free flour blends work well here if you need a gluten-free option.
- Apples: Feel free to mix in different apple varieties like Granny Smith for tartness or Honeycrisp for sweetness.
How to Make Salted Caramel Apple Crumble Bars Fall Treat– Step-by-Step Directions
Preheat and Prepare Your Pan
- Preheat the Oven: Set your oven to 375°F (190°C) to ensure it’s ready when you finish preparing your bars.
- Line the Baking Pan: Take a 9×13-inch baking pan and line it with parchment paper. This will make removing the bars easier later.
Mix the Base
- Combine Wet Ingredients: In a large bowl, whisk together the melted butter, granulated sugar, vanilla extract, and salt until well incorporated.
- Add Flour: Slowly mix in the flour until the mixture becomes crumbly. You want a texture that holds together but is still loose.
Form the Crust
- Press into the Pan: Take about two-thirds of the crumbly mixture and press it evenly into the bottom of your lined pan to form the crust. This layer is crucial for holding everything together.
Prepare the Apple Filling
- Toss the Apples: In a separate bowl, combine the sliced apples with cinnamon and nutmeg. Mix thoroughly until the apples are coated evenly.
- Layer the Apples: Spread the apple mixture over the crust in the baking pan. Don’t worry about making it perfect; uneven layers just add character.
Add the Caramel and Topping
- Drizzle with Caramel: Generously drizzle the salted caramel sauce over the apple layer. This adds that decadent touch everyone loves.
- Crumble the Remaining Mixture: Take the remaining crumbly mixture and sprinkle it generously over the top of the apples and caramel.
Baking to Perfection
- Bake: Place the pan in the preheated oven and bake for 40-45 minutes. You want a golden brown topping and tender apples, filling your kitchen with an irresistible aroma.
Cool and Serve
- Cool Completely: Once baked, allow the bars to cool completely in the pan before cutting them into squares or rectangles. This prevents them from falling apart.
Serving Suggestions for Salted Caramel Apple Crumble Bars Fall Treat
Best occasions to serve this dish
These bars are incredibly versatile and perfect for:
- Family meals
- Neighborhood potlucks
- Birthday celebrations
- Holiday gatherings like Thanksgiving
- Cozy evenings at home with friends
What to serve with it
- Drinks: Warm cider, herbal tea, or coffee.
- Sauces: More salted caramel, whipped cream, or vanilla ice cream.
- Sides: A fresh salad with nuts or a charcuterie board for balance.
Storing Salted Caramel Apple Crumble Bars Fall Treat Properly
Best storage practices
For keeping your Salted Caramel Apple Crumble Bars fresh:
- In the Fridge: Store in an airtight container for up to 5 days.
- In the Freezer: You can freeze them for up to 2 months, separating layers with parchment paper.
Reheating and freezing tips
To enjoy these bars even later:
- Reheat: Warm individual pieces in the microwave for about 15-20 seconds for a cozy treat. Avoid sogginess by using a paper towel.
- Freezing: Make sure they’re fully cooled before wrapping them tightly in plastic wrap and placing them in a freezer bag.
Tips & Tricks for Salted Caramel Apple Crumble Bars Fall Treat
Mistakes to avoid
- Overmixing the crust can lead to a tougher texture.
- Using overly soggy apples can result in a mushy filling.
- Skipping the cooling time may cause the bars to crumble apart.
Extra tips for better results
- Use a mix of apple varieties for depth of flavor and texture.
- Add nuts to the crumble for some added crunch and nutrition.
- Serve warm with a scoop of ice cream on top for a delectable dessert experience.
Recipe Variations of Salted Caramel Apple Crumble Bars Fall Treat
Creative twists
Looking to mix things up? Here are some ideas:
- Nutty Crumble: Add chopped pecans or walnuts to the crumble mixture for added flavor.
- Dried Fruits: Incorporate dried cranberries or raisins for a chewier texture.
- Different Spices: Experiment with ginger or cloves for an extra kick.
Dietary adjustments
This recipe can easily be adjusted for various dietary needs:
- Vegan: Substitute butter with coconut oil and use a plant-based egg replacer if needed.
- Gluten-Free: Swap the all-purpose flour with a gluten-free blend.
- Dairy-Free: Use nut milk for the salted caramel sauce.
Conclusion about Salted Caramel Apple Crumble Bars Fall Treat
In conclusion, these Salted Caramel Apple Crumble Bars Fall Treat are truly a gem of a recipe. Their perfect blend of flavors, easy preparation, and versatility make them the ideal addition to any fall gathering or cozy night at home. You’ll fall in love with their warmth, taste, and the delightful crunch from the crumble topping.
So gather your ingredients, invite some friends, and enjoy making these bars together. Remember, sharing is caring—so don’t hesitate to share this delicious recipe with everyone you know!
FAQs about Salted Caramel Apple Crumble Bars Fall Treat: Get Addicted in 45 Min
What if it doesn’t turn out right?
If your bars don’t hold together, they may need more time to cool. If they’re dry, consider using more caramel or butter next time.
Can I prepare it ahead of time?
Absolutely! You can make these bars a day in advance. Just store them in the fridge and cut them into bars when ready to serve.
What are the best ingredient substitutions?
Common swaps include using coconut oil instead of butter, brown sugar instead of granulated sugar, and gluten-free flour to accommodate special diets.
How long can it be stored?
When refrigerated, you can easily store these bars for 5 days. If freezing, they’ll be good for up to 2 months.
Can I use store-bought dough or crust?
While we recommend making your own for freshness and flavor, you can certainly use a store-bought crust in a pinch.
Is this recipe kid-friendly?
Definitely! Kids will love the sweet apple filling and crumble topping, and the easy preparation makes it fun for them to help out.
Can I make it allergen-free?
Yes! Substitute nuts, dairy, and gluten ingredients to create allergen-free bars. Just ensure all substitutes are verified as allergen-free for your needs.
Salted Caramel Apple Crumble Bars
Ingrédients
For the crust and topping
- 1 cup unsalted butter, melted Substitute with coconut oil for dairy-free version.
- 1.5 cups granulated sugar Brown sugar can be used for richer flavor.
- 1 teaspoon vanilla extract
- 0.5 teaspoon salt
- 2.5 cups all-purpose flour Can use gluten-free flour blends.
- 0.5 cup salted caramel sauce
For the filling
- 3 cups peeled and thinly sliced apples (about 3 medium) Granny Smith for tartness or Honeycrisp for sweetness works well.
- 1 teaspoon ground cinnamon
- 0.25 teaspoon ground nutmeg
Instructions
Preparation
- Preheat your oven to 375°F (190°C) and line a 9×13-inch baking pan with parchment paper.
- In a large bowl, whisk together the melted butter, granulated sugar, vanilla extract, and salt until well incorporated.
- Slowly mix in the flour until the mixture becomes crumbly.
- Press about two-thirds of the crumbly mixture evenly into the bottom of the lined pan to form the crust.
Prepare the Apple Filling
- In a separate bowl, combine the sliced apples with cinnamon and nutmeg, mixing thoroughly until the apples are coated.
- Spread the apple mixture evenly over the crust.
Add Caramel and Topping
- Generously drizzle the salted caramel sauce over the apple layer.
- Sprinkle the remaining crumbly mixture over the top of the apples and caramel.
Baking
- Bake in the preheated oven for 40-45 minutes until golden brown on top and the apples are tender.
Cooling and Serving
- Allow the bars to cool completely in the pan before cutting into squares or rectangles.