
Table of Contents
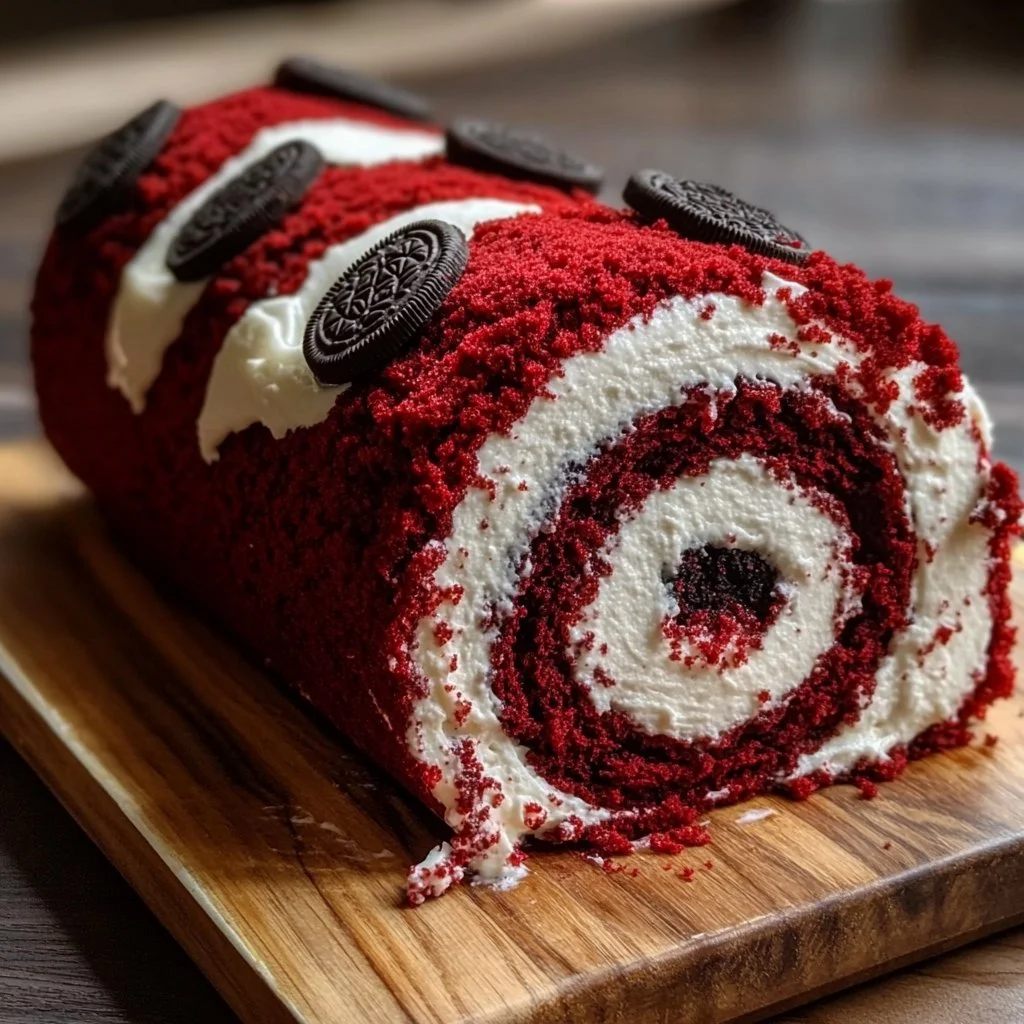
When it comes to desserts that wow, few can rival the captivating beauty of a Red Velvet Oreo Cake Roll. Imagine a rich, velvety cake rolled into a delightful log, filled with luscious Oreo cream and topped with a delicate dusting of powdered sugar. Does that not sound irresistible? This recipe is not just another dessert; it’s a celebration of flavors and colors that can brighten any occasion.
What truly sets the Red Velvet Oreo Cake Roll apart is its perfect balance of sweetness and depth. The combination of the classic red velvet flavor with the crunch of Oreo cookies creates a dessert that’s both familiar and exciting. Whether you’re making it for a family gathering or just because you want something special, this cake roll is a fantastic way to bring joy to your table.
Key Benefits of Red Velvet Oreo Cake Roll
Why you’ll love this recipe
- Easy to Make: With simple ingredients and straightforward steps, this recipe is beginner-friendly.
- Impressive Presentation: The vibrant red color and unique roll shape make it visually stunning.
- Versatile for Occasions: Perfect for birthdays, holidays, or just a cozy weekend treat.
- Decadent Flavor: The fusion of red velvet and Oreo filling creates a flavor experience that’s hard to forget.
- Make-Ahead Friendly: It’s easy to prepare in advance, allowing you to enjoy the moment when it’s time to serve.
What makes it stand out
The Red Velvet Oreo Cake Roll isn’t just another dessert; it’s a conversation starter. The unique concept of rolling moist, chocolatey red velvet cake filled with a creamy Oreo mixture makes it a standout dish at any gathering. It’s not only perfect for special occasions but also delightful for a simple dessert to elevate your weekday meals.
Its seasonal appeal can’t be overlooked. Come Valentine’s Day, Christmas, or even a cozy autumn evening, this cake roll fits right in, adding a pop of color and deliciousness to the table. You can also tweak it to suit your preferences—add nuts for a crunch, or change the filling to match the season.
Ingredients for Red Velvet Oreo Cake Roll
Crafting this stunning Red Velvet Oreo Cake Roll requires a simple shopping list and a little preparation. Let’s break down everything you need into easy-to-understand sections.
Complete ingredient list with measurements
- 1 cup all-purpose flour
- 1 cup granulated sugar
- 1/4 cup unsweetened cocoa powder
- 1 teaspoon baking powder
- 1/2 teaspoon baking soda
- 1/2 teaspoon salt
- 3 large eggs
- 1/2 cup vegetable oil
- 1 teaspoon vanilla extract
- 1 tablespoon red food coloring
- 1 cup heavy cream
- 1 cup crushed Oreo cookies
- 1/2 cup cream cheese, softened
- Powdered sugar for dusting
Substitutes and alternatives
Not all of us can have everything in our pantry, but don’t worry! Here are some common swaps:
- Gluten-Free: Use a 1:1 gluten-free flour blend instead of all-purpose flour.
- Dairy-Free: Almond-based or oat cream cheese works well instead of regular cream cheese, and coconut cream can be used instead of heavy cream.
- Vegetable Oil Alternative: Melted coconut oil or melted butter can easily replace vegetable oil.
- Egg Substitute: For a vegan version, consider using flax eggs (1 tablespoon flaxseed meal + 2.5 tablespoons water per egg).
How to Make Red Velvet Oreo Cake Roll – Step-by-Step Directions
Making the Red Velvet Oreo Cake Roll might seem intimidating at first, but it’s pretty simple! Ready? Let’s dive into the step-by-step process, ensuring your cake roll turns out perfect every time.
Step 1: Preheat the oven
Start by preheating your oven to 350°F (175°C). This step is crucial as it prepares your oven for baking and helps the cake rise properly.
Step 2: Prepare the pan
Line a 15×10-inch jelly roll pan with parchment paper. Ensure the paper hangs over the edges slightly; this will make it easier to lift the cake out later.
Step 3: Mix dry ingredients
In a mixing bowl, combine the all-purpose flour, granulated sugar, cocoa powder, baking powder, baking soda, and salt. Whisk them together until fully blended. This mixture provides the structure and flavor for your cake.
Step 4: Combine wet ingredients
In another bowl, whisk together the eggs, vegetable oil, vanilla extract, and red food coloring until fully combined. The vibrant color of the red food coloring should shine through, setting the stage for that classic red velvet appearance.
Step 5: Blend dry and wet ingredients
Gradually add your dry mixture to the wet ingredients, mixing gently with a spatula until you achieve a smooth batter. Don’t overmix; a few small lumps are fine.
Step 6: Pour and spread the batter
Pour the batter into your prepared pan. Spread it evenly to ensure even baking. This is your canvas for the beautiful cake roll!
Step 7: Bake the cake
Place the pan in the oven and bake for 12-15 minutes, or until a toothpick inserted in the center comes out clean. As it bakes, your kitchen will start to smell heavenly!
Step 8: Roll the cake
As soon as the cake is out of the oven, you’ll want to act fast. Carefully roll the cake while it’s still warm, using the parchment paper to guide the roll. Let it cool in this position. This step helps maintain the shape of the roll.
Step 9: Make the filling
In a separate bowl, whip the heavy cream until stiff peaks form. Gently fold in the crushed Oreo cookies and softened cream cheese until fully combined. Take a moment to savor the aroma!
Step 10: Unroll and fill the cake
Once the cake has cooled completely, gently unroll it. Spread the Oreo filling evenly across the surface, leaving a small border around the edges.
Step 11: Roll it back up
Now, roll the cake back up without the parchment paper this time. Place it seam-side down on a serving platter. It should look like a masterpiece already!
Step 12: Dust and chill
Finally, dust the top with powdered sugar and refrigerate the cake roll for at least 1 hour before serving. This final touch not only enhances the presentation but also allows the flavors to meld together beautifully.
Serving Suggestions for Red Velvet Oreo Cake Roll
Bringing your Red Velvet Oreo Cake Roll to the table can spark joy! Here are some fabulous serving suggestions to elevate your dessert presentation.
Best occasions to serve this dish
- Family Gatherings: A surefire way to impress your relatives during family gatherings.
- Birthday Parties: Make someone’s special day unforgettable with this delicious treat.
- Holidays: Its festive red hue makes it ideal for Christmas or Valentine’s Day celebrations.
- Casual Get-Togethers: Perfect for any casual dinner or afternoon coffee with friends.
What to serve with it
- Beverages: Pair it with milk, hot chocolate, or your favorite coffee.
- Sauces: A drizzle of chocolate or caramel sauce enhances the flavors.
- Toppings: Additional crushed Oreos, whipped cream, or fresh berries make for a delightful topping.
- Sides: Consider serving with a scoop of vanilla ice cream to balance the flavors.
Storing Red Velvet Oreo Cake Roll Properly
To enjoy your Red Velvet Oreo Cake Roll for days to come, proper storage is key.
Best storage practices
- In the Fridge: The cake can be stored in an airtight container for up to 4 days. This allows it to maintain its moisture and flavor.
- In the Freezer: For longer storage, wrap it in plastic wrap and then in aluminum foil. It can last up to 3 months in the freezer.
Reheating and freezing tips
- Reheating: If desired, thaw the frozen cake in the fridge overnight. You can optionally warm individual slices in the microwave for a few seconds if you prefer a cozy snack.
- Avoiding Sogginess: Ensure it’s well-wrapped to prevent moisture loss. This helps retain its texture, avoiding that soggy feeling upon thawing.
Tips & Tricks for Red Velvet Oreo Cake Roll
Achieving a perfect Red Velvet Oreo Cake Roll is easier with these helpful tips and tricks!
Mistakes to avoid
- Overmixing the Batter: This can lead to a tough texture. Mix until just combined.
- Not Cooling Before Filling: Ensure the cake is completely cool before adding the filling to prevent melting.
- Skipping the Parchment Paper: This can lead to sticking, making it hard to roll without tearing.
Extra tips for better results
- Use Fresh Ingredients: Fresh baking powder and cream will yield the best results.
- Chill the Filling: Chill the filling for a bit before spreading it on the cake, making it easier to work with.
- Experiment with Flavors: Don’t hesitate to add a splash of almond extract or mint for a unique twist.
Recipe Variations of Red Velvet Oreo Cake Roll
Ready to get creative? The Red Velvet Oreo Cake Roll can be easily customized to suit different tastes and dietary restrictions.
Creative twists
- Nutty Touch: Add finely chopped walnuts or pecans to the filling for a delightful crunch.
- Spicy Addition: For the fall season, include a touch of cinnamon or nutmeg in the batter for a warm flavor.
- Festive Spins: Change the food coloring for other holidays—green for St. Patrick’s Day or orange for Halloween!
Dietary adjustments
- Vegan Variation: Replace eggs with flax eggs, use almond or coconut milk, and vegan cream cheese.
- Gluten-Free: Use almond flour or a gluten-free baking mix as a substitute for all-purpose flour.
- Dairy-Free: Swap heavy cream and cream cheese with coconut cream and cashew cream, respectively.
Conclusion about Red Velvet Oreo Cake Roll
The Red Velvet Oreo Cake Roll is more than just a dessert; it’s a sweet embrace that invites you to celebrate life’s little moments. Its delightful flavors, combined with its beautiful presentation, make it a truly versatile treat, perfect for any occasion.
Don’t just take our word for it; try making this cake roll yourself. You’ll find it easy, rewarding, and oh-so delicious! Share this recipe with your loved ones and enjoy the smiles it brings to your table.
FAQs about Red Velvet Oreo Cake Roll
Here are some frequently asked questions to help you with your Red Velvet Oreo Cake Roll baking journey.
What if it doesn’t turn out right?
If your cake doesn’t roll properly, it might have cooled too much. Give it another try while it’s warm next time. Remember, practice makes perfect!
Can I prepare it ahead of time?
Absolutely! The Red Velvet Oreo Cake Roll can be made a day in advance. Just store it in the fridge until you’re ready to serve.
What are the best ingredient substitutions?
Common substitutions include gluten-free flour for those with gluten allergies, or vegan cream cheese for a dairy-free option.
How long can it be stored?
In an airtight container in the fridge, it lasts 3-4 days, and in the freezer, it can last up to 3 months.
Can I use store-bought dough or crust?
While it’s best made from scratch for flavor and texture, you could use pre-made cake mix as a shortcut.
Is this recipe kid-friendly?
Definitely! Kids will love the vibrant colors and the fun of rolling the cake. Just supervise during baking.
Can I make it allergen-free?
Yes, with simple swaps like gluten-free flour and dairy-free alternatives, you can adapt this recipe to meet various dietary needs.
Now armed with this comprehensive guide, you’re ready to create a masterpiece. Enjoy your baking adventure with the Red Velvet Oreo Cake Roll!
Red Velvet Oreo Cake Roll
Equipment
- plaque à roulé (jelly roll pan)
- Papier sulfurisé
- Batteur électrique
- Spatule
- Torchon propre
Ingrédients
Gâteau Red Velvet
- 3/4 cup farine tout usage
- 1/4 cup cacao non sucré
- 1 tsp levure chimique
- 1/4 tsp sel
- 4 œufs température ambiante
- 3/4 cup sucre granulé
- 1 tsp extrait de vanille
- 1 tsp vinaigre blanc
- 1 tsp colorant rouge (gel ou liquide) ajuster selon intensité désirée
Garniture Oreo Cream
- 1 cup crème à fouetter (35%) froide
- 225 g fromage à la crème ramolli
- 1/2 cup sucre glace
- 8 biscuits Oreo écrasés
Décoration (optionnelle)
- Oreo émiettés
- sucre glace ou chocolat fondu pour le dessus
Instructions
- Préchauffer le four à 180 °C. Chemiser une plaque à roulé de papier sulfurisé et la graisser légèrement.
- Dans un bol, tamiser la farine, le cacao, la levure et le sel. Réserver.
- Dans un grand bol, battre les œufs et le sucre pendant 3 à 5 minutes jusqu’à ce que le mélange blanchisse et double de volume. Ajouter la vanille, le vinaigre et le colorant rouge.
- Incorporer délicatement les ingrédients secs à la spatule jusqu’à obtenir une pâte homogène.
- Verser la pâte dans la plaque et lisser. Cuire 10 à 12 minutes ou jusqu’à ce qu’un cure-dent en ressorte propre.
- Dès la sortie du four, démouler sur un torchon propre saupoudré de sucre glace. Retirer le papier sulfurisé et rouler le gâteau délicatement avec le torchon. Laisser refroidir complètement.
- Préparer la garniture : battre le fromage à la crème et le sucre glace jusqu’à consistance lisse. Incorporer la crème fouettée, puis les Oreo écrasés.
- Dérouler le gâteau refroidi, étaler uniformément la crème Oreo, puis le rouler à nouveau sans le torchon. Envelopper dans un film plastique et réfrigérer 30-45 minutes.
- Décorer avec du sucre glace, du chocolat fondu ou des morceaux d’Oreo avant de servir.