
Table of Contents
Introduction to No Bake Red Velvet Cake Balls: 5 Steps to Pure Bliss
Are you craving something sweet and satisfying, yet easy to whip up? The answer lies in the delightful No Bake Red Velvet Cake Balls: 5 Steps to Pure Bliss! This charming dessert combines the romance of red velvet cake with the simplicity of no-bake treats. Whether it’s a special occasion or a casual gathering, these cake balls are sure to impress.
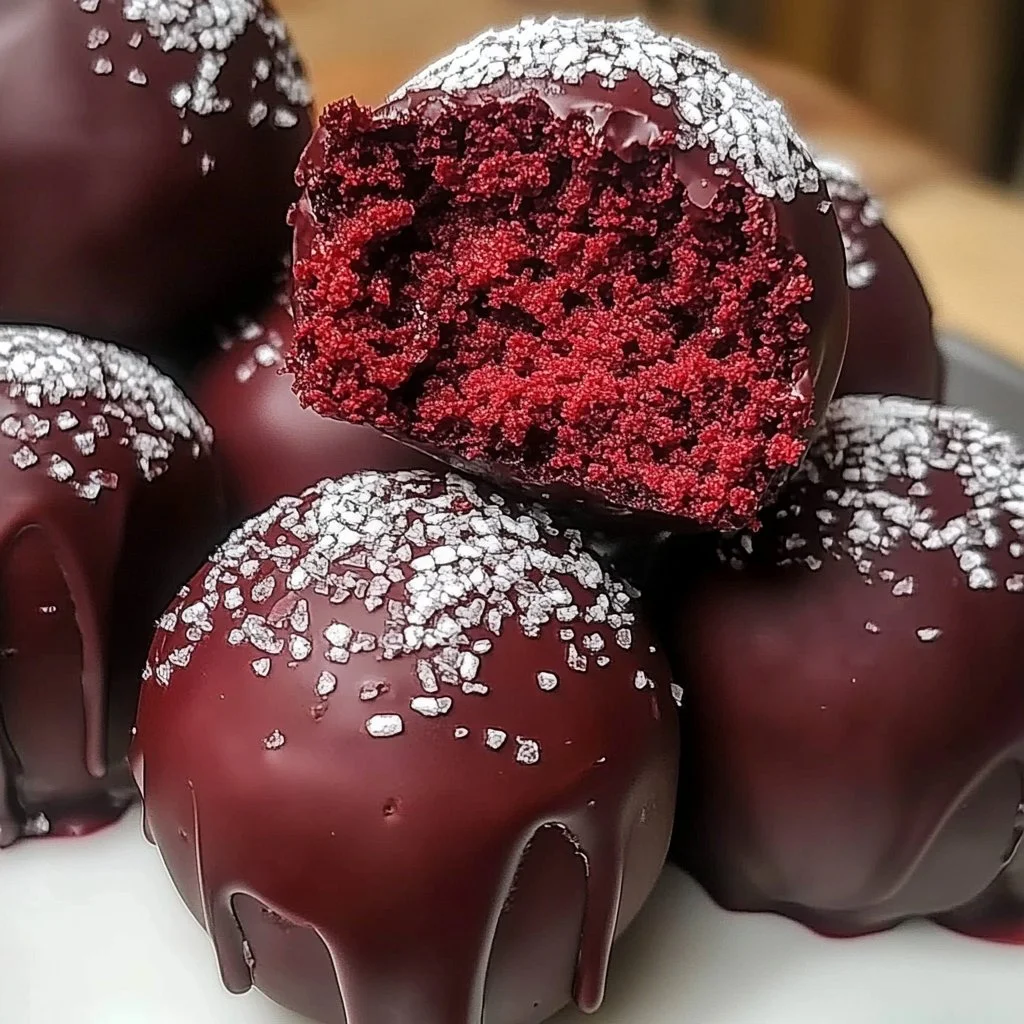
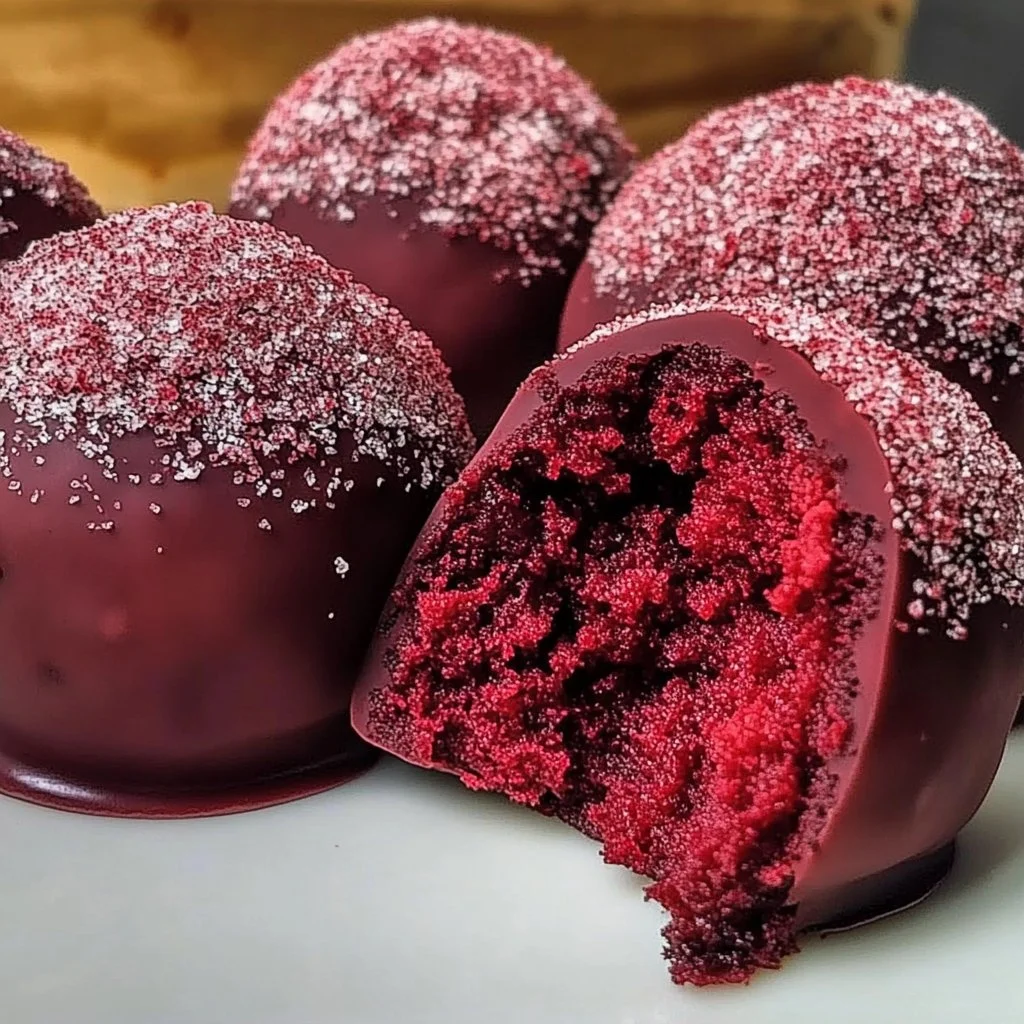
Imagine these vibrant red treats, coated in a rich layer of chocolate, melting in your mouth. They are not only visually stunning but also packed with flavor. You might find yourself wondering how something so indulgent could be so simple to create. The beauty of No Bake Red Velvet Cake Balls: 5 Steps to Pure Bliss is in their ease of preparation. You don’t need to turn on the oven or spend hours in the kitchen, making this recipe perfect for any home cook.
The versatility of this dessert is also noteworthy. It’s an ideal treat for a myriad of events—from birthdays and anniversaries to holiday celebrations and casual get-togethers. Plus, if you have dietary restrictions or specific preferences, you can easily customize this recipe. With just a few basic ingredients, you can create a delicious dessert that caters to your tastes.
Not only are these delectable morsels simple to prepare, but they also have that wow factor that can elevate any occasion. The combination of cream cheese, red velvet cake mix, and rich chocolate creates a taste sensation that is both nostalgic and exciting. So why not dive into the world of No Bake Red Velvet Cake Balls: 5 Steps to Pure Bliss? Your taste buds will thank you!
Key Benefits of No Bake Red Velvet Cake Balls: 5 Steps to Pure Bliss
Why You’ll Love This Recipe
- Quick and Easy: No baking required—just mix, roll, and chill.
- Decadent Flavor: Silky cream cheese paired with rich chocolate.
- Perfect for Celebrations: Ideal for parties, weddings, or casual snacks.
- Customizable: Variety of toppings and flavors to suit personal preferences.
- No Special Tools Needed: No need for advanced kitchen gadgets—just your hands!
What Makes It Stand Out
What makes No Bake Red Velvet Cake Balls: 5 Steps to Pure Bliss truly special is their perfect balance of flavors and textures. The creaminess of cream cheese, the sweetness of powdered sugar, and the rich chocolate coating come together in each bite. Unlike traditional baking, this recipe allows the flavors to shine without the need for elaborate steps or special equipment.
Customization is another highlight. You can experiment with different toppings, such as crushed nuts, sprinkles, or shredded coconut. This versatility means that you can create unique treats tailored to different tastes and dietary needs. Whether you want a festive treat for the holidays or a sweet indulgence for movie night, these cake balls are to be your go-to.
Ingredients for No Bake Red Velvet Cake Balls: 5 Steps to Pure Bliss
Complete Ingredient List with Measurements
- 1 cup red velvet cake mix
- 1/2 cup cream cheese, softened
- 1/4 cup powdered sugar
- 1 teaspoon vanilla extract
- 1 cup chocolate chips
Substitutes and Alternatives
If you’re looking to make this recipe more inclusive for various dietary needs, here are some substitutions. For gluten-free cake mix, choose a certified gluten-free alternative. Vegan cream cheese can be swapped for the regular cream cheese to cater to dairy-free diets. Additionally, you can use dairy-free chocolate chips to maintain that melt-in-your-mouth quality without dairy.
For those with a sweet tooth but looking to reduce sugar intake, consider using a sugar substitute in place of powdered sugar. This will not only fit into various diets but will still yield delightful results.
How to Make No Bake Red Velvet Cake Balls: 5 Steps to Pure Bliss – Step-by-Step Directions
Step 1 – Prepare Ingredients
Start by gathering all your ingredients in a working area. Make sure the cream cheese is softened, as this will help in mixing the ingredients smoothly.
Step 2 – Cook the Base
In a large bowl, combine the red velvet cake mix, softened cream cheese, powdered sugar, and vanilla extract. Mix until a smooth, thick dough-like consistency forms. This should take about 2-3 minutes of mixing.
Step 3 – Roll the Mixture
Once your mixture is well combined, take small portions and roll them into bite-sized balls. Aim for about one-inch in diameter. Place them on a lined baking sheet for easy access later.
Step 4 – Chill the Balls
Cover the baking sheet with the rolled cake balls and refrigerate for about 30 minutes. This helps them firm up, making them easier to dip in chocolate later.
Step 5 – Melt Chocolate
While the cake balls chill, melt the chocolate chips. You can do this in the microwave in 30-second intervals or use a double boiler, stirring until smooth.
Step 6 – Dip Each Cake Ball
After the cake balls have chilled and the chocolate is melted, dip each ball into the chocolate using a fork. Make sure they are fully coated, letting the excess chocolate drip back into the bowl.
Step 7 – Place on a Baking Sheet
Once dipped, return the cake balls to the lined baking sheet. Repeat this process until all the balls are coated in chocolate.
Step 8 – Let the Chocolate Set
Let the chocolate-coated cake balls sit at room temperature until the chocolate has hardened. This usually takes about 20-30 minutes.
Serving Suggestions for No Bake Red Velvet Cake Balls: 5 Steps to Pure Bliss
Best Occasions to Serve This Dish
No Bake Red Velvet Cake Balls: 5 Steps to Pure Bliss is perfect for various occasions. Consider serving them at birthdays, holiday gatherings, or even casual family get-togethers. They make great party favors or dessert table additions, providing guests with a delightful treat.
What to Serve With It
These cake balls can serve as a standalone dessert, but pairing them with a nice cup of coffee or a cold glass of milk makes for a comforting combination. Consider adding a platter of fresh fruits or a cheese board to balance out the sweetness and provide variety.
How to Store No Bake Red Velvet Cake Balls: 5 Steps to Pure Bliss Properly
Best Storage Practices
To keep your No Bake Red Velvet Cake Balls: 5 Steps to Pure Bliss fresh, store them in an airtight container. You can refrigerate them for up to a week. The cold makes them taste even better, as the flavors have more time to meld together.
Reheating and Freezing Tips
If you have leftovers, you can freeze the cake balls for later enjoyment. Just ensure they are placed in a freezer-safe container. When you’re ready to eat them, simply thaw them in the refrigerator overnight, and they’ll be ready to enjoy!
Tips & Tricks for No Bake Red Velvet Cake Balls: 5 Steps to Pure Bliss
Mistakes to Avoid
1 – Not Softening Cream Cheese: Ensure your cream cheese is at room temperature for easier mixing. Cold cream cheese can make it hard to combine.
2 – Overmixing: Mix just until combined to avoid a tough texture in the final balls.
3 – Skipping Chilling Time: Chilling is crucial for maintaining the cake ball shape during dipping.
4 – Inconsistent Sizing: Use a cookie scoop for uniform sizing to ensure even coating and presentation.
5 – Rushing the Chocolate: Allow the chocolate to cool slightly before dipping to prevent it from becoming too thick.
Extra Tips for Better Results
For added flavor, consider mixing in some mini chocolate chips or nuts into the cake ball mixture. A splash of almond extract can also enhance the overall taste profile. When dipping, use a fork to help manipulate the balls without damaging them.
Recipe Variations of No Bake Red Velvet Cake Balls: 5 Steps to Pure Bliss
Creative Twists
1 – Red Velvet Oreo Cheesecake Balls: Make a twist by adding crushed Oreo cookies to the mixture for added texture.
2 – Coconut-Lime Delight: For a tropical spin, add shredded coconut to the mixture and use white chocolate for dipping.
3 – Nutty Red Velvet Balls: Incorporate chopped walnuts or pecans into the mixture before rolling.
Dietary Adjustments
For vegan versions, opt for dairy-free cream cheese and chocolate chips. For gluten-free needs, always check that the cake mix and other ingredients are certified gluten-free.
Conclusion about No Bake Red Velvet Cake Balls: 5 Steps to Pure Bliss
No Bake Red Velvet Cake Balls: 5 Steps to Pure Bliss is truly a recipe designed for everyone. Its simplicity, delightful taste, and versatility make it a star in any dessert lineup. Whether you serve them at gatherings or keep them for personal indulgence, these sweet treats deliver pure satisfaction in every bite. Don’t miss out on exploring this innovative recipe that allows you to create something beautiful and delicious without breaking a sweat in the kitchen. Give it a try, and you might just find your new favorite treat!
FAQs about No Bake Red Velvet Cake Balls: 5 Steps to Pure Bliss
Can I make these cake balls ahead of time?
Yes, you can prepare them a few days in advance and store them in the refrigerator until ready to serve.
How long do No Bake Red Velvet Cake Balls stay fresh?
They will remain fresh in the refrigerator for about a week if stored in an airtight container.
Can I freeze the No Bake Red Velvet Cake Balls?
Yes, they freeze well. Just place them in a freezer-safe container, and they can last for up to three months.
What can I use instead of red velvet cake mix?
You can use vanilla or chocolate cake mix for a different flavor profile, but it will lose the classic red velvet taste.
How do I soften cream cheese quickly?
You can place sealed cream cheese in a microwave for about 15-20 seconds, but ensure not to overheat it.
Can I use a different type of chocolate for coating?
Absolutely! You can use white chocolate, milk chocolate, or even colored candy melts to customize the look and flavor.
How do I prevent the chocolate from hardening too quickly?
Keep the chocolate melted in a warm spot and avoid letting it sit too long outside of heat.
Are these cake balls gluten-free?
They can be gluten-free if you use a gluten-free red velvet cake mix and check that all other ingredients meet these standards.
Can I use homemade cake mix instead?
Yes, if you have a homemade red velvet cake recipe, you can substitute it for the cake mix and follow the same steps.
What makes these cake balls so special?
The combination of rich flavors, ease of making, and the ability to customize ingredients makes them stand out!

No Bake Red Velvet Cake Balls
Ingrédients
Main Ingredients
- 1 cup red velvet cake mix Use gluten-free alternative if needed.
- 1/2 cup cream cheese, softened Ensure cream cheese is at room temperature.
- 1/4 cup powdered sugar Can substitute with sugar alternatives.
- 1 teaspoon vanilla extract For added flavor.
- 1 cup chocolate chips Dairy-free option available.
Instructions
Preparation
- Gather all your ingredients in a working area.
- In a large bowl, combine the red velvet cake mix, softened cream cheese, powdered sugar, and vanilla extract. Mix until smooth.
- Take small portions and roll them into bite-sized balls, placing them on a lined baking sheet.
- Refrigerate for about 30 minutes to firm up.
- Melt the chocolate chips in the microwave or a double boiler until smooth.
- Dip each cake ball in melted chocolate until fully coated, letting excess drip off.
- Return dipped cake balls to the lined baking sheet and let them set at room temperature for 20-30 minutes.