
Table of Contents
Introduction about Baked Halloween Tortilla Chips
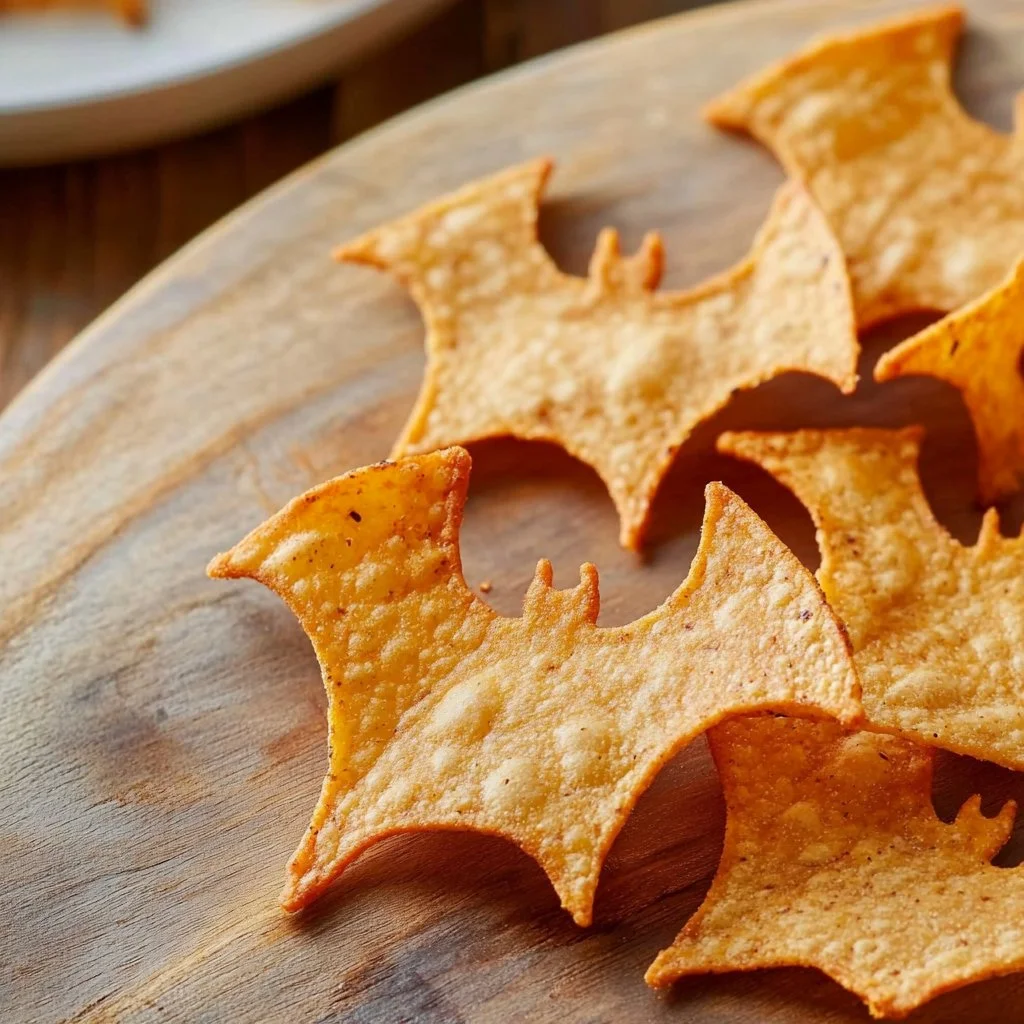
Who doesn’t love a delicious, crunchy snack, especially when it adds a festive touch to your gatherings? If you’re looking for something fun and tasty to celebrate the Halloween season, look no further! Our Baked Halloween Tortilla Chips offer a delightful way to enjoy a classic treat while getting into the spooky spirit. Imagine crispy tortilla chips shaped like ghosts, bats, and pumpkins, perfect for dipping or munching on their own. Doesn’t that sound fun?
The beauty of Baked Halloween Tortilla Chips lies in their simplicity and versatility. Whether you’re hosting a Halloween party or just looking for a fun afternoon activity with the kids, this recipe is incredibly straightforward. It brings an extra special touch to your snack game, and you’ll find that it’s easy to customize for different tastes and preferences. So, grab your cookie cutters, and let’s create some spooky, delicious chips that everyone will love!
Key Benefits of Baked Halloween Tortilla Chips
Why you’ll love this recipe
When it comes to snacks, you want something that’s not just tasty, but also easy and enjoyable. Here are some key benefits of our Baked Halloween Tortilla Chips:
- Delicious Flavor: The light dusting of seasoning gives these chips an irresistible taste.
- Simple & Quick: With just a few ingredients, you can whip these up in no time.
- Family Fun: Shaping the tortillas into spooky designs is a fun activity for kids and adults alike.
- Healthy Alternative: Baking instead of frying means lower fat, making it a healthier choice.
- Customizable: Use your favorite seasonings or tortillas to make it your own.
- Perfect for Any Occasion: Whether it’s a party, movie night, or just a family treat, these chips fit right in!
What makes it stand out
What sets Baked Halloween Tortilla Chips apart from regular chips is their festive flair. This recipe isn’t just about taste; it’s about creating an experience. Shaping the tortillas into Halloween-themed designs makes these chips a standout at any gathering.
Moreover, the recipe allows you to get creative with seasonings and dips, letting you infuse your personal touch. They can easily transform a regular snack time into a seasonal celebration, making your movie nights or Halloween parties more memorable. Whether you go with traditional salt or explore more unique flavor profiles, the options are endless!
Ingredients for Baked Halloween Tortilla Chips
Complete ingredient list with measurements
To make your own Baked Halloween Tortilla Chips, you’ll need the following simple ingredients:
- Flour tortillas: 6-8 medium-sized ones (corn tortillas can also work for a different flavor).
- Cooking spray (or olive oil): To lightly coat the chips.
- Salt (or seasoning of choice): To sprinkle on top for flavor.
Substitutes and alternatives
Don’t worry if you can’t find specific ingredients! Here are some handy substitutes:
- Tortillas: Gluten-free tortillas for a gluten-free option, or try whole wheat for a healthier choice.
- Cooking spray: Use melted coconut oil or avocado oil if you prefer natural oils.
- Seasoning: Try garlic powder, chili powder, or even pumpkin spice for a seasonal twist!
How to Make Baked Halloween Tortilla Chips – Step-by-Step Directions
Making Baked Halloween Tortilla Chips is easy and fun! Follow these simple steps:
Step 1 – Prep your workspace and ingredients
Before you get started, set the mood! Clean your kitchen workspace and gather all your ingredients. Preheat your oven to 350°F (175°C). This will ensure that your chips bake evenly and come out perfectly crispy.
Step 2 – Lay out the tortillas
Take your tortillas and lay them flat on a clean surface. If you’re using corn tortillas, keep in mind they might be a bit more fragile than flour tortillas, so handle them gently.
Step 3 – Cut out spooky shapes
Using your Halloween-themed cookie cutters, cut out spooky shapes from the tortillas. You can make ghosts, bats, pumpkins, or any shape that sparks your creativity. Depending on the size of your cookie cutters and tortillas, you might be able to cut multiple shapes from a single tortilla!
Step 4 – Prepare your baking sheet
Line a baking sheet with parchment paper or a silicone baking mat. This will prevent the chips from sticking and make cleanup a breeze. Place your Halloween-shaped tortilla pieces on the baking sheet, leaving a bit of space between them to ensure they bake evenly.
Step 5 – Coat with cooking spray or olive oil
Lightly coat your tortilla shapes with cooking spray or brush them with a small amount of olive oil. This helps the seasoning adhere well and adds a lovely crispness to your chips.
Step 6 – Add seasoning
Sprinkle salt or your chosen seasoning over the chips. Be generous but not overwhelming, as you want to enhance the flavor without overpowering it. Shake some extra fun into the mix with seasonal spices like taco seasoning or garlic salt!
Step 7 – Bake the chips
Place your baking sheet in the preheated oven and bake for about 10-12 minutes. Keep a close eye on them! The chips should turn golden brown and crispy, so watch out to prevent over-browning or burning.
Step 8 – Cool and serve
Once done, remove the chips from the oven and allow them to cool for a few minutes. This cooling step is essential as it helps the chips crisp up even more! Serve them up with your favorite dip, or enjoy them solo.
Congratulations! You’ve made some fabulous Baked Halloween Tortilla Chips that are sure to be a hit.
Serving Suggestions for Baked Halloween Tortilla Chips
Best occasions to serve this dish
These Baked Halloween Tortilla Chips are perfect for various occasions:
- Halloween parties
- Movie nights with family
- Game day snacks
- School gatherings or bake sales
- Tasty treats for fall picnics
What to serve with it
Pair your spooky chips with delightful dips and sides. Here are some ideas:
- Salsa (mild or spicy)
- Guacamole
- Hummus (try a pumpkin spice version for a fall twist)
- Queso dip
- Sour cream or Greek yogurt
With these tasty pairings, your Baked Halloween Tortilla Chips will be a crowd-pleaser!
Storing Baked Halloween Tortilla Chips Properly
Best storage practices
Once you’ve made your Baked Halloween Tortilla Chips, it’s good to know how to store them properly to keep them fresh.
- Room Temperature: Store in an airtight container at room temperature. They will stay crispy for about 3-5 days.
- Fridge: You can also put them in the fridge, but they might lose some crunchiness.
Reheating and freezing tips
If you have leftover chips and want to reheat them:
- Heat your oven to 350°F (175°C).
- Spread the chips on a baking sheet and bake for about 5 minutes or until they regain their crispiness.
For freezing:
- Freezing: You can freeze the unbaked tortilla shapes (before baking) in a single layer, then transfer them to a freezer-safe bag. They will last up to 2 months.
- Thawing: When ready to use, simply take them out and bake them straight from frozen; just add a couple of extra minutes to the baking time.
Tips & Tricks for Baked Halloween Tortilla Chips
Mistakes to avoid
Here are some common pitfalls to watch out for when making your chips:
- Overcrowding the baking sheet: If the tortilla shapes are too close together, they will steam rather than bake, resulting in softer chips.
- Skipping the oil: Not using any oil might lead to seasoning not sticking and less crispy chips.
- Not watching the time: Chips can go from perfectly golden to burnt very quickly, so keep an eye on them during baking.
Extra tips for better results
- Experiment with shapes: Use different cookie cutters to create unique designs for different occasions.
- Add flavor depth: Consider mixing in various herbs and spices to your oil before coating the chips.
- Try different tortillas: Experimenting with corn, spinach, or even beet tortillas can lead to delicious twists!
Recipe Variations of Baked Halloween Tortilla Chips
Creative twists
Looking to get a bit more adventurous? Here are some fun ideas:
- Spicy chips: Add cayenne pepper or smoked paprika to your seasoning for a kick.
- Sweet variations: Dust with cinnamon sugar for a sweet treat that’s perfect for dessert.
- Cheesy chips: Sprinkle grated cheese over the chips a few minutes before they finish baking for a delicious cheesy bite.
Dietary adjustments
Want to make your chips fit specific dietary needs? Here are a few ideas:
- Gluten-Free: Use gluten-free tortillas made from corn or other gluten-free grains.
- Vegan: Ensure you use plant-based oils and seasonings that are dairy-free.
- Low-Carb: Try using cauliflower tortillas instead for a low-carb version!
Conclusion about Baked Halloween Tortilla Chips
In summary, Baked Halloween Tortilla Chips are not only an enjoyable snack but also a fantastic way to celebrate the Halloween season with family and friends. They’re easy to make, packed with flavor, and offer an opportunity for creativity through various shapes and seasonings.
The next time you’re looking for a festive treat that’s healthy and fun, I encourage you to give these chips a try. You’ll be amazed at how simple they are to make and how delightful they taste. Enjoy sharing this spooky snack with your loved ones!
FAQs about Baked Halloween Tortilla Chips
What if it doesn’t turn out right?
Sometimes, you might find that your Baked Halloween Tortilla Chips aren’t as crispy as you’d hoped. Don’t worry! If they’ve turned out soft, they might need more baking time. Just pop them back in the oven for a few minutes until they crisp up. If you’ve overbaked them and they feel too hard, next time reduce the baking time slightly.
Can I prepare it ahead of time?
Absolutely! You can prepare and chill your tortilla shapes ahead of time. Just store them in an airtight container in the fridge until you’re ready to bake. This makes them perfect for last-minute gatherings or parties.
What are the best ingredient substitutions?
Common substitutions include gluten-free tortillas for gluten sensitivity, olive oil instead of cooking spray, and various seasonings such as garlic powder, onion powder, or even ranch dressing mix for different flavors.
How long can it be stored?
If stored in an airtight container at room temperature, your chips will last about 3-5 days. If stored in the fridge, they might soften a bit but can still be consumed within a week.
Can I use store-bought dough or crust?
While using store-bought tortillas is a great idea, using pre-made dough might not yield the same results. However, if you find a pre-made tortilla that suits your needs, feel free to try it!
Is this recipe kid-friendly or family-appropriate?
Definitely! Making Baked Halloween Tortilla Chips is a great family activity, and kids will love the fun shapes. Plus, it’s a healthier snack option compared to store-bought chips.
Can I make this recipe allergen-free?
Yes! You can easily make these chips allergen-free by opting for gluten-free tortillas. Make sure all seasonings and oils are also free from allergens that concern you and your family.
Now that you have all the ins and outs of making Baked Halloween Tortilla Chips, it’s time to get in the kitchen and start creating! Enjoy your crunchy creations!

Baked Halloween Tortilla Chips
Ingrédients
Main Ingredients
- 6-8 medium-sized flour tortillas (or corn tortillas) Corn tortillas can create a different flavor.
- as needed spray cooking spray (or olive oil) To lightly coat the chips.
- to taste teaspoon salt (or seasoning of choice) To sprinkle on top for flavor.
Instructions
Preparation
- Clean your workspace and gather all ingredients. Preheat your oven to 350°F (175°C).
- Lay the tortillas flat on a clean surface, gently handling if using corn tortillas.
- Using Halloween-themed cookie cutters, cut out spooky shapes from the tortillas.
- Line a baking sheet with parchment paper or a silicone mat.
- Place the tortilla shapes on the baking sheet, leaving space between them.
- Lightly coat the shapes with cooking spray or brush with olive oil.
- Sprinkle salt or your chosen seasoning over the chips.
Baking
- Bake the chips in the preheated oven for 10-12 minutes, watching closely to prevent burning.
Serving
- Remove the chips from the oven and let them cool for a few minutes before serving.