

Table of Contents
Introduction to Canadian Butter Tarts
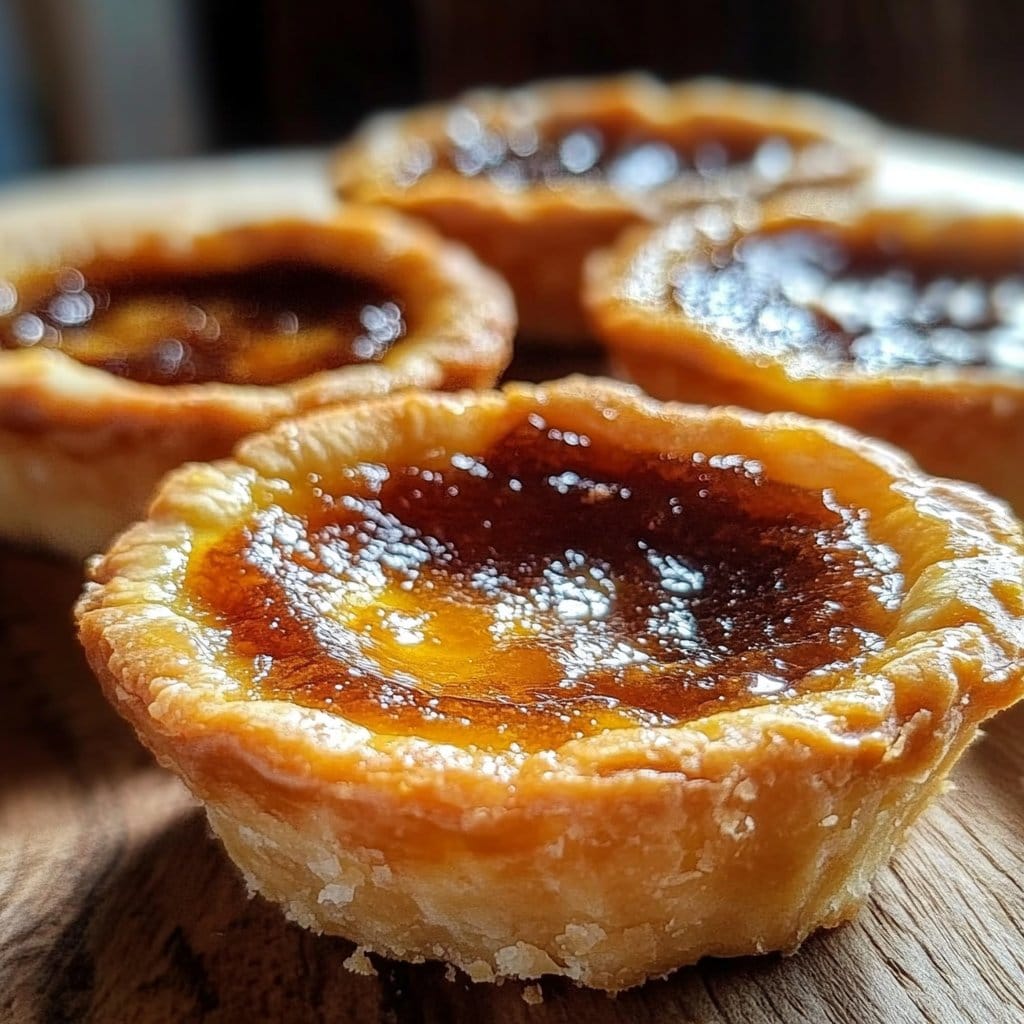
There’s something about the rich and gooey filling of Canadian Butter Tarts that makes them an irresistible dessert staple. Have you ever wondered what the secret is to these little pockets of joy? The fusion of a flaky, buttery crust with a sweet, sticky filling is nothing short of a culinary hug. This recipe for Canadian Butter Tarts is not only easy to follow but also allows for a variety of personal twists, making it perfect for any occasion.
What makes Canadian Butter Tarts truly special is the perfect balance between sweetness and the slight crunch of the crust. With a few simple ingredients and minimal prep time, you can create delightful tarts that impress family and friends alike. Whether enjoyed fresh from the oven or at a celebratory gathering, they add a touch of warmth and hospitality that is hard to resist. Are you ready to embark on a fun baking journey that results in heavenly treats?
This recipe also offers flexibility, allowing you to incorporate your favorite ingredients. Whether you like adding raisins, nuts, or even chocolate, the possibilities are endless. Canadian Butter Tarts are not just a dessert; they are a conversation starter, a memory maker, and most importantly, a delicious indulgence that warms your heart. Let’s dive deeper into the wonderful world of Canadian Butter Tarts!
Key Benefits of Canadian Butter Tarts
Why You’ll Love This Recipe
- Delicious Flavor: The sweet filling combined with a buttery crust creates a truly delightful flavor experience.
- Simplicity: With just a few ingredients, this recipe makes it easy for anyone to whip up a batch.
- Versatile: Customize the filling to suit your taste preferences or dietary needs.
- Perfect for Everyone: Whether it’s a party or a quiet night at home, these tarts fit right in.
- Quick to Prepare: In just an hour, you can have these tarts ready to served.
What Makes It Stand Out
Canadian Butter Tarts are a traditional Canadian dessert that has been cherished for generations. What sets them apart is their unique filling, which often varies by family recipe. Some may prefer their tarts loaded with raisins for added texture, while others might enjoy a simple, unencumbered sweet custard. The tart crust is equally important, striking a balance between being flaky and sturdy enough to hold all that delicious filling.
The easy customization options make this dessert stand out as well. You can swap ingredients based on what you have available or your personal tastes, which enhances the tarts’ appeal. They are perfect for holidays, potlucks, or just a cozy afternoon with a cup of tea.
Ingredients for Canadian Butter Tarts
Complete Ingredient List with Measurements
- 1 1/4 cups all-purpose flour
- 1/2 cup unsalted butter, cold and cubed
- 1/4 cup granulated sugar
- 1/2 teaspoon salt
- 3 to 4 tablespoons ice water
- 1 cup packed brown sugar
- 1/2 cup corn syrup
- 1/4 cup unsalted butter, melted
- 2 large eggs
- 1 teaspoon vanilla extract
- 1/2 cup raisins or pecans (optional)
Substitutes and Alternatives
Finding suitable substitutes in this recipe can easily accommodate allergies or dietary restrictions. For those who cannot have gluten, you can use a gluten-free flour blend in place of all-purpose flour. If you prefer a dairy-free option, substitutes like coconut oil instead of butter can work well for the crust. For sweetness, agave syrup or maple syrup can replace corn syrup, providing a unique flavor twist.
When it comes to the filling, leaves out raisins or nuts altogether if they don’t suit your taste. Experimenting with different combinations can result in fun, new flavors of Canadian Butter Tarts that still capture the original charm of this delicious treat.
How to Make Canadian Butter Tarts – Step-by-Step Directions
Step 1 – Prepare Ingredients
Start by gathering all your ingredients and measuring them out. This will make the process smooth and keep you organized. Make sure your butter is cold for the crust, and your eggs are at room temperature for the filling.
Step 2 – Cook the Base
In a large bowl, mix together the flour, cold cubed butter, granulated sugar, and salt using a pastry cutter or your fingers until coarse crumbs form. This is the key to a flaky crust. Once mixed, slowly add ice water, one tablespoon at a time, until the dough holds together without being sticky.
Step 3 – Roll Out the Dough
On a floured surface, roll out the dough until it’s about 1/8 inch thick. Use a round cutter to cut out circles and fit them into tart pans or muffin tins, pressing gently to adhere. You may need to slightly trim the edges for a cleaner look.
Step 4 – Chill the Crust
To ensure a flaky texture, chill the crusts in the refrigerator for about 30 minutes. This also prevents shrinking during baking.
Step 5 – Prepare the Filling
In another bowl, whisk together the brown sugar, corn syrup, melted butter, eggs, and vanilla until smooth. Make sure everything is well combined. If you’re adding raisins or pecans, stir them in gently at this stage.
Step 6 – Fill the Tarts
Remove the crusts from the refrigerator and carefully pour the filling into each tart shell. Fill them about three-quarters full to allow for expansion while baking.
Step 7 – Bake
Preheat your oven to 400°F (200°C). Once heated, place the tarts in the oven and bake for about 15 to 20 minutes. Keep an eye on them. The filling should be set and the tops slightly puffed, while the crust turns a beautiful golden brown.
Step 8 – Cool Down
After baking, allow the tarts to cool in the pans for about 10 minutes. Then, transfer them to a wire rack to cool completely. This will help set the filling further.
Step 9 – Serve
Once cooled, enjoy your delicious Canadian Butter Tarts as is or serve with a dollop of whipped cream or a scoop of vanilla ice cream.
Step 10 – Store Leftovers
If you have any leftovers, make sure to store them properly. Place them in an airtight container in the fridge.
Serving Suggestions for Canadian Butter Tarts
Best Occasions to Serve This Dish
Canadian Butter Tarts are a perfect addition to any gathering. They shine during holiday get-togethers, family barbecues, or even as a delightful surprise at a casual dinner party. Their elegant presentation makes them a crowd-pleaser, and their delightful taste ensures they won’t last long on the dessert table.
What to Serve With It
Pair Canadian Butter Tarts with a steaming cup of coffee or herbal tea for a cozy afternoon treat. For a decadent dessert experience, serve them alongside a scoop of freshly made vanilla ice cream or a drizzle of caramel sauce. Berries can also complement the sweetness perfectly, adding a fruity touch.
How to Store Canadian Butter Tarts Properly
Best Storage Practices
To keep Canadian Butter Tarts fresh, store them in an airtight container in the refrigerator. These tarts are best consumed within a week but can last up to 10 days. Make sure they are completely cooled before sealing to prevent condensation.
Reheating and Freezing Tips
If you plan to freeze your tarts, wrap each tart individually in plastic wrap before placing them in a freezer bag. To reheat, let them thaw in the refrigerator overnight and then warm them in the microwave for about 10-15 seconds or in the oven at 350°F (175°C) for about 5-10 minutes.
Tips & Tricks for Canadian Butter Tarts
Mistakes to Avoid
- Overmixing the Dough: This can create tough pastry instead of a flaky crust.
- Not Chilling the Dough: Skipping the chilling process may lead to shrinking crusts during baking.
- Filling Too Full: Overfilling can cause the filling to overflow and create a mess in your oven.
- Ignoring Timing: Keeping a close watch while baking is essential to achieve a perfectly set filling and golden crust.
- Not Cooling Completely: Cutting into the tarts while they’re still warm can result in a runny filling.
Extra Tips for Better Results
For enhanced flavor, consider adding a pinch of cinnamon or nutmeg to the filling. Ensure your butter is truly cold and cubed to get that flaky texture. Experimenting with various nuts or even chocolate chips in the filling can add delightful surprises in every bite.
Recipe Variations of Canadian Butter Tarts
Creative Twists
- Chocolate-Covered Tarts: Add chocolate chips to the filling for a rich, indulgent treat. They melt beautifully and offer a different flavor profile.
- Nutty Gourmet Tarts: Use mixed nuts instead of raisins for an interesting mouthful and added crunch.
- Maple Pecan Tarts: Swap out corn syrup for maple syrup and add pecans for a true taste of Canada.
Dietary Adjustments
For a vegan version, substitute eggs with flaxseed meal or a commercial egg replacer and use a dairy-free butter option for the crust and filling. Gluten-free flour can easily replace all-purpose flour for those with gluten intolerance.
Conclusion about Canadian Butter Tarts
In conclusion, making Canadian Butter Tarts is not only a fantastic way to craft a classic dessert but also a chance to express your creativity. The delicious flavor and simple preparation processes make these tarts beloved by many. Whether you stick with the traditional recipe or customize it to suit your palate, these tarts bring joy and warmth into your kitchen. There’s nothing quite like a warm tart fresh out of the oven, bringing you a slice of Canada in every bite. So why not give this recipe a try? Delight yourself and your loved ones with these delightful Canadian Butter Tarts!
FAQs about Canadian Butter Tarts
1 – Can I make Canadian Butter Tarts ahead of time?
Yes, you can prepare the dough and filling a day in advance. Store them separately in the refrigerator and assemble right before baking.
2 – How do I store leftover Canadian Butter Tarts?
Store leftover tarts in an airtight container in the fridge, and they should be good for about 7 to 10 days.
3 – Can I freeze Canadian Butter Tarts?
Absolutely! Wrap them individually in plastic wrap and place in a freezer bag. They are best eaten within 2 months.
4 – What can I use instead of corn syrup?
You can use maple syrup or agave nectar as an alternative to corn syrup in the filling.
5 – Are Canadian Butter Tarts gluten-free?
Yes, just substitute all-purpose flour with a gluten-free flour blend to make them gluten-free.
6 – What are traditional fillings for Canadian Butter Tarts?
The traditional filling includes a mixture of brown sugar, eggs, and corn syrup. Raisins or pecans are popular optional additions.
7 – Can I make these tarts mini-sized?
Certainly! Use a mini muffin tin to create bite-sized versions while adjusting bake time accordingly.
8 – What should I serve with Canadian Butter Tarts?
These tarts pair deliciously with coffee, tea, or even a scoop of vanilla ice cream for a comforting dessert experience.

Canadian Butter Tarts
Ingrédients
For the crust
- 1 1/4 cups all-purpose flour Can substitute with gluten-free flour.
- 1/2 cup unsalted butter, cold and cubed Ensure butter is cold for flaky crust.
- 1/4 cup granulated sugar
- 1/2 teaspoon salt
- 3 to 4 tablespoons ice water Add gradually until dough holds together.
For the filling
- 1 cup packed brown sugar
- 1/2 cup corn syrup Can substitute with maple syrup or agave.
- 1/4 cup unsalted butter, melted
- 2 large eggs Can substitute with egg replacer for vegan option.
- 1 teaspoon vanilla extract
- 1/2 cup raisins or pecans (optional) Add according to preference.
Instructions
Preparation
- Start by gathering all your ingredients and measuring them out.
- In a large bowl, mix together the flour, cold cubed butter, granulated sugar, and salt using a pastry cutter or your fingers until coarse crumbs form.
- Slowly add ice water, one tablespoon at a time, until the dough holds together without being sticky.
Assembly
- Roll out the dough on a floured surface until it’s about 1/8 inch thick.
- Cut out circles and fit them into tart pans or muffin tins, pressing gently to adhere.
- Chill the crusts in the refrigerator for about 30 minutes.
Filling
- In another bowl, whisk together the brown sugar, corn syrup, melted butter, eggs, and vanilla until smooth.
- Stir in raisins or pecans, if desired.
- Remove the crusts from the refrigerator and carefully pour the filling into each tart shell, filling them three-quarters full.
Baking
- Preheat your oven to 400°F (200°C).
- Bake for about 15 to 20 minutes until the filling is set and the tops are slightly puffed, while the crust turns golden brown.
- Allow to cool in the pans for about 10 minutes, then transfer to a wire rack to cool completely.
Serving
- Enjoy your Canadian Butter Tarts as is or serve with whipped cream or vanilla ice cream.
Storage
- Store leftovers in an airtight container in the refrigerator.