

Table of Contents
Introduction to No-Bake Chocolate Ripple Cake
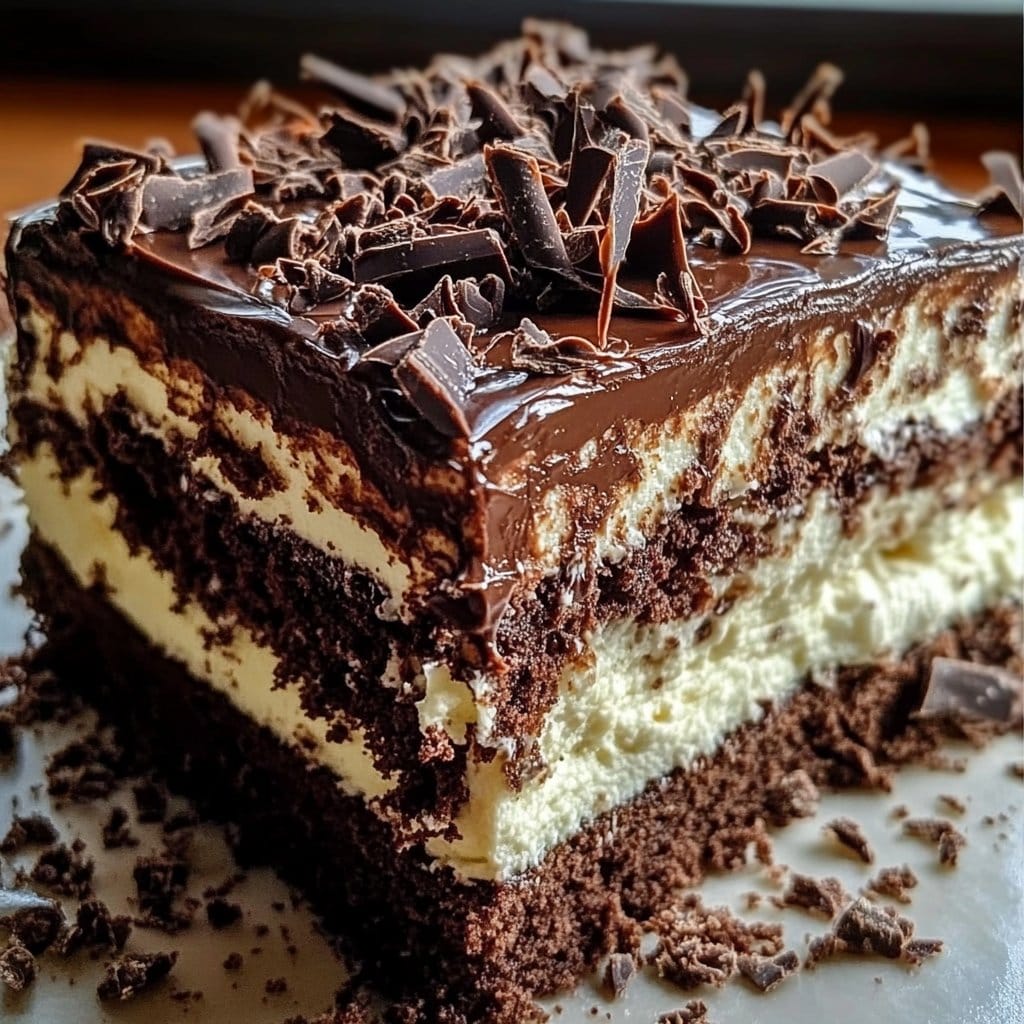
Have you ever craved a dessert that delivers both elegance and ease? Look no further than the No-Bake Chocolate Ripple Cake. This delightful treat promises a blend of luscious chocolate flavors and creamy textures, all without the need for an oven. It’s the perfect solution for those rushed evenings or when you want to impress guests without spending hours in the kitchen.
What makes the No-Bake Chocolate Ripple Cake so special? First, it’s incredibly easy to prepare, requiring minimal effort but offering maximum satisfaction. The mere act of folding together cream and chocolate pudding brings a sense of comfort and nostalgia. The chocolate wafers create a delightful ripple effect, making every slice visually appealing and mouthwatering.
This dessert stands out not only for its taste but also for its versatility. You can customize it to suit various dietary preferences or occasions. Whether it’s a summer gathering, a family dinner, or even a cheerful celebration, the No-Bake Chocolate Ripple Cake makes a perfect addition to your dessert table. Plus, who doesn’t love the idea of a no-bake treat during the warm months?
Imagine serving a decadent slice of this cake after a sumptuous meal, earning compliments and smiles from your loved ones. As you dig into the rich layers of creamy chocolate goodness, you’ll quickly realize why this recipe is cherished by many.
Key Benefits of No-Bake Chocolate Ripple Cake
Why You’ll Love This Recipe
- Easy to Make: No baking means less fuss and quicker results.
- Rich Flavor: The combination of chocolate cream and wafers offers a decadent taste.
- Versatile: Easily customize it to suit different preferences and occasions.
- No Special Equipment Needed: Simple mixing and layering are all it takes.
- Make Ahead: Prepare it in advance and let it chill for better flavor integration.
- Crowd-Pleaser: Loved by both kids and adults, making it ideal for gatherings.
What Makes It Stand Out
The No-Bake Chocolate Ripple Cake isn’t just another dessert; it has an originality that captivates. The simplicity of its ingredients combined with the luxurious feel sets it apart from other cakes. It doesn’t rely on baked textures; instead, it showcases the beauty of creamy layers and chocolate sensations.
Moreover, the cake is incredibly adaptable. You can layer in nuts, different flavored creams, or even fruit purees for variety. The best occasions for serving this exquisite dessert range from casual family dinners to more formal celebrations. Its ability to be prepared ahead of time makes it a reliable choice for busy hosts and entertainers.
Ingredients for No-Bake Chocolate Ripple Cake
Complete Ingredient List with Measurements
- 2 cups heavy cream
- 1 cup chocolate pudding mix
- 1 teaspoon vanilla extract
- 24 chocolate wafers
- 1/2 cup chocolate shavings (for garnish)
Substitutes and Alternatives
If you’re looking for alternatives due to dietary restrictions, there are plenty of options. For a lighter version, you can swap heavy cream with whipped coconut cream. If you’re dairy-free, almond milk can work well in place of the pudding mix. You can also use gluten-free wafers to cater to those with gluten sensitivities. Just be sure to read the labels for any hidden allergens.
How to Make No-Bake Chocolate Ripple Cake – Step-by-Step Directions
Step 1 – Prepare Ingredients
Gather all of your ingredients. Measure out the heavy cream, chocolate pudding mix, and vanilla extract, and set aside the chocolate wafers and shavings for later.
Step 2 – Whip the Cream
In a mixing bowl, whip the heavy cream until soft peaks begin to form. This step is crucial for achieving a light and fluffy texture, so be careful not to over-whip it.
Step 3 – Add Pudding Mix and Vanilla
Gently fold the chocolate pudding mix and vanilla extract into the whipped cream. Make sure to blend it well until there are no streaks of pudding mix remaining.
Step 4 – Start Layering
Begin the layering process. In a serving dish, spread a thin layer of the cream mixture. This will act as the base for your cake.
Step 5 – Layer the Wafers
Place the chocolate wafers on top of the cream layer, ensuring they are evenly distributed. You can slightly overlap them if necessary.
Step 6 – Repeat the Process
Continue layering by adding more cream and then chocolate wafers. Repeat this until all ingredients are utilized, making sure to end with a cream layer on top.
Step 7 – Chill the Cake
Cover the dish with plastic wrap or a lid and place it in the refrigerator. Let it chill for at least 4 hours or ideally overnight for the best texture and flavor.
Step 8 – Garnish
Once ready to serve, remove the cake from the refrigerator. Garnish it generously with chocolate shavings to add an elegant finishing touch.
Step 9 – Slice and Serve
Carefully cut the cake into slices, making sure to preserve the layers. Serve to your eager guests and enjoy the delighted reactions.
Step 10 – Refrigerate Leftovers
Any leftovers should be stored in the refrigerator, covered, for beste freshness.
Serving Suggestions for No-Bake Chocolate Ripple Cake
Best Occasions to Serve This Dish
The No-Bake Chocolate Ripple Cake is perfect for various occasions, whether it’s a casual family gathering, a birthday celebration, or a potluck. Its rich flavor and eye-catching layers make it an impressive centerpiece for any dessert table, delighting both kids and adults alike.
What to Serve With It
Consider pairing your No-Bake Chocolate Ripple Cake with a scoop of vanilla or coffee ice cream for a delightful contrast. Fresh berries or a drizzle of raspberry sauce also add a refreshing zing that complements the chocolate flavors beautifully.
How to Store No-Bake Chocolate Ripple Cake Properly
Best Storage Practices
To keep your No-Bake Chocolate Ripple Cake fresh, store any leftovers in an airtight container in the refrigerator. It can generally last for about 3 to 4 days, preserving its delicious layers and creamy texture.
Reheating and Freezing Tips
This dessert is typically served chilled, so there’s no need for reheating. If you plan to make it in advance, you can freeze the cake. Just ensure it’s well wrapped to avoid freezer burn. To serve after freezing, thaw it overnight in the refrigerator.
Tips & Tricks for No-Bake Chocolate Ripple Cake
Mistakes to Avoid
- Over-whipping the cream can lead to a grainy texture.
- Not chilling long enough means the layers won’t set properly.
- Using homemade pudding instead of the mix could change the cake’s texture.
- Skipping the garnish might make it look less appealing.
- Not layering evenly can result in uneven slices.
Extra Tips for Better Results
For extra flavor, try adding a touch of espresso powder to the whipped cream mixture or incorporating layers of fruits such as bananas or strawberries. Presenting the cake in individual cups instead of a full dish can also enhance its appeal.
Recipe Variations of No-Bake Chocolate Ripple Cake
Creative Twists
- Mint Chocolate Ripple Cake: Add mint extract and crushed mint candies between layers for a refreshing twist.
- Peanut Butter Chocolate Ripple Cake: Incorporate peanut butter into the cream mixture for a nutty flavor boost.
- Cookies and Cream Ripple Cake: Substitute some of the chocolate wafers with crushed Oreo cookies for a delightful cookies and cream variation.
Dietary Adjustments
For a vegan version, opt for coconut cream and a dairy-free chocolate pudding mix. Alternatively, gluten-free chocolate wafers can accommodate those with gluten sensitivities without sacrificing flavor.
Conclusion about No-Bake Chocolate Ripple Cake
The No-Bake Chocolate Ripple Cake is an exceptional dessert that stands out for its rich flavor, creamy texture, and beautiful presentation. Its ease of preparation makes it a favorite, especially for those who might not have the time—or inclination—to bake. This recipe is more than just a cake; it’s an experience, filled with layers of chocolatey delight that will satisfy any sweet tooth. Whether you’re entertaining guests or simply enjoying a treat at home, this cake is sure to impress. Don’t miss out on the chance to whip up this delightful dessert that brings smiles and satisfaction with every delicious bite.
FAQs about No-Bake Chocolate Ripple Cake
Can I make No-Bake Chocolate Ripple Cake in advance?
Yes, this cake is ideal for make-ahead preparation. You can prepare it the night before and let it chill overnight for the best results.
How long does No-Bake Chocolate Ripple Cake last in the fridge?
It can last about 3 to 4 days in the fridge when stored properly in an airtight container.
Can I freeze No-Bake Chocolate Ripple Cake?
Yes, you can freeze it. Just ensure it’s well-covered to prevent freezer burn and thaw in the fridge before serving.
What can I substitute for heavy cream?
Whipped coconut cream is a great alternative for a dairy-free version, keeping a similar texture.
Can I use different flavored pudding mixes?
Absolutely! Vanilla or strawberry pudding mixes can create exciting flavor combinations for unique variations.
How do I ensure the cream and pudding mix blend well?
Fold the pudding mix into the whipped cream gently to maintain the airy texture while ensuring there are no streaks.
Can I use homemade chocolate pudding instead of the mix?
Yes, but it may alter the texture and set of the cake, making it less firm.
Is it necessary to garnish with chocolate shavings?
Garnishing enhances presentation, but you can skip it if you prefer a simpler look.
What if I don’t have chocolate wafers?
You can use graham crackers or any similar cookie as a substitute for the layers, adjusting the flavor profile slightly.
How should I serve No-Bake Chocolate Ripple Cake?
Slice and serve chilled, optionally with ice cream or fruit for a delightful pairing.

No-Bake Chocolate Ripple Cake
Ingrédients
Main Ingredients
- 2 cups heavy cream
- 1 cup chocolate pudding mix
- 1 teaspoon vanilla extract
- 24 pieces chocolate wafers
- 1/2 cup chocolate shavings for garnish
Instructions
Preparation
- Gather all of your ingredients. Measure out the heavy cream, chocolate pudding mix, and vanilla extract, and set aside the chocolate wafers and shavings for later.
- In a mixing bowl, whip the heavy cream until soft peaks begin to form. Be careful not to over-whip it.
- Gently fold the chocolate pudding mix and vanilla extract into the whipped cream until well-blended.
Layering
- In a serving dish, spread a thin layer of the cream mixture as the base.
- Place the chocolate wafers on top of the cream layer, ensuring they are evenly distributed.
- Continue layering by adding more cream followed by chocolate wafers, repeating until all ingredients are used, ending with a cream layer on top.
Chilling and Serving
- Cover the dish with plastic wrap and chill in the refrigerator for at least 4 hours, or ideally overnight.
- Garnish the cake with chocolate shavings before serving.
- Slice the cake into servings and enjoy.
Storage
- Store any leftovers in the refrigerator, covered, for best freshness.