

Table of Contents
When it comes to desserts, who can resist the warm, comforting aroma of a freshly baked Apple Crisp with Fresh? Picture this: a cozy evening, the scent of cinnamon and baked apples wafting through your kitchen, a crunchy topping crisping up beautifully in the oven. Doesn’t that sound delightful?
Apple Crisp with Fresh is not only a treat for your senses but also a nostalgic dish that reminds many of childhood kitchen adventures. Whether you’re a seasoned baker or a beginner, this recipe is straightforward and rewarding. The combination of sweet, tender apples and a crispy, buttery topping is simply irresistible!
And let’s not forget: this dish is incredibly versatile! It can be served at family gatherings, holiday celebrations, or just a simple weeknight meal to cap off your day. So, why not gather a few simple ingredients and whip up this delightful dessert? Let’s dive into everything you need to know about preparing your very own Apple Crisp with Fresh!
Key Benefits of Apple Crisp with Fresh
Why you’ll love this recipe
- Delectable Flavor: The combination of sweet apples, cinnamon, and a buttery topping is pure bliss.
- Easy to Make: Even beginners can master this with ease; no complicated steps involved!
- Warm Comfort: The warm, gooey filling and crunchy top make it the perfect comforting dessert.
- Quick Preparation: With just a handful of ingredients, you can have this delightful dish ready in no time.
- Family-Friendly: Kids and adults alike will find this dish hard to resist!
- Customizable: You can easily adapt the recipe to suit your tastes or dietary needs.
What makes it stand out
Apple Crisp with Fresh isn’t just another dessert; it’s a stunning way to showcase the beauty of seasonal fruits. The simplicity of this recipe allows the fresh apples to shine, enhanced by just a sprinkle of sugar and cinnamon. You can play around with the flavor profile by adding nuts or even a splash of vanilla extract, making it a truly unique dish every time you bake it.
Not only is it perfect for casual family dinners, but it can also elevate any gathering with friends. Whether it’s a summer barbecue where apples are in season or a cozy winter night, this dessert will fit in beautifully. Plus, with minimal ingredients, it’s budget-friendly, ensuring everyone can enjoy this delicious treat.
Ingredients for Apple Crisp with Fresh
Complete ingredient list with measurements
Here’s what you will need to create your delightful Apple Crisp with Fresh:
- 6 apples (peeled, cored, and sliced)
- 1/2 cup granulated sugar
- 1 tsp ground cinnamon
- 1 tbsp lemon juice
- 3/4 cup all-purpose flour
- 3/4 cup old-fashioned oats
- 1/2 cup brown sugar (packed)
- 1/2 cup unsalted butter (cold and cut into cubes)
Substitutes and alternatives
If you have specific dietary restrictions or preferences, here are some common substitutes:
- Gluten-Free: Use gluten-free flour and oats.
- Lower Sugar: You can reduce the sugar content or use a sugar alternative like honey or maple syrup.
- Dairy-Free: Substitute unsalted butter with coconut oil or a vegan butter alternative.
- Fruits: Feel free to mix in other fruits like pears or berries for a different flavor profile.
How to Make Apple Crisp with Fresh – Step-by-Step Directions
Creating your own Apple Crisp with Fresh is an enjoyable process. Just follow these steps:
Step 1 – Prep your workspace and ingredients
Start by ensuring your kitchen is clean and organized. Gather all your ingredients and tools:
- A baking dish
- A large bowl
- A smaller mixing bowl
- A pastry cutter or fork for cutting butter.
This will make the process much smoother!
Step 2 – Prepare the apples
Peel, core, and slice your apples into thin wedges. This ensures even cooking for your Apple Crisp with Fresh. You can use any variety of apples you like—Granny Smith, Honeycrisp, or Fuji are excellent choices due to their balance of sweetness and tartness.
Step 3 – Make the apple filling
In a large bowl, combine the sliced apples, granulated sugar, ground cinnamon, and lemon juice. Toss the apples gently to coat them evenly. The lemon juice not only adds flavor but helps prevent the apples from browning.
Step 4 – Spread the filling
Once your apples are well-mixed, spread them evenly into the bottom of a lightly greased baking dish. You can use cooking spray or a bit of butter to ensure nothing sticks.
Step 5 – Prepare the crisp topping
In a separate bowl, combine the all-purpose flour, oats, and brown sugar. Mix well. Next, cut in the cold butter using a pastry cutter or fork. Continue until the mixture resembles coarse crumbs. This is key for achieving that perfect crunchy top!
Step 6 – Assemble the Apple Crisp
Sprinkle the crisp topping evenly over the layer of apples in the baking dish. Make sure to cover all the apples to prevent them from burning while baking.
Step 7 – Bake the crisp
Preheat your oven to 350°F (175°C). Place the baking dish in the oven and bake for 40–45 minutes. Look for a golden-brown topping and bubbling filling—this is when you know it’s done!
Step 8 – Cool and serve
Once the Apple Crisp with Fresh is done baking, remove it from the oven and let it cool for about 10–15 minutes. This cooling time helps the juices to settle, making it easier to serve.
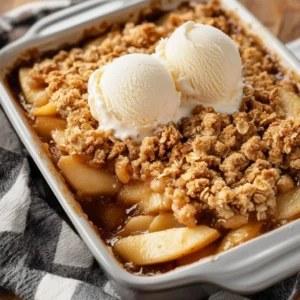
Step 9 – Serve warm
This dish is best enjoyed warm! Serve it with a scoop of vanilla ice cream on top, if desired. The contrast of warm fruit and cold ice cream is sublime!
Step 10 – Enjoy!
Sit back, relax, and enjoy the fruits of your labor! You’ve just made a delicious Apple Crisp with Fresh that everyone will love.
Serving Suggestions for Apple Crisp with Fresh
Best occasions to serve this dish
Apple Crisp with Fresh is incredibly versatile. Here are some occasions it’s perfect for:
- Family dinners: A comforting end to a hearty meal.
- Picnics: A great dessert to bring along for outdoor gatherings.
- Holiday celebrations: Especially popular during fall and winter, it’s a festive treat.
- Casual get-togethers with friends: Everyone appreciates a comforting dessert!
What to serve with it
Pairing can elevate your dessert experience. Consider these options:
- Vanilla ice cream or whipped cream on top
- Caramel sauce drizzled over the crisp
- A scoop of vanilla yogurt for a tangy contrast
- A cup of hot cider or tea on the side
Storing Apple Crisp with Fresh Properly
Best storage practices
If you happen to have leftovers (which is rare!), here’s how to store your Apple Crisp with Fresh:
- Refrigerator: Cover and store in the fridge for up to 3 days.
- Freezer: Wrap tightly in plastic wrap or aluminum foil, and store in an airtight container. It can last for up to 3 months.
Reheating and freezing tips
When reheating, do the following:
- In the microwave: Reheat individual portions for 30-60 seconds.
- In the oven: Preheat to 350°F (175°C) and cover with aluminum foil. Warm for about 15-20 minutes.
If freezing, remember not to reheat directly from the freezer; allow it to thaw in the fridge overnight before warming up.
Tips & Tricks for Apple Crisp with Fresh
Mistakes to avoid
- Using too many sour apples: Balance is key; aim for a mix of sweet and tart apples.
- Overmixing the topping: You want it to be crumbly, not a smooth dough.
- Not preheating the oven: Ensure it’s at the right temperature for even baking.
Extra tips for better results
- Try adding nuts: Chopped walnuts or pecans can add a delightful crunch.
- Experiment with spices: A hint of nutmeg or ginger can elevate the flavor.
- Use fresh seasonal apples: The fresher the apples, the better the taste!
Recipe Variations of Apple Crisp with Fresh
Creative twists
Feel free to experiment with your Apple Crisp with Fresh:
- Add-ins: Dried cranberries, raisins, or nuts can add different textures and flavors.
- Spices: Try pumpkin pie spice for a seasonal twist.
- Fruit blends: Mix apples with pears, berries, or peaches for a fruity medley.
Dietary adjustments
You can easily modify this recipe to meet dietary needs:
- Gluten-Free: Use certified gluten-free flour and oats.
- Vegan: Substitute butter with plant-based alternatives and use maple syrup instead of sugar.
- Low-Sugar: Stevia or erythritol can be great substitutes for those watching their sugar intake.
Conclusion about Apple Crisp with Fresh
In conclusion, Apple Crisp with Fresh is a delightful dessert that combines simplicity with sumptuous flavor. Its warm, comforting nature makes it a fantastic choice for any occasion, from casual weeknights to special celebrations.
With easy preparation steps and endless options for customization, this dish allows you to make it your own. We encourage you to give this recipe a try and relish every bite of your homemade Apple Crisp with Fresh! Don’t forget to share your experience with friends and family.
FAQs about Apple Crisp with Fresh
What if it doesn’t turn out right?
Not to worry! If your Apple Crisp doesn’t look perfect, check the baking time and ingredients. Sometimes, an extra few minutes in the oven can help. Adjusting the sugar and apple variety can also change the outcome.
Can I prepare it ahead of time?
Absolutely! You can assemble it ahead of time and store it in the fridge until you’re ready to bake it. Just remember to add a few extra minutes to the baking time if it goes into the oven straight from the fridge.
What are the best ingredient substitutions?
Common substitutions include using coconut oil for butter (for dairy-free), gluten-free flour for all-purpose flour, and maple syrup for sugar if you prefer a natural sweetener.
How long can it be stored?
Your Apple Crisp with Fresh will last up to 3 days in the fridge and about 3 months in the freezer. Just be sure to store it properly!
Can I use store-bought dough or crust?
Sure! If you’re short on time, a store-bought crust can work, but the crisp topping is where the magic happens. Homemade toppings are always recommended for the best texture.
Is this recipe kid-friendly or family-appropriate?
Definitely! This dessert is perfect for all ages, and kids will love helping out in the kitchen with the apple preparation.
Can I make this recipe allergen-free?
Yes! By substituting gluten-free flour, using dairy-free butter, and selecting appropriate sugar alternatives, you can easily make this dish allergen-friendly.
Now that you’re equipped with all this knowledge, roll up your sleeves and get ready to enjoy the amazing flavors of homemade Apple Crisp with Fresh! Happy baking!
Apple Crisp
Equipment
- Baking dish
- Mixing bowls
- Pastry cutter or fork
Ingrédients
Apple Filling
- 6 apples peeled, cored, and sliced
- 1/2 cup granulated sugar
- 1 tsp ground cinnamon
- 1 tbsp lemon juice
Crisp Topping
- 3/4 cup all-purpose flour
- 3/4 cup old-fashioned oats
- 1/2 cup brown sugar packed
- 1/2 cup unsalted butter cold and cubed
Instructions
- Preheat oven to 350°F (175°C). Lightly grease a baking dish.
- In a large bowl, toss sliced apples with granulated sugar, cinnamon, and lemon juice until evenly coated.
- Spread apple mixture evenly into the prepared baking dish.
- In a separate bowl, mix flour, oats, and brown sugar. Cut in cold butter with a pastry cutter or fork until mixture resembles coarse crumbs.
- Sprinkle topping evenly over apples.
- Bake for 40–45 minutes, until topping is golden brown and filling is bubbling.
- Let cool for 10–15 minutes before serving. Best served warm with vanilla ice cream or whipped cream.