
Table of Contents
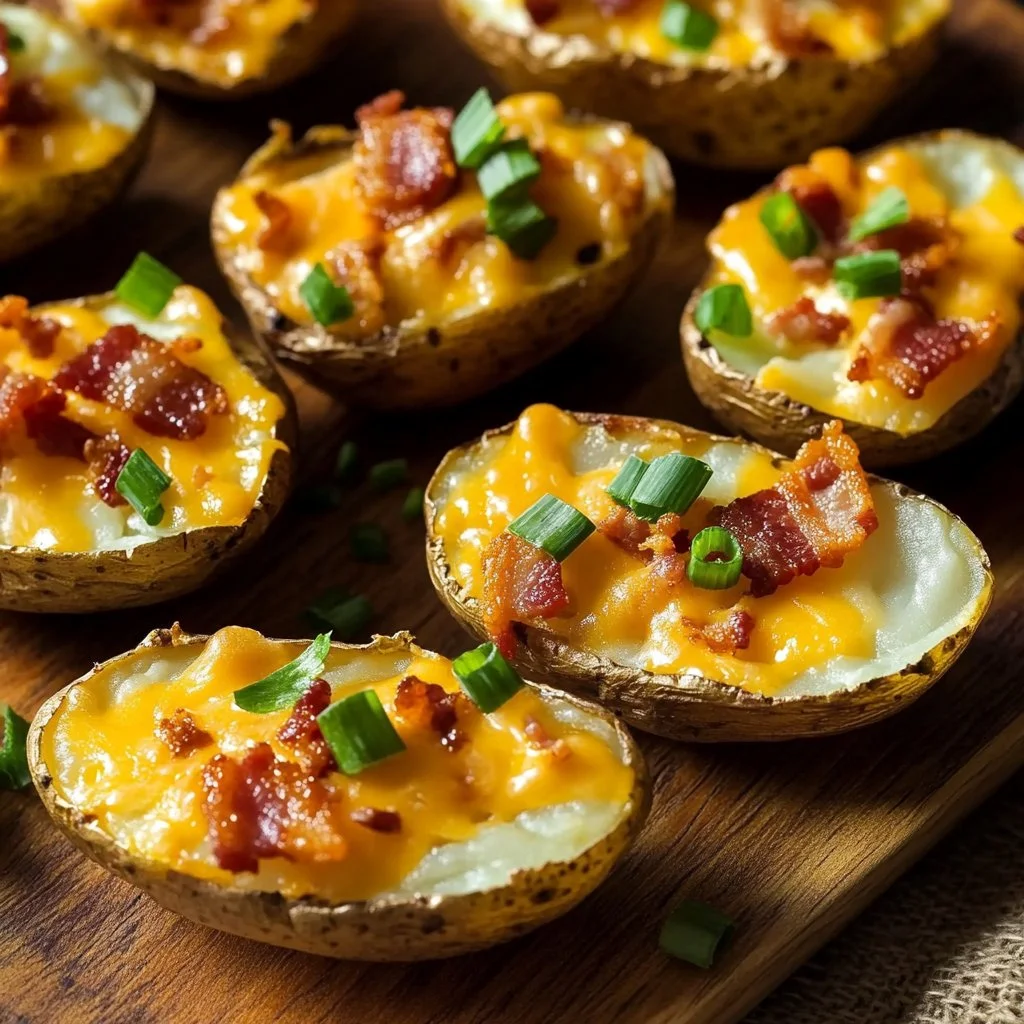
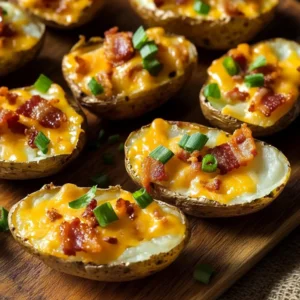
Are you ready to dive into the comforting world of Baked Potato Skins? These delectable treats are not just a side dish; they’re a delightful snack, an appetizer, or even a main event on game day! There’s something absolutely wonderful about crispy potato skins filled with cheese, bacon, and all your favorite toppings. The best part? This recipe is incredibly simple and utterly satisfying. So, let’s get excited about those Baked Potato Skins, shall we?
Imagine this: you come home after a long day, and the aroma of freshly baked potatoes wafts through your kitchen. You scoop them out, add some melty cheese, crispy bacon, and dollop of sour cream on top. Doesn’t that sound heavenly? These Baked Potato Skins are not only delicious but also versatile, making them perfect for any occasion!
Key Benefits of Baked Potato Skins
Once you taste Baked Potato Skins, there’s no turning back! They’re more than just a treat; they’re a crowd-pleaser at any gathering. Here’s why you’ll adore this recipe so much.
Why you’ll love this recipe
- Ease of Preparation: With simple ingredients and straightforward steps, even novice cooks can whip this up with confidence.
- Crowd Favorite: Perfect for parties, game days, and family dinners, everyone will be asking for more.
- Customizable: You can easily swap ingredients to suit your taste or dietary needs.
- Comfort Food Vibes: There’s something comforting about baked potatoes, especially when topped with gooey cheese and savory bacon.
- Quick and Delicious: You can have these ready and on the table in under an hour!
- Leftover Perks: Any leftovers can be reinvented into something just as tasty.
What makes it stand out
Baked Potato Skins offer a unique blend of flavors and textures that keep everyone coming back for more. The crispy exterior, warm potato flesh, and indulgent toppings make for an unforgettable bite. There’s nothing quite like the satisfaction of pulling off the perfect skin from a baked potato.
What truly sets this recipe apart is its versatility across various occasions. Whether you make Baked Potato Skins for a cozy family movie night, a lively Super Bowl party, or a casual potluck, they always hit the spot. Plus, seasonal themes can be incorporated into your toppings, so they’re perfect in any weather!
Ingredients for Baked Potato Skins
Let’s gather our ingredients for these mouthwatering Baked Potato Skins! Here’s everything you’ll need to make this delightful dish.
Complete ingredient list with measurements
- 4 large Russet potatoes
- 2 tablespoons olive oil
- 1 cup shredded cheddar cheese
- 1/2 cup cooked and crumbled bacon
- 1/4 cup sour cream
- 2 green onions, sliced
- Salt and pepper to taste
Substitutes and alternatives
If you’re looking for some alternatives, here are a few common swaps:
- Potato Alternatives: Sweet potatoes or Yukon Gold potatoes work great, offering a different flavor.
- Cheese: Try pepper jack or a mixture of mozzarella and cheddar for a creamier texture.
- Bacon: Replace with turkey bacon or even use cooked sausage for a different twist.
- Sour Cream: Greek yogurt can be a healthier, tangy substitute.
- Vegan Options: Use dairy-free cheese and skip the bacon entirely for a plant-based version!
How to Make Baked Potato Skins – Step-by-Step Directions
Now, let’s get that oven preheating and start making those scrumptious Baked Potato Skins!
Step 1: Preheat Your Oven
Begin by preheating your oven to 400°F (200°C). This gives your potatoes a perfect roast.
Step 2: Prepare the Potatoes
Grab your 4 large Russet potatoes. Scrub them thoroughly under running water to remove any dirt. Prick the potatoes with a fork several times; this helps steam escape while baking!
Step 3: Bake the Potatoes
Place the poked potatoes directly on the oven rack or on a baking sheet. Bake them for 45-50 minutes or until they’re tender enough that a fork can easily pierce them.
Step 4: Cool and Scoop
Once they are baked, let the potatoes cool for a few minutes until they’re comfortable to handle. Then, cut them in half lengthwise. Gently scoop out some of the flesh with a spoon, leaving about 1/4 inch along the skin.
Step 5: Prepare the Skins
Now it’s time to brush those potato skins! Use 2 tablespoons of olive oil to coat the insides of the skins. Season them with salt and pepper to taste for extra flavor.
Step 6: Bake for Crispiness
Place the skins, cut side up, on a baking sheet and return them to the oven. Bake for an additional 10-15 minutes until they become delightful and crispy!
Step 7: Add Cheese and Bacon
Once crispy, remove the skins from the oven. Sprinkle 1 cup of shredded cheddar cheese and 1/2 cup of cooked and crumbled bacon into each skin.
Step 8: Melting Goodness
Return the skins to the oven for another 5 minutes or until the cheese is melted and bubbly.
Step 9: Final Touches
After they’re out of the oven, it’s time to add the finishing touches! Top each skin with 1/4 cup of sour cream and sprinkle the sliced green onions over the top for a fresh crunch.
Step 10: Serve and Enjoy
Serve your Baked Potato Skins warm and watch them disappear in no time. They’re best enjoyed hot, fresh from the oven!
Serving Suggestions for Baked Potato Skins
Baked Potato Skins are the ultimate versatile dish. Whether you’re serving them at a family gathering or simply enjoying a cozy night at home, you can’t go wrong.
Best occasions to serve this dish
- Family Meals: Pair them with a hearty salad for a comforting weeknight dinner.
- Game Day: An absolute hit at any sports event or watching party.
- Holidays: Elevate your Thanksgiving or Christmas feast with these delightful appetizers.
What to serve with it
Here are some ideas for delightful pairings:
- Light beer or soda
- Ranch dressing or a zesty dipping sauce
- Fresh salad on the side
- Appetizer platter with veggies and hummus
Storing Baked Potato Skins Properly
Did you have some leftovers? No problem! Here’s how to store them properly and keep them tasting great.
Best storage practices
- In the Fridge: Store any uneaten Baked Potato Skins in an airtight container for up to 3 days.
- In the Freezer: For longer storage, freeze the cooked skins in a freezer-safe bag for about 2-3 months.
Reheating and freezing tips
- To Reheat: Oven is the best choice. Preheat to 375°F (190°C), place the skins on a baking sheet, and heat until warm. This helps restore their crispiness.
- Avoid sogginess: If they’ve been in the fridge, place them directly in the oven rather than the microwave to preserve that crispy exterior.
Tips & Tricks for Baked Potato Skins
To ensure your Baked Potato Skins turn out beautifully every time, here are some tips and tricks!
Mistakes to avoid
- Overcrowding: Don’t bake too many potato skins on one tray; it’s better to use two pans if needed.
- Not Preheating: Always preheat your oven. This is essential for that crispy texture.
- Sogginess: Avoid adding too many toppings before baking; it can make the skins soggy.
Extra tips for better results
- Use Quality Cheese: A good quality cheddar melts better and has more flavor.
- Experiment with Spices: Add garlic powder or smoked paprika before baking for a flavor boost.
- Add Fresh Herbs: Mixing in some fresh herbs like chives or parsley enhances the presentation and flavor profile!
Recipe Variations of Baked Potato Skins
Getting creative can take your Baked Potato Skins to the next level! Here are some fun twists you can try.
Creative twists
- Mexican Style: Top with black beans, corn, salsa, and jalapeños for a spicy kick.
- Buffalo Chicken: Adding shredded buffalo chicken and ranch dressing gives a whole new dimension.
- Sweet and Savory: Try some maple syrup-glazed walnuts along with your toppings for a sweet twist.
Dietary adjustments
- Vegan: Use plant-based cheese and skip any animal products.
- Gluten-Free: This recipe is naturally gluten-free, so feel free to enjoy without worrying.
- Dairy-Free: Explore dairy-free cheeses and sour cream to suit your dietary needs!
Conclusion about Baked Potato Skins
In conclusion, Baked Potato Skins are the ideal way to indulge in comfort food that’s both delicious and satisfying. Whether you’re sharing them with friends or enjoying them by yourself, the taste and aroma are simply irresistible.
So don’t wait! Gather your ingredients, follow this simple guide, and enjoy every crispy, cheesy bite. Share this recipe with your loved ones, and create memorable moments around your table.
FAQs about Baked Potato Skins
What if it doesn’t turn out right?
If your Baked Potato Skins don’t turn out perfectly the first time, don’t fret! The key is to adjust cooking time and temperature according to your oven. Practice makes perfect!
Can I prepare it ahead of time?
Yes! You can bake your potatoes and scoop them out in advance. Just store them in the fridge until you’re ready to top and crisp them up!
What are the best ingredient substitutions?
You can swap out regular potatoes for sweet potatoes or use any cheese that melts well. Bacon can be replaced with turkey bacon or omitted altogether for a vegetarian version.
How long can it be stored?
In the fridge, Baked Potato Skins last about 3 days. Keep them in an airtight container. If frozen, they can stay good for about 2-3 months.
Can I use store-bought dough or crust?
While this recipe is designed specifically for potato skins, feel free to get creative and try using a dough base if you’re making a different version.
Is this recipe kid-friendly?
Absolutely! Kid-friendly and versatile, kids will love helping add their favorite toppings and digging in.
Can I make it allergen-free?
Yes! Simply replace any non-allergen ingredients (like dairy cheese or bacon) with suitable alternatives, and you’re good to go!
Baked Potato Skins are a classic recipe that everyone should try. Happy cooking!
Baked Potato Skins
Equipment
- Plaque de cuisson
- Papier sulfurisé
- cuillère / petite cuillère
- Four
Ingrédients
Pommes de terre & coquilles
- 6 pommes de terre de taille moyenne (type Russet) bien lavées et essuyées
- 2 c. à soupe beurre fondu
- sel et poivre au goût
Garniture
- 1 cup fromage cheddar râpé
- 6 tranches bacon cuit et émietté
- crème fraîche / crème aigre pour servir
- oignons verts / ciboulette hachée pour garniture
Instructions
- Préchauffer le four à 200 °C (≈ 400 °F). Piquez les pommes de terre avec une fourchette pour éviter qu’elles n’éclatent.
- Cuire les pommes de terre directement sur la grille du four pendant environ 1 heure, jusqu’à ce qu’elles soient tendres au centre.
- Laisser tiédir légèrement, puis couper chaque pomme de terre en deux dans le sens de la longueur.
- Avec une petite cuillère, retirer la chair, en laissant une bordure d’environ 0,5 cm pour que la peau conserve sa rigidité.
- Badigeonner l’intérieur (et l’extérieur si désiré) des coquilles avec le beurre fondu, saler et poivrer.
- Remettre les coquilles à four dans une plaque sur du papier sulfurisé, placer côté intérieur vers le haut, et enfourner ~7-8 minutes pour les rendre croustillantes.
- Retirer du four, remplir chaque coquille de fromage râpé et bacon émietté.
- Remettre sous le gril (broiler) pendant environ 3-4 minutes, jusqu’à ce que le fromage soit fondu et bulles.
- Sortir du four, garnir de crème fraîche, d’oignons verts ou de ciboulette selon l’envie, et servir chaud.