
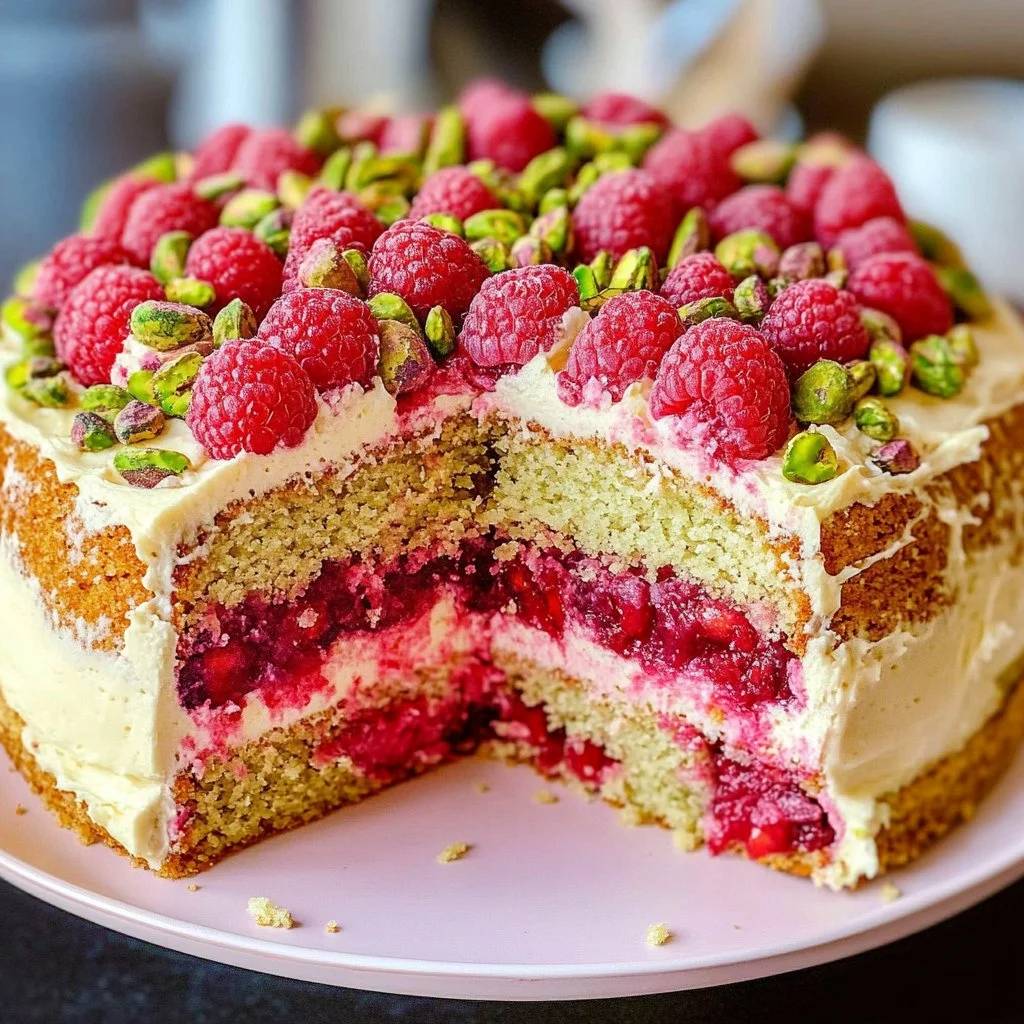
Irresistible Raspberry Pistachio Cake – Elegant & Moist
Equipment
- Moule à gâteau (deux cercles ronds)
- Bol à mélanger
- Fouet électrique ou batteur
- Casserole pour la garniture framboise
Ingrédients
Pour le gâteau
- 100 g pistaches non salées (réduites en poudre) farine de pistache maison
- 260 g farine tout usage
- ¾ c. à c levure chimique
- ¾ c. à c bicarbonate de soude
- ¾ c. à c sel
- 180 g beurre (température ambiante)
- 300 g sucre en poudre
- 4 gros œufs (température ambiante)
- 240 g crème aigre (sour cream) température ambiante
- 60 g huile végétale (canola)
- 2 c. à c extrait de vanille
Garniture framboise
- 250 g framboises surgelées
- 50 g sucre en poudre
- 2 c. à c jus de citron
- 1 c. à c extrait de vanille
- 1 c. à c fécule de maïs
- 2 c. à c eau
Buttercream framboise
- 400 g beurre (température ambiante)
- 660 g sucre glace
- 1½ c. à s poudre de framboise lyophilisée
- 2 c. à c extrait de vanille
- 2 c. à s lait entier température ambiante
Instructions
- Préchauffez le four à 175 °C (350 °F). Graissez et préparez deux moules à gâteau.
- Mélangez la farine de pistache, farine, levure, bicarbonate et sel. Réservez.
- Dans un autre bol, crémez le beurre et le sucre jusqu’à consistance légère et aérée (~3-4 min).
- Ajoutez les œufs un à un, puis la crème aigre, l’huile et la vanille. Mélangez jusqu’à homogénéité.
- Incorporez progressivement le mélange sec au mélange humide à basse vitesse jusqu’à juste combiné.
- Divisez la pâte entre les moules, lissez le dessus et enfournez 25-30 min ou jusqu’à ce qu’un cure-dent ressorte propre.
- Pendant la cuisson, préparez la garniture framboise : mêlez framboises, sucre, jus de citron, vanille, fécule dissoute dans l’eau ; chauffez jusqu’à épaississement (~5-7 min), laissez refroidir.
- Préparez le buttercream : fouettez le beurre, ajoutez le sucre glace, la poudre de framboise, la vanille et le lait jusqu’à texture légère.
- Une fois les gâteaux refroidis, étalez le buttercream sur le premier, posez-le, puis recouvrez tout le gâteau.
- Décorez avec des framboises fraîches, des pistaches concassées ou des fleurs comestibles selon vos envies.
Notes
Table of Contents
Introduction about Raspberry Pistachio Cake
Have you ever craved a dessert that’s both indulgent and refreshing at the same time? Well, let me introduce you to the delightful Raspberry Pistachio Cake. If you’re like many of us who strive for the perfect balance of nutty and fruity flavors, this cake will undoubtedly become one of your all-time favorites! Imagine slicing into a lush, moist cake infused with the subtle earthiness of pistachios, complemented perfectly by the vibrant tartness of raspberries. Sounds mouthwatering, right?
This unique cake is not only delicious, but it’s also surprisingly easy to make. Whether you’re preparing for a family gathering, a birthday celebration, or just a casual afternoon tea, this Raspberry Pistachio Cake is sure to impress. Plus, the bright colors and delightful flavors make it a showstopper that screams, “Enjoy me!” So, gather your ingredients, and let’s dive into this wonderful baking adventure together!
Key Benefits of Raspberry Pistachio Cake
Why You’ll Love This Recipe
Here are some key benefits that make this Raspberry Pistachio Cake a must-try:
- Irresistibly Flavorful: The combination of pistachios and raspberries creates an exquisite taste sensation.
- Easy and Accessible: With simple ingredients and straightforward steps, baking this cake is beginner-friendly.
- Perfect for Any Occasion: Whether it’s a birthday, holiday, or a regular Tuesday, this cake fits all celebrations.
- Moist and Rich: Thanks to the sour cream and butter, the texture is incredibly moist and rich.
- Visually Stunning: The vibrant colors of raspberries and the green of pistachios make it a feast for the eyes.
What Makes It Stand Out
What truly sets this cake apart is its originality. Most layer cakes stick to classic chocolate or vanilla, but the Raspberry Pistachio Cake brings a refreshing twist. It’s a unique blend of flavors that not only tastes delicious but also adds a gourmet touch to any dining table.
Additionally, this cake is highly customizable. You can adjust the sweetness, incorporate seasonal fruits, or even switch up the nuts to suit your preference. The versatility of this recipe makes it even more appealing, whether you’re baking it for the summer picnic or a cozy winter gathering.
Ingredients for Raspberry Pistachio Cake
Complete Ingredient List with Measurements
To whip up this spectacular Raspberry Pistachio Cake, gather the following ingredients:
For the Cake:
- 100 g unsalted pistachios (blended into flour)
- 260 g all-purpose flour
- 3/4 tsp baking powder
- 3/4 tsp baking soda
- 3/4 tsp salt
- 180 g butter (room temperature)
- 300 g granulated sugar
- 4 large eggs (room temperature)
- 240 g sour cream (room temperature)
- 60 g vegetable oil (e.g., canola oil)
- 2 tsp vanilla extract
For the Raspberry Filling:
- 250 g frozen raspberries
- 50 g granulated sugar
- 2 tsp lemon juice
- 1 tsp vanilla extract
- 1 tsp cornstarch
- 2 tsp water
For the Raspberry Buttercream:
- 400 g butter (room temperature)
- 660 g powdered sugar
- 1 1/2 tbsp freeze-dried raspberry powder
- 2 tsp vanilla extract
- 2 tbsp whole milk (room temperature)
Substitutes and Alternatives
If you need to make some adjustments due to allergies or preferences, here are some substitutes you can consider:
- Gluten-Free: Use a gluten-free all-purpose flour blend instead of regular flour.
- Dairy-Free: Replace butter with a dairy-free butter alternative and use non-dairy sour cream.
- Sugar Alternatives: If you’re looking to reduce sugar, you could use natural sweeteners like honey or maple syrup, but make sure to adjust the liquid ingredients accordingly.
How to Make Raspberry Pistachio Cake – Step-by-Step Directions
Step 1 – Prep Your Workspace and Ingredients
Before you start, make sure your kitchen is tidy and all your ingredients are out and measured. Preheat your oven to 350°F (175°C) and grease your cake pans using butter or cooking spray to ensure easy removal later.
Step 2 – Prepare the Cake Batter
In a mixing bowl, combine the blended pistachio flour, all-purpose flour, baking powder, baking soda, and salt. Set this dry mixture aside. In another large bowl, cream together the room-temperature butter and granulated sugar until light and fluffy, which should take about 3-4 minutes.
Step 3 – Add Eggs and Wet Ingredients
Next, add the large eggs one at a time, ensuring each is well incorporated before adding the next. Pour in the sour cream, vegetable oil, and vanilla extract, and mix until everything is smoothly combined.
Step 4 – Combine Dry and Wet Ingredients
Take your dry ingredient mix and slowly add it to the wet ingredients, mixing on low speed until just combined. Be careful not to overmix; a few lumps are perfectly fine!
Step 5 – Prepare the Raspberry Filling
In a small saucepan over medium heat, combine the frozen raspberries, granulated sugar, lemon juice, vanilla extract, cornstarch mixed with water, and bring to a gentle simmer. Cook for about 5-7 minutes, stirring gently until it thickens. Remove from heat and let it cool.
Step 6 – Divide and Layer the Cake
Divide the batter evenly between your prepared cake pans. Spoon the raspberry filling (after it has cooled slightly) on top of one layer, then carefully top it with the second layer of batter. This layering technique creates a delightful surprise when you slice into the cake.
Step 7 – Bake the Cake
Pop the assembled cake into your preheated oven and bake for 25-30 minutes. The cake is done when a toothpick inserted in the center comes out clean. Allow it to cool in the pans for about 10 minutes before transferring to wire racks to cool completely.
Step 8 – Make the Raspberry Buttercream
In a large mixing bowl, beat the room-temperature butter until creamy. Gradually add in the powdered sugar, followed by the freeze-dried raspberry powder, vanilla extract, and milk. Beat until light and fluffy. Adjust the consistency with more milk or sugar until you reach your desired spreading texture.
Step 9 – Assemble the Cake
Once your cake layers are completely cool, spread a generous layer of raspberry buttercream on top of the first layer. Gently place the second layer on top and frost the entire cake with the remaining buttercream.
Step 10 – Decorate
To finish off your Raspberry Pistachio Cake, feel free to decorate with fresh raspberries, crushed pistachios, or even edible flowers for a touch of elegance.
Serving Suggestions for Raspberry Pistachio Cake
Best Occasions to Serve This Dish
The Raspberry Pistachio Cake is incredibly versatile and suitable for numerous occasions:
- Birthday Parties: A stunning cake for family celebrations.
- Holidays: Perfect for festive gatherings like Easter or Christmas.
- Afternoon Tea: Enjoy with family or friends for a leisurely afternoon catch-up.
- Weddings: A great option for a cake at casual or rustic weddings.
What to Serve With It
Enhance your Raspberry Pistachio Cake experience by serving it with some delightful accompaniments:
- Beverages: Tea, coffee, or light sparkling wines.
- Toppings: A drizzle of chocolate sauce, whipped cream, or a scoop of vanilla ice cream.
- Sides: Fresh fruit or a side of fruit salad balances the sweetness.
Storing Raspberry Pistachio Cake Properly
Best Storage Practices
To keep your Raspberry Pistachio Cake fresh, store it in an airtight container. If refrigerated, it can last up to 5 days. Alternatively, if you opt to freeze it, wrap it tightly in plastic wrap and then aluminum foil to prevent freezer burn.
Reheating and Freezing Tips
When reheating, take care not to dry it out. Place a slice in the microwave for about 15-20 seconds. For frozen slices, allow the cake to thaw in the refrigerator overnight before enjoying. Avoid reheating multiple times; it can affect the texture and taste.
Tips & Tricks for Raspberry Pistachio Cake
Mistakes to Avoid
- Overmixing the Batter: This can lead to a dense cake. Mix just until combined.
- Skipping Room Temperature Ingredients: Cold ingredients can affect the batter texture, so take them out ahead of time.
Extra Tips for Better Results
- Use a Kitchen Scale: Measuring ingredients by weight ensures accuracy, especially for flour.
- Taste Test: Before frosting, taste the raspberry filling and adjust sugar or lemon juice according to your preference.
Recipe Variations of Raspberry Pistachio Cake
Creative Twists
Feel free to customize this Raspberry Pistachio Cake to fit your taste:
- Flavored Nuts: Try adding chopped almonds or walnuts.
- Zest it Up: Incorporate citrus zest (lemon or orange) for added flavor.
- Seasonal Spices: Add cinnamon or nutmeg for a warm twist during the fall.
Dietary Adjustments
If you have specific dietary needs, here’s how to tweak the recipe:
- Gluten-Free: Replace all-purpose flour with a gluten-free mix.
- Dairy-Free: Use coconut yogurt instead of sour cream and a dairy-free butter option.
- Vegan Version: Substitute eggs with flaxseed or chia seeds mixed with water.
Conclusion about Raspberry Pistachio Cake
In conclusion, the Raspberry Pistachio Cake is a delightful fusion of flavors and textures that makes it a fantastic choice for any occasion. Its easy preparation and beautiful presentation are just some of the perks that make it an appealing recipe to try. Whether you’re celebrating a special event or simply treating yourself to something sweet, this cake promises to be a hit.
So, what are you waiting for? Grab your ingredients, bake this gorgeous cake, and enjoy every delicious bite! Don’t forget to share your experiences and feedback after trying this delightful dessert.
FAQs about Raspberry Pistachio Cake
What if it doesn’t turn out right?
If your cake doesn’t rise or seems too dense, it’s likely due to overmixing or incorrect measurements. Always check your oven temperature and use a kitchen scale for accuracy.
Can I prepare it ahead of time?
Absolutely! You can bake the cake a day in advance and store it covered in the fridge. Just frost it the day you’re serving it to keep it fresh.
What are the best ingredient substitutions?
Common substitutes include gluten-free flour for a gluten-free option, vegetable oil for melted butter, or applesauce for oil if you want it to be lighter.
How long can it be stored?
When stored properly in an airtight container, the cake lasts up to 5 days in the fridge. It can also be frozen for up to 3 months.
Can I use store-bought dough or crust?
For the cake part, homemade works best for flavor and texture. However, you can use store-bought toppings or fillings for convenience.
Is this recipe kid-friendly or family-appropriate?
Totally! Kids tend to love the sweet raspberry filling, and any chocolate or whipped cream served alongside will be a hit too!
Can I make this recipe allergen-free?
Yes! With the right substitutions, you can tailor this recipe for gluten-free, dairy-free, and nut-free diets by using alternative flours and non-dairy products.
Now that you’re fully equipped to make this majestic Raspberry Pistachio Cake, happy baking! Enjoy every moment of creating this delightful treat!