

Table of Contents
Introduction to Mulberry Mousse Cake Filling
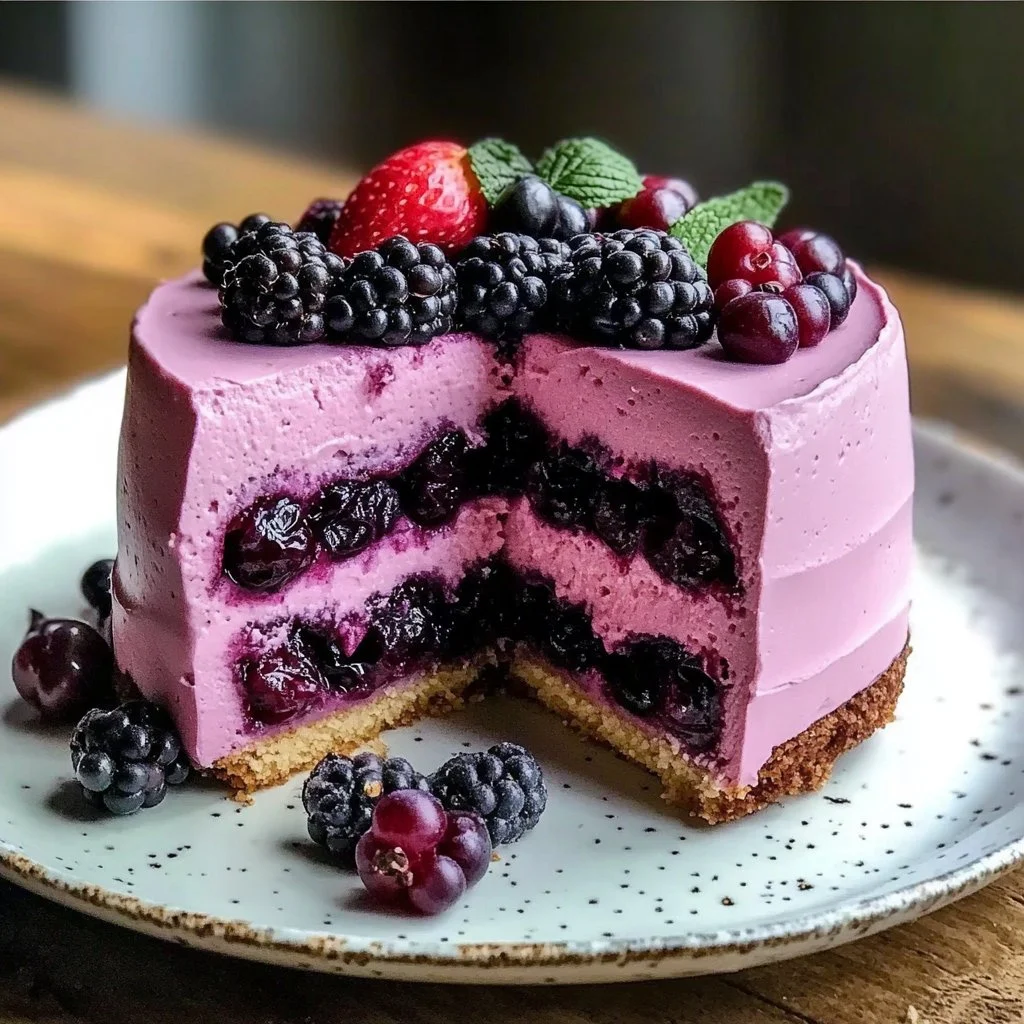
Have you ever tasted a dessert that simply captures the essence of summer? If you haven’t, then the Mulberry Mousse Cake Filling might just be the game changer you need. This delicious filling is not only rich and creamy, but it also bursts with the fresh, tangy flavor of mulberries. Imagine layering it between cake or enjoying it on its own as a light dessert. It’s a sweet indulgence that leaves a lasting impression.
What makes the Mulberry Mousse Cake Filling stand out is its gorgeous color and fluffy texture. The vibrant hues of mulberries create a visually stunning dish that is sure to impress your guests. It’s perfect for special occasions like birthday parties, anniversaries, or even holiday gatherings. Who wouldn’t want to impress their friends and family with a beautiful and tasty dessert?
Furthermore, this recipe showcases just how easy it is to incorporate seasonal fruits into your baking. With minimal ingredients and straightforward steps, anyone can create a light and fluffy mousse that highlights the divine flavor of mulberries. If you’re looking to elevate your dessert game, this recipe is a fantastic choice that you won’t want to miss.
Key Benefits of Mulberry Mousse Cake Filling
Why You’ll Love This Recipe
- Delicious Flavor: The natural sweetness and tartness of mulberries shine through.
- Light and Airy: Texture is key, and the whipped cream and gelatin create a delightful mouthfeel.
- Simple to Make: With straightforward steps, even beginner bakers can perfect this filling.
- Versatile Usage: Perfect for cakes, parfaits, or even eaten on its own.
- Fresh Ingredients: Uses wholesome, homemade elements for a richer taste.
- Stunning Presentation: The vibrant color adds aesthetic appeal to any dessert.
What Makes It Stand Out
The originality of the Mulberry Mousse Cake Filling lies in its ability to showcase a less common berry, making it a conversation starter at any gathering. Mulberries may not be as mainstream as strawberries or blueberries, but they carry a unique flavor profile that is both sweet and slightly tart. This filling will impress guests with its sophisticated taste.
Additionally, the ease of customization makes this mousse stand out. You can experiment with different flavor profiles by adding vanilla, almond extract, or even chocolate. This versatility opens doors for endless possibilities, ensuring that your mousse will remain fresh and exciting for different occasions or personal preferences.
Ingredients for Mulberry Mousse Cake Filling
Complete Ingredient List with Measurements
- 1 cup mulberry puree (made from cooked, blended mulberries)
- 2 tablespoons lemon juice (freshly squeezed)
- 8 ounces cream cheese (at room temperature)
- 1 cup whipped cream (heavy cream whipped to stiff peaks)
- 1 tablespoon gelatin (dissolved in warm water)
Substitutes and Alternatives
If you’re looking for alternatives due to allergies or dietary needs, consider these options. For the cream cheese, vegan cream cheese can be used for a dairy-free version. If mulberries are hard to find, substitute with fresh or frozen berries like blackberries or raspberries, keeping the lemon juice to maintain that tanginess. For those avoiding gelatin, a plant-based alternative like agar-agar can work, although you’ll need to adjust the ratios accordingly.
How to Make Mulberry Mousse Cake Filling – Step-by-Step Directions
Step 1 – Prepare Ingredients
Start by gathering and measuring all your ingredients. Ensure that the cream cheese is at room temperature to guarantee a smooth consistency in your filling. This preparation will streamline your cooking process, making the subsequent steps easier.
Step 2 – Cook the Base
In a saucepan over medium heat, cook the mulberries for about 10 minutes. Stir occasionally until they break down and soften. After cooking, transfer the mixture to a blender and puree until smooth. Allow the mulberry puree to cool before incorporating it into the filling.
Step 3 – Mix Lemon Juice
In a mixing bowl, combine the cooled mulberry puree with freshly squeezed lemon juice. The acidity of the lemon juice enhances the mulberry flavor, adding brightness and balancing sweetness.
Step 4 – Beat the Cream Cheese
In a separate mixing bowl, beat the cream cheese until it reaches a smooth and creamy texture. This step is crucial because it prevents lumps in your final mousse. Use an electric mixer for best results.
Step 5 – Combine with Mulberry Mixture
Gradually add the mulberry mixture to the creamed cheese. Continue mixing until both components are fully integrated, creating a delightful purée that showcases the vibrant color of mulberries.
Step 6 – Whip the Heavy Cream
Whip the heavy cream in a separate bowl until stiff peaks form. It’s essential to achieve the right texture here; over-whipping can lead to a grainy consistency. Aim for a firm yet spreadable texture.
Step 7 – Fold in Whipped Cream
Gently fold the whipped cream into the mulberry cream cheese mixture using a spatula. Be cautious not to deflate the whipped cream—this keeps the mixture light and fluffy.
Step 8 – Dissolve Gelatin
Dissolve the gelatin in warm water until fully dissolved. This ensures an even distribution of the gelatin in the mousse, which is necessary for achieving the desired firmness as it chills.
Step 9 – Mix in Gelatin to Mousse
Carefully mix the dissolved gelatin into the mousse mixture. Stir gently to combine, ensuring the gelatin is integrated evenly throughout.
Step 10 – Chill
Transfer the finished mousse to a suitable container. Cover it and chill in the refrigerator for at least 2 hours before using. This rest period allows the gelatin to set and gives the mousse its delightful texture.
Serving Suggestions for Mulberry Mousse Cake Filling
Best Occasions to Serve This Dish
The Mulberry Mousse Cake Filling is perfect for any celebration where desserts steal the spotlight. Think of birthday parties where this mousse can add a unique flair to cake layers or bridal showers where light desserts are appreciated. Its fresh flavor makes it a fantastic choice for summer gatherings, picnics, or even holiday dinners.
What to Serve With It
Pair this mousse with light pastries, fluffy sponge cakes, or even meringue for a delightful contrast in textures. It can also be topped with toasted nuts or fresh fruits to enhance its freshness. For drink pairings, consider light teas or sparkling wines that complement the mousse’s fruity flavors.
How to Store Mulberry Mousse Cake Filling Properly
Best Storage Practices
To maintain the quality of your Mulberry Mousse Cake Filling, store it in an airtight container in the refrigerator. This mousse can be kept for about 3-5 days. If you plan to use it after that, freezing is an option, although the texture may be slightly affected upon thawing.
Reheating and Freezing Tips
As a mousse, it is best served cold, and reheating is not required. If you freeze it, allow it to thaw in the refrigerator rather than at room temperature to maintain its texture. Consume within one month of freezing for the best taste.
Tips & Tricks for Mulberry Mousse Cake Filling
Mistakes to Avoid
1 – Not Using Room Temperature Cream Cheese: Starting with cold cream cheese can lead to lumps in your mousse. Always let your cream cheese warm up.
2 – Over or Under Whipping Cream: Achieving the right consistency in whipped cream is imperative. Too much can make it grainy, while too little won’t provide the necessary airiness.
3 – Ignoring Gelatin Ratios: Too much gelatin will lead to a rubbery texture, while too little won’t set properly. Follow the measurements closely.
4 – Not Chilling Long Enough: Failing to chill for at least 2 hours can result in a mousse that’s too soft. Patience is key here.
5 – Skipping the Puree Step: Skipping the blending of cooked mulberries might leave you with a chunky mixture rather than a smooth filling.
Extra Tips for Better Results
For a richer flavor, consider incorporating a teaspoon of vanilla extract into the cream cheese mixture. This little addition can elevate the overall taste. Also, when folding in the whipped cream, use gentle motions to maintain the light texture. Presentation is also key, so consider using a piping bag to serve the mousse in individual cups for an elegant touch.
Recipe Variations of Mulberry Mousse Cake Filling
Creative Twists
1 – Chocolate Mulberry Mousse: Add melted dark chocolate to the base mixture for a luscious blend of chocolate and berry flavors, making it a dessert lover’s dream.
2 – Nutty Addition: Stir in crushed nuts such as pistachios or almonds into the mousse for a delightful crunch that contrasts beautifully with the fluffy texture.
3 – Citrus Infusion: Experiment with different citrus juices, like orange or lime, to give the mousse a tangy twist and further enhance the brightness of mulberries.
Dietary Adjustments
For a vegan version, substitute the cream cheese with a plant-based alternative and use coconut cream instead of whipped heavy cream for a delightful coconut-berry flavor. To make this recipe gluten-free, ensure all ingredients used are certified gluten-free, particularly if you are serving those with gluten sensitivities.
Conclusion about Mulberry Mousse Cake Filling
The Mulberry Mousse Cake Filling is not just a dessert; it’s an experience. It combines fresh flavors, an enticing color, and a light, airy texture that can make any occasion special. Whether you indulge in it as a layered cake filling or serve it as a standalone dessert, this recipe is sure to impress. With its ease and versatility, you can swap ingredients and customize it to suit your taste. So why not give it a try? Dive into the delightful world of Mulberry Mousse Cake Filling today!
FAQs about Mulberry Mousse Cake Filling
How long can I store the mousse?
You can store the Mulberry Mousse Cake Filling in the refrigerator for 3-5 days in an airtight container.
Can I make this ahead of time?
Absolutely! This mousse can be made a day in advance. Just store it properly in the fridge until you’re ready to serve.
How can I substitute mulberries?
If you can’t find mulberries, you can substitute them with other berries like blackberries, raspberries, or even strawberries for a different flavor.
Is this mousse suitable for freezing?
Yes, you can freeze the mousse, but note that the texture may change slightly once thawed. It’s best enjoyed fresh.
Can I use a vegan alternative for cream cheese?
Yes, you can substitute cream cheese with a vegan cream cheese to make this recipe dairy-free.
What can I serve with this mousse?
Consider pairing it with sponge cake, light pastries, or fresh fruit for a refreshing complement to the mousse.
Do I have to use gelatin?
Gelatin is necessary for setting the mousse. If you need a vegetarian option, look for plant-based gelatin alternatives like agar-agar.
What should I do if my mousse doesn’t set?
If the mousse doesn’t set properly, it may be due to not enough gelatin or inadequate chilling time. Ensure both are adequate for best results.
Mulberry Mousse Cake Filling
Ingrédients
For the mousse base
- 1 cup mulberry puree (made from cooked, blended mulberries) Homemade
- 2 tablespoons lemon juice Freshly squeezed
- 8 ounces cream cheese At room temperature
For the whipped component
- 1 cup whipped cream Heavy cream whipped to stiff peaks
- 1 tablespoon gelatin Dissolved in warm water
Instructions
Preparation
- Start by gathering and measuring all your ingredients, ensuring the cream cheese is at room temperature.
- In a saucepan over medium heat, cook the mulberries for about 10 minutes. Stir occasionally until they break down and soften.
- Transfer the mixture to a blender and puree until smooth. Allow the mulberry puree to cool.
- In a mixing bowl, combine the cooled mulberry puree with freshly squeezed lemon juice.
- In a separate mixing bowl, beat the cream cheese until it reaches a smooth and creamy texture.
- Gradually add the mulberry mixture to the creamed cheese, mixing until fully integrated.
- Whip the heavy cream in a separate bowl until stiff peaks form.
- Gently fold the whipped cream into the mulberry cream cheese mixture using a spatula.
- Dissolve the gelatin in warm water until fully dissolved.
- Carefully mix the dissolved gelatin into the mousse mixture, ensuring it is integrated evenly.
- Transfer the mousse to a suitable container, cover, and chill in the refrigerator for at least 2 hours.