
Table of Contents
Introduction to DIY Ice Cream Bar
Who doesn’t love ice cream? It’s the ultimate treat that can bring a smile to anyone’s face, regardless of age. The DIY Ice Cream Bar takes this beloved dessert and elevates it to a new level of fun and creativity. Have you ever wished for a way to customize your ice cream experience? This fantastic recipe allows you to do just that. Imagine setting up a colorful spread of ice cream flavors and toppings, where friends and family can unleash their wildest sundae dreams.
What makes the DIY Ice Cream Bar so special? For starters, it’s all about personalization. Each guest can create their unique ice cream masterpiece by combining their favorite flavors and toppings. Whether you’re a fan of classic vanilla with chocolate syrup, or you prefer a tropical fruit medley, this setup ensures everyone leaves happy and satisfied. The best part? It’s incredibly easy to do. No complicated techniques or lengthy preparations – just a wonderful assortment of ingredients that cater to different tastes.
Beyond flavor and fun, it’s a versatile choice perfect for various occasions. From birthdays and summer parties to casual movie nights, the DIY Ice Cream Bar brings people together in a delightful way. So why not scoop up some ice cream and dive into creating your very own delicious treat? There’s no better way to enjoy a sweet celebration than by crafting your dream sundae at home. Let’s explore the irresistible world of DIY Ice Cream Bar.
Key Benefits of DIY Ice Cream Bar
Why You’ll Love This Recipe
- Flavor Variety: Multiple ice cream flavors for every palate.
- Simplicity: Easy to set up and customizable.
- Fun for Everyone: Engage guests in creating their sundaes.
- Seasonal Adaptability: Great for summers, holidays, and all occasions.
- Cost-Effective: Save money by making it at home.
- Interactive Experience: A creative party activity for family and friends.
What Makes It Stand Out
The DIY Ice Cream Bar stands out because of its originality. Unlike store-bought ice cream systems where options are limited, this recipe offers an endless array of combinations. Guests can mix and match flavors, toppings, and syrups to craft something truly unique. The creativity involved in serving up a sundae allows everyone to express their tastes, making the experience even more enjoyable.
Additionally, it’s perfect for any occasion. From casual gatherings to formal celebrations, the DIY Ice Cream Bar is adaptable and delightful. Set it up at a birthday party, summer BBQ, or even a cozy family night and watch as everyone gets excited about the delicious possibilities.
Ingredients for DIY Ice Cream Bar
Complete Ingredient List with Measurements
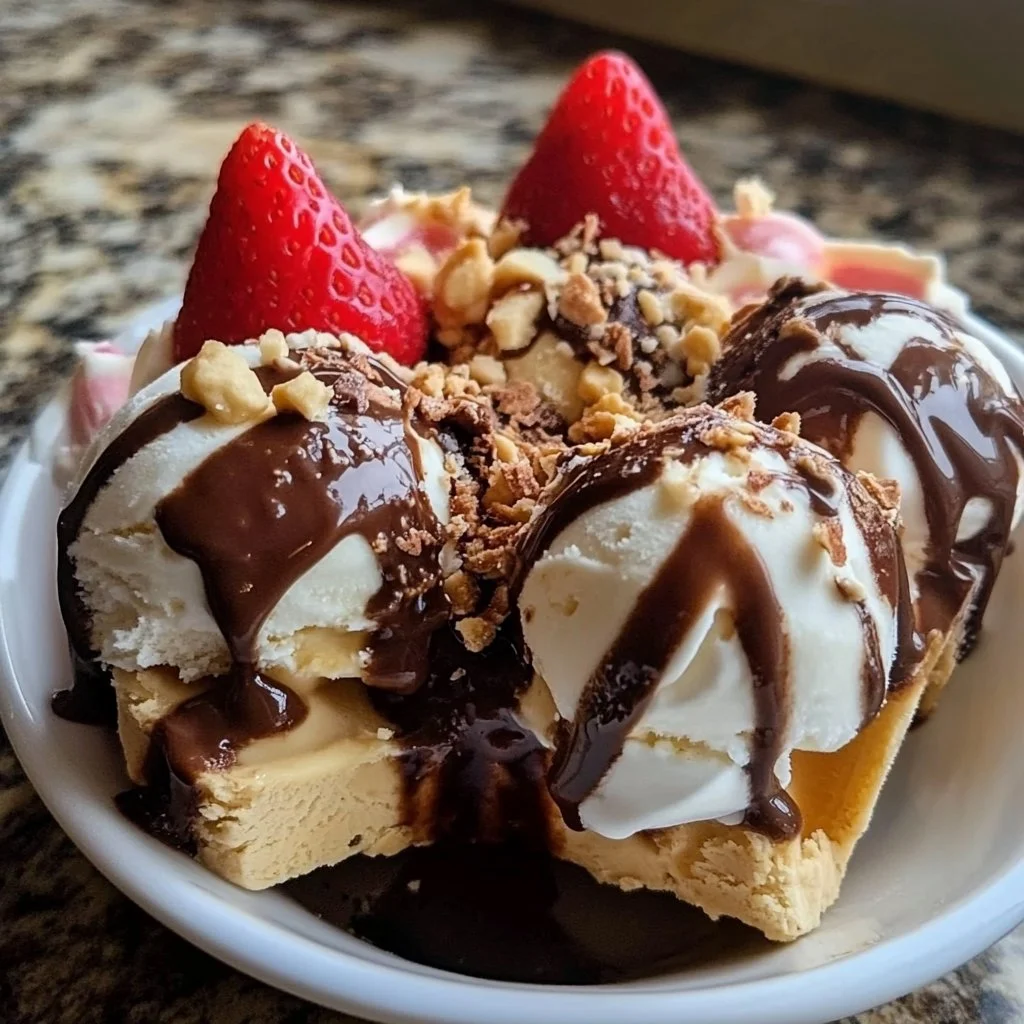
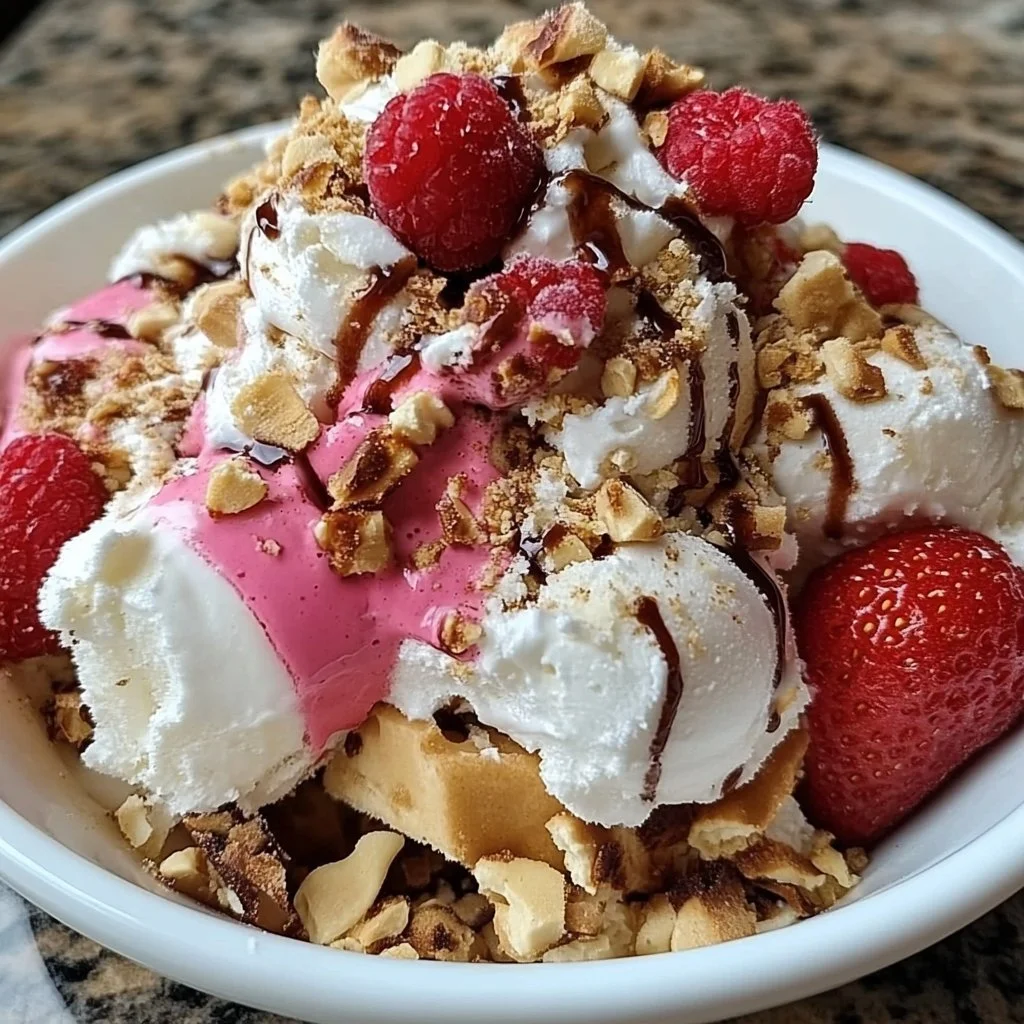
- Ice Cream Flavors: 4-5 quarts of various flavors (vanilla, chocolate, strawberry, mint chocolate chip, cookie dough)
- Toppings:
- Sprinkles (1 cup)
- Chocolate chips (1 cup)
- Nuts (1 cup)
- Fresh fruit (sliced strawberries, bananas, 1 cup each)
- Whipped cream (1 can)
- Syrups:
- Chocolate syrup (1 cup)
- Caramel syrup (1 cup)
- Strawberry syrup (1 cup)
- Waffle cones or bowls: 10-12 assorted cones or bowls
- Spoons: 10-12 disposable or reusable spoons
Substitutes and Alternatives
If anyone in your group has dietary restrictions, you can easily adapt the DIY Ice Cream Bar. For lactose intolerance, consider using dairy-free ice cream alternatives made from almond milk, coconut milk, or cashew milk.
For those with nut allergies, skip the nuts and opt for other crunchy toppings like crushed cookies or granola. Gluten-free options can also be provided through gluten-free cones or bowls to ensure everyone enjoys a delicious dessert.
How to Make DIY Ice Cream Bar – Step-by-Step Directions
Step 1 – Prepare Ingredients
Start by gathering all your ingredients on a table. This includes your variety of ice creams, toppings, syrups, cones, and spoons. Arrange them in a way that’s visually appealing. You may want to label the ice cream flavors for ease.
Step 2 – Set Up Ice Cream Flavors
Scoop your different ice cream flavors into bowls or a large ice cream tub. Make sure to leave space between the flavors to avoid mixing them. A colorful display will make the bar inviting and enticing.
Step 3 – Arrange Toppings
In separate bowls, arrange your toppings neatly. You can use small plastic or glass bowls to show off sprinkles, nuts, and other toppings. This not only keeps your event organized but also adds to the aesthetic appeal.
Step 4 – Offer Syrups
Place the chocolate, caramel, and strawberry syrups in squeeze bottles or bowls. This way, guests can easily pour or drizzle their favorite syrup over their creations without any mess.
Step 5 – Prepare Waffle Cones or Bowls
Set out a selection of waffle cones and bowls for serving the ice cream. Having both options allows guests to choose what they prefer, whether they want to enjoy it in a cone or bowl.
Step 6 – Gather Supplies
Make sure to provide an adequate number of spoons so that everyone can easily access them while crafting their sundaes. This also helps minimize waiting time during the ice cream-making process.
Step 7 – Invite Guests
Once everything is set up, invite your guests to come and start creating their own DIY Ice Cream Bar sundaes. Encourage them to experiment with different flavors and toppings.
Step 8 – Enjoy the Creations
As everyone gets involved, enjoy the fun and laughter that comes with creating your delicious desserts. Don’t forget to take some memorable photos of the process.
Serving Suggestions for DIY Ice Cream Bar
Best Occasions to Serve This Dish
The DIY Ice Cream Bar is perfect for a variety of occasions. For kids’ birthday parties, it brings a delightful and interactive element that keeps everyone entertained. During summer get-togethers or barbecue parties, it adds a cool touch, making it a hit with guests. It’s also ideal for holidays like Independence Day or Halloween, where unique themed toppings and flavors can be introduced.
What to Serve With It
Pair the DIY Ice Cream Bar with refreshing beverages like lemonade, iced tea, or soda. If you’re hosting an adult gathering, consider adding some cocktails or wine to complement the fun atmosphere. You might also think about serving some light snacks or finger foods like popcorn or pretzels to balance out the sweetness.
How to Store DIY Ice Cream Bar Properly
Best Storage Practices
If you have any leftovers from the DIY Ice Cream Bar, make sure to store them properly. Ice cream should be kept in an airtight container in the freezer to maintain its texture and flavor. Cover the toppings and syrups as well, placing them in the refrigerator if they are perishable.
Reheating and Freezing Tips
Ice cream doesn’t need reheating, but if it becomes too hard in the freezer, let it sit at room temperature for about 5-10 minutes before scooping. This allows for easier serving. For leftover toppings, check for any signs of spoilage before using them later.
Tips & Tricks for DIY Ice Cream Bar
Mistakes to Avoid
- Too Many Flavors: Overloading on flavors can overwhelm guests. Stick to 4-5 popular choices.
- Not Enough Toppings: Ensure you have plenty of toppings to cater to various preferences.
- Ignoring Allergies: Don’t forget to consider dietary restrictions; label all ingredients.
- Poor Ice Cream Storage: Keep ice cream covered to avoid freezer burn.
- Syrup Spills: Use squeeze bottles to minimize mess when serving syrup.
Extra Tips for Better Results
To enhance the flavor experience, think about freezing the bowls or cones before serving. This will keep the ice cream from melting too quickly. You can also create themed toppings depending on the event, like red and blue sprinkles for a patriotic theme or spooky shapes for Halloween.
Recipe Variations of DIY Ice Cream Bar
Creative Twists
- Theme Nights: Host a chocolate lover’s night with chocolate ice cream, ganache, brownie bits, and chocolate-covered treats.
- Seasonal Flavors: Introduce pumpkin spice ice cream and candy corn toppings for a fall-inspired bar.
- Mocktail Ice Cream Sundaes: Create a bar featuring sorbets and accompanying mocktail toppings for a refreshing summer treat.
Dietary Adjustments
For vegan guests, opt for plant-based ice cream and use coconut whipped cream. You can also replace regular syrups with homemade versions using maple syrup or agave nectar.
Conclusion about DIY Ice Cream Bar
The DIY Ice Cream Bar is not only a delicious way to celebrate but also an interactive, fun-filled activity that everyone will enjoy. By allowing guests to create their own unique sundaes, you foster creativity and ensure that every palate is catered to. The ease of setup means you can focus on enjoying the occasion rather than being stuck in the kitchen. So gather your favorite ice cream flavors, toppings, and syrups, and get ready for a sweet adventure that brings people together.
FAQs about DIY Ice Cream Bar
How long can I keep ice cream in the freezer?
Ice cream will typically last for about 2-3 months in the freezer when stored properly in an airtight container.
Can I make the toppings ahead of time?
Yes, you can prepare the toppings a day in advance. Store them in the refrigerator in sealed containers to keep them fresh.
Can I use non-dairy ice cream for my DIY Ice Cream Bar?
Absolutely! There are many delicious non-dairy ice cream options available that cater to lactose intolerant or vegan guests.
What if I run out of ice cream?
Be sure to plan according to your guest count. If you anticipate high consumption, it’s always better to have extra ice cream on hand.
How can I prevent ice cream from melting quickly?
Consider partially freezing the serving bowls and cones prior to the event to help keep the ice cream colder for longer.
Can I use store-bought syrups?
Yes, store-bought syrups work perfectly, but homemade syrups add a special touch and can be tailored to your liking.
What are some unique toppings to consider?
Experiment with toppings like pretzel bits, crushed cookies, toasted coconut, or even candy bars for added sweetness and crunch.
Is it possible to make a DIY Ice Cream Bar for a large event?
Absolutely! Just scale up your ingredients accordingly and consider simpler options for toppings to make setup easier.

DIY Ice Cream Bar
Ingrédients
Ice Cream Flavors
- 4-5 quarts various flavors of ice cream (vanilla, chocolate, strawberry, mint chocolate chip, cookie dough) Choose a variety of popular flavors.
Toppings
- 1 cup Sprinkles
- 1 cup Chocolate chips
- 1 cup Nuts Optional, skip for nut allergies.
- 1 cup Fresh fruit (sliced strawberries, bananas) Use 1 cup of each fruit.
- 1 can Whipped cream
Syrups
- 1 cup Chocolate syrup
- 1 cup Caramel syrup
- 1 cup Strawberry syrup
Serving Supplies
- 10-12 pieces Waffle cones or bowls Assorted cones or bowls.
- 10-12 pieces Spoons Disposable or reusable.
Instructions
Preparation
- Gather all your ingredients on a table, including ice cream, toppings, syrups, cones, and spoons.
- Scoop different ice cream flavors into bowls or a large ice cream tub, leaving space between flavors.
- Arrange toppings in separate bowls to keep the event organized and visually appealing.
- Place the chocolate, caramel, and strawberry syrups in squeeze bottles or bowls for easy access.
- Set out a selection of waffle cones and bowls.
- Ensure you have enough spoons for all guests.
- Invite guests to start creating their own sundaes.
- Encourage experimentation and enjoy the fun of creating unique desserts.