
Table of Contents
Introduction to Twix Cookies: 7 Delightful Steps to Sweet Nostalgia
Imagine biting into a soft, chewy cookie that combines the best flavors of chocolate, caramel, and cookie dough. You can experience this delightful indulgence with Twix Cookies: 7 Delightful Steps to Sweet Nostalgia. This recipe is a modern twist on a classic favorite and captures the essence of the famous candy bar. What if you could make irresistible cookies that evoke warm memories of childhood sweets?
This recipe is special because it embodies everything you love about snacks: gooey caramel, rich chocolate, and a soft cookie base. It’s a harmonious blend that tantalizes the taste buds. Additionally, it’s incredibly easy to prepare, making it accessible even for novice bakers. Whether you’re baking for a special occasion or just for some self-pampering, these cookies will surely hit the spot.
Another beautiful aspect of Twix Cookies: 7 Delightful Steps to Sweet Nostalgia is its versatility. You can enjoy them alone, or use them as an exciting addition to your dessert table. With just a few ingredients and simple steps, you can bring a touch of nostalgia into your kitchen.
Why not gather your loved ones and embark on a baking adventure? The warm aroma that fills your home will surely stir up memories and invite cherished conversations. Indulging in these cookies is more than just dessert; it’s a heartfelt experience. Let’s dive into this delightful recipe and discover the magic of Twix Cookies: 7 Delightful Steps to Sweet Nostalgia.
Key Benefits of Twix Cookies: 7 Delightful Steps to Sweet Nostalgia
Why You’ll Love This Recipe
- Flavor Explosion: Bright, rich caramel paired with chocolate and buttery cookie dough.
- Simplicity: Steps are straightforward, making it a perfect recipe for both beginners and experienced bakers alike.
- Customizable: Add nuts or different chocolate types to suit your taste preferences.
- Nostalgic Experience: Evokes memories of childhood treats, enhancing your baking fun.
- Perfect for Sharing: A crowd-pleaser for parties, gatherings, or as gifts for loved ones.
What Makes It Stand Out
This recipe brings a contemporary flair to a beloved dessert, combining elements from traditional baking while offering a unique twist. The ability to sprinkle in personal touches, like adding sea salt on top of the caramel drizzle or switching up chocolate varieties, takes these cookies beyond the ordinary. Serve them during special occasions like birthdays or holidays, and watch them disappear quickly.
Moreover, Twix Cookies: 7 Delightful Steps to Sweet Nostalgia is a fantastic way to connect with friends and family. Nothing beats bonding over the thrill of baking together. It’s this mix of simplicity, flavor, and nostalgia that creates a special place in our hearts for these cookies.
Ingredients for Twix Cookies: 7 Delightful Steps to Sweet Nostalgia
Complete Ingredient List with Measurements
- 1 cup unsalted butter, softened
- 1 cup brown sugar
- 1/2 cup granulated sugar
- 2 large eggs
- 2 teaspoons vanilla extract
- 2 1/2 cups all-purpose flour
- 1 teaspoon baking soda
- 1/2 teaspoon salt
- 1 cup caramel sauce (store-bought or homemade)
- 1 cup chocolate chips
Substitutes and Alternatives
If you have dietary restrictions or allergies, it’s easy to make a few substitutions. For those who need to avoid gluten, gluten-free all-purpose flour can easily replace the regular all-purpose flour. A vegan butter substitute could work for dairy-free versions, along with plant-based milk.
For sweetness adjustments, you can use coconut sugar instead of brown sugar for a less processed option. If you’re a fan of dark chocolate, try using dark chocolate chips instead of semi-sweet. This flexibility helps you cater to the diverse needs of those you’re sharing these cookies with.
How to Make Twix Cookies: 7 Delightful Steps to Sweet Nostalgia – Step-by-Step Directions
Step 1 – Prepare Ingredients
Start by gathering all your ingredients. This makes the process go smoothly. Measure out the butter, sugars, eggs, and dry ingredients, so everything is ready to mix.
Step 2 – Preheat the Oven
Preheat your oven to 350°F (175°C). This is crucial for even baking. While the oven is warming up, you can move on to the next steps to save time.
Step 3 – Cream the Butter and Sugars
In a large mixing bowl, combine the softened unsalted butter, brown sugar, and granulated sugar. Use a hand mixer or stand mixer to cream these ingredients together until the mixture is light and fluffy. This usually takes about 2-3 minutes.
Step 4 – Add Eggs and Vanilla
Next, add the two large eggs, along with the vanilla extract, into the butter-sugar mixture. Mix well until everything is fully incorporated, creating a smooth and creamy texture.
Step 5 – Combine Dry Ingredients
In a separate bowl, mix together the all-purpose flour, baking soda, and salt. Stir them well to ensure the baking soda is evenly distributed throughout the flour mixture.
Step 6 – Mix Wet and Dry Ingredients
Gradually add the dry ingredients into the wet mixture. Use a spatula or mixer to combine until you achieve a dough-like consistency. Be careful not to overmix, as this can affect the texture of your cookies.
Step 7 – Fold in Chocolate Chips
Once the dough is combined, gently fold in the chocolate chips with a spatula. This adds a delightful melty interior that makes these cookies extra special.
Step 8 – Shape the Cookies
Using a tablespoon, drop rounded balls of dough onto a baking sheet lined with parchment paper. Leave enough space between each ball to allow for spreading during baking.
Step 9 – Bake the Cookies
Place the baking sheet in the preheated oven and bake for 10-12 minutes. The cookies should be golden around the edges but still soft in the center. This texture is key for that melt-in-your-mouth experience.
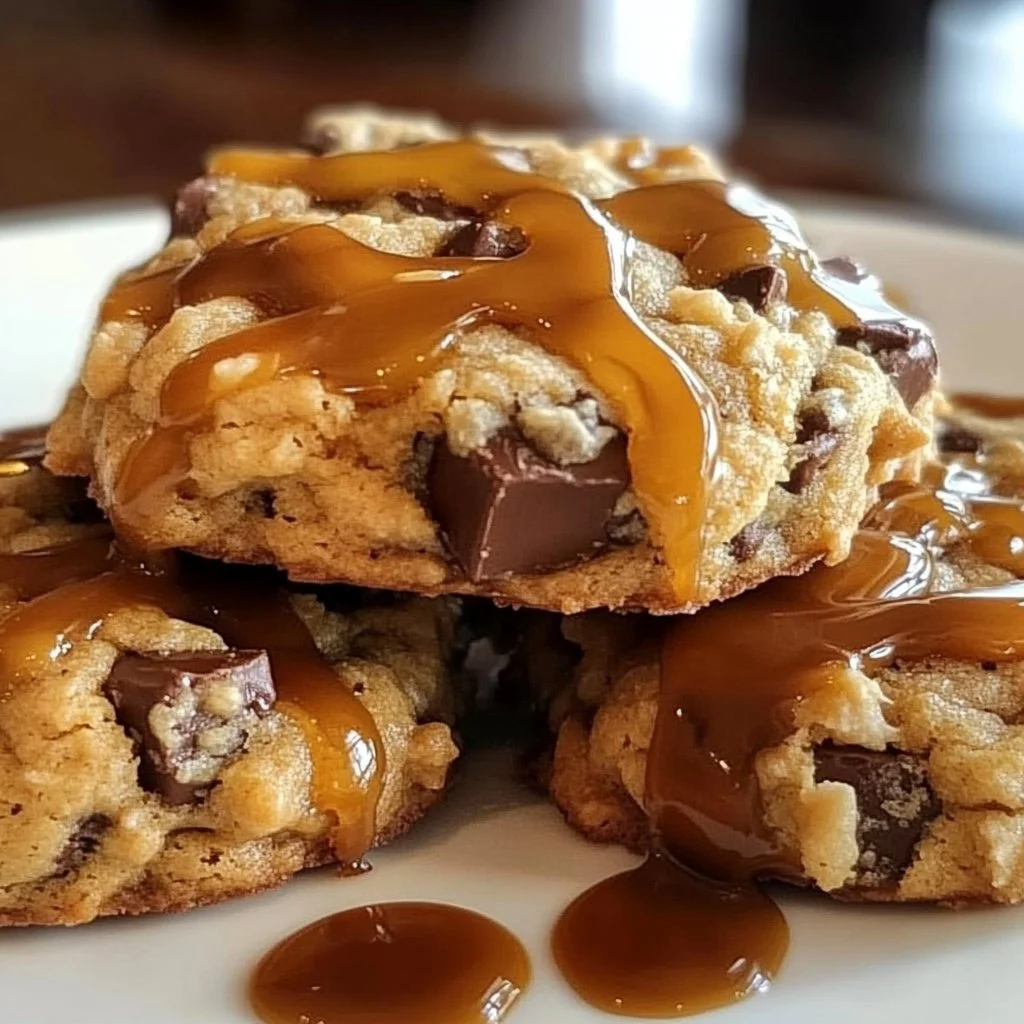
Step 10 – Drizzle with Caramel
Once the cookies are out of the oven, let them cool slightly before drizzling caramel sauce over the top. The warmth of the cookies will slightly melt the caramel, making it irresistibly gooey.

Serving Suggestions for Twix Cookies: 7 Delightful Steps to Sweet Nostalgia
Best Occasions to Serve This Dish
Twix Cookies: 7 Delightful Steps to Sweet Nostalgia fit perfectly into various settings. Birthdays, holidays, or just a casual dessert night with family are all ideal occasions. You can also whip up a batch for potluck gatherings, where they will be sure to impress.
For a festive touch, serve them alongside a scoop of vanilla ice cream or include them as part of a dessert platter with assorted sweets. This versatility will make you the star of any gathering!
What to Serve With It
Consider pairing these delicious cookies with a glass of milk or a favorite hot beverage. Coffee or hot chocolate enhances the indulgent flavors, making for a comforting treat. You can also present them as part of a dessert buffet, alongside cakes, pies, or fruit.
How to Store Twix Cookies: 7 Delightful Steps to Sweet Nostalgia Properly
Best Storage Practices
To keep your freshly baked cookies soft and chewy, store them in an airtight container at room temperature. They should last up to a week. If you want to maintain their freshness for a longer period, consider refrigerating them in a sealed bag.
Reheating and Freezing Tips
If you want to enjoy your cookies warm after a few days, simply microwave them for about 10-15 seconds to refresh their softness. For longer storage, these cookies can be frozen for up to three months. Place them in a single layer in a freezer-safe container to prevent sticking.
Tips & Tricks for Twix Cookies: 7 Delightful Steps to Sweet Nostalgia
Mistakes to Avoid
1 – Using Cold Butter: Ensure the butter is at room temperature for the best creaming results.
2 – Overmixing: Once the dry and wet ingredients are combined, mix just until incorporated.
3 – Ignoring Oven Temperature: Make sure to preheat your oven to avoid uneven baking.
4 – Not Measuring Accurately: Use a scale or measuring cups for precise measurements for the best results.
5 – Crowding the Baking Sheet: Space out your cookie dough balls properly to allow them to spread during baking.
Extra Tips for Better Results
For an enhanced flavor, try using high-quality chocolate chips. Additionally, sprinkling a little sea salt on top of your cookies right before they cool can create a delightful balance between sweet and salty. Experimenting with different flavored extracts like almond or hazelnut can also introduce unique twists to the cookies.
Recipe Variations of Twix Cookies: 7 Delightful Steps to Sweet Nostalgia
Creative Twists
- Nutty Crunch: Add chopped walnuts or pecans to the dough for added texture and flavor.
- Stuffed Cookies: Replace a portion of the dough with a dollop of peanut butter or Nutella for a surprise in the center.
- Dipped in Chocolate: For extra indulgence, dip the cooled cookies in melted chocolate and let them harden before serving.
Dietary Adjustments
To create a vegan version, substitute eggs with flaxseed meal or a commercial egg replacer and use vegan butter. For a gluten-free adaptation, choose an appropriate gluten-free flour blend to ensure the cookies still rise properly without compromising taste.
Conclusion about Twix Cookies: 7 Delightful Steps to Sweet Nostalgia
Twix Cookies: 7 Delightful Steps to Sweet Nostalgia is more than just a recipe; it’s about creating moments and wonderful memories with loved ones. With their rich, indulgent flavors and easy preparation, these cookies are perfect for any occasion. Whether you’re sharing them with friends or keeping them all to yourself, the satisfying taste will surely bring joy.
This delightful recipe captures the essence of traditional flavors while allowing for easy customization. So why wait? Grab your ingredients and create a batch of cookies that will transport you back to those sweet moments, each bite a delicious reminder of why we love homemade treats.
FAQs about Twix Cookies: 7 Delightful Steps to Sweet Nostalgia
Can I make Twix Cookies ahead of time?
Yes, you can prepare the dough in advance and store it in the refrigerator for up to 3 days before baking.
How do I store leftover cookies?
Store cookies in an airtight container at room temperature for up to a week, or refrigerate for longer freshness.
Can I freeze these cookies?
Absolutely, freeze the cookies in a single layer for up to three months. Place them in a freezer-safe bag after freezing.
What can I use instead of caramel sauce?
You can use chocolate ganache or homemade fudge sauce for a different flavor profile.
How do I make the cookies chewier?
Add an extra egg yolk to the dough or try chilling the dough before baking for a softer texture.
What can I do if my cookies spread too much?
Chilling the dough for 30 minutes before baking can help prevent excessive spreading.
Can I substitute brown sugar with white sugar?
You can, but using brown sugar gives the cookies a richer flavor and chewiness due to its molasses content.
What drink pairs well with these cookies?
Milk, coffee, or hot chocolate are great choices to enjoy with your Twix Cookies.

Twix Cookies
Ingrédients
For the Cookie Dough
- 1 cup unsalted butter, softened At room temperature for best results.
- 1 cup brown sugar Can substitute with coconut sugar for a less processed option.
- 1/2 cup granulated sugar
- 2 large eggs Can substitute with flaxseed meal for a vegan option.
- 2 teaspoons vanilla extract Feel free to experiment with flavored extracts.
- 2 1/2 cups all-purpose flour Can be replaced with gluten-free flour.
- 1 teaspoon baking soda
- 1/2 teaspoon salt
- 1 cup chocolate chips Darker chocolate chips can be used for a richer flavor.
For the Caramel Drizzle
- 1 cup caramel sauce Store-bought or homemade.
Instructions
Preparation
- Gather all ingredients to ensure a smooth baking process.
- Preheat your oven to 350°F (175°C).
- In a mixing bowl, cream together the softened butter, brown sugar, and granulated sugar until light and fluffy.
- Add the eggs and vanilla extract to the mixture and mix until fully incorporated.
- In another bowl, mix all-purpose flour, baking soda, and salt.
- Gradually add the dry mixture to the wet mixture until a dough forms.
- Fold in the chocolate chips gently.
- Drop rounded balls of dough onto a lined baking sheet, spacing them apart.
- Bake for 10-12 minutes until golden around the edges but soft in the center.
- Allow to cool slightly then drizzle caramel sauce on top before serving.