
Table of Contents
Introduction to Lotion Bars: 7 Magical Recipes for Soft, Glowing Skin
Have you ever faced the dilemma of dry skin and rough patches? Do you wish for a simple yet effective solution right at home? If so, look no further! Lotion Bars: 7 Magical Recipes for Soft, Glowing Skin is just what you need. These little wonders provide a luscious, moisturizing experience, keeping your skin soft and vibrant without the chemicals often found in store-bought lotions.
What makes this recipe special is its simplicity and versatility. You can whip up these lotion bars in no time, using natural ingredients that are gentle on the skin. Imagine the satisfaction of creating a product tailored to your skin’s needs, all while enjoying the delightful scents of essential oils!
Whether you want to pamper yourself or create a unique gift for friends and family, Lotion Bars: 7 Magical Recipes for Soft, Glowing Skin connects you with nature. These homemade lotion bars are a wonderful way to switch from commercial lotions, making them an excellent choice for sensitive skin. Plus, they take only a handful of ingredients to make and can be customized to your liking. Are you ready to embark on this delightful journey to glowing skin?
Key Benefits of Lotion Bars: 7 Magical Recipes for Soft, Glowing Skin
Why You’ll Love This Recipe
- Easy to make with just a few ingredients.
- Nourishes and deeply moisturizes the skin.
- Customizable with your favorite essential oils.
- Great for all skin types, including sensitive skin.
- Perfect handmade gifts for friends and family.
- Eco-friendly, reducing the need for plastic packaging.
What Makes It Stand Out
One of the standout features of Lotion Bars: 7 Magical Recipes for Soft, Glowing Skin is their unique formulation. Unlike traditional lotions that can contain water and preservatives, these bars are rich in natural oils and butters. This means they provide a long-lasting protective barrier for your skin, locking in moisture where you need it most.
Customization is another factor that sets these lotion bars apart. You can experiment with different essential oils or add natural ingredients like vitamin E or honey to enhance the bars’ benefits. This versatility makes them suitable for different seasons and skin conditions.
Ingredients for Lotion Bars: 7 Magical Recipes for Soft, Glowing Skin
Complete Ingredient List with Measurements
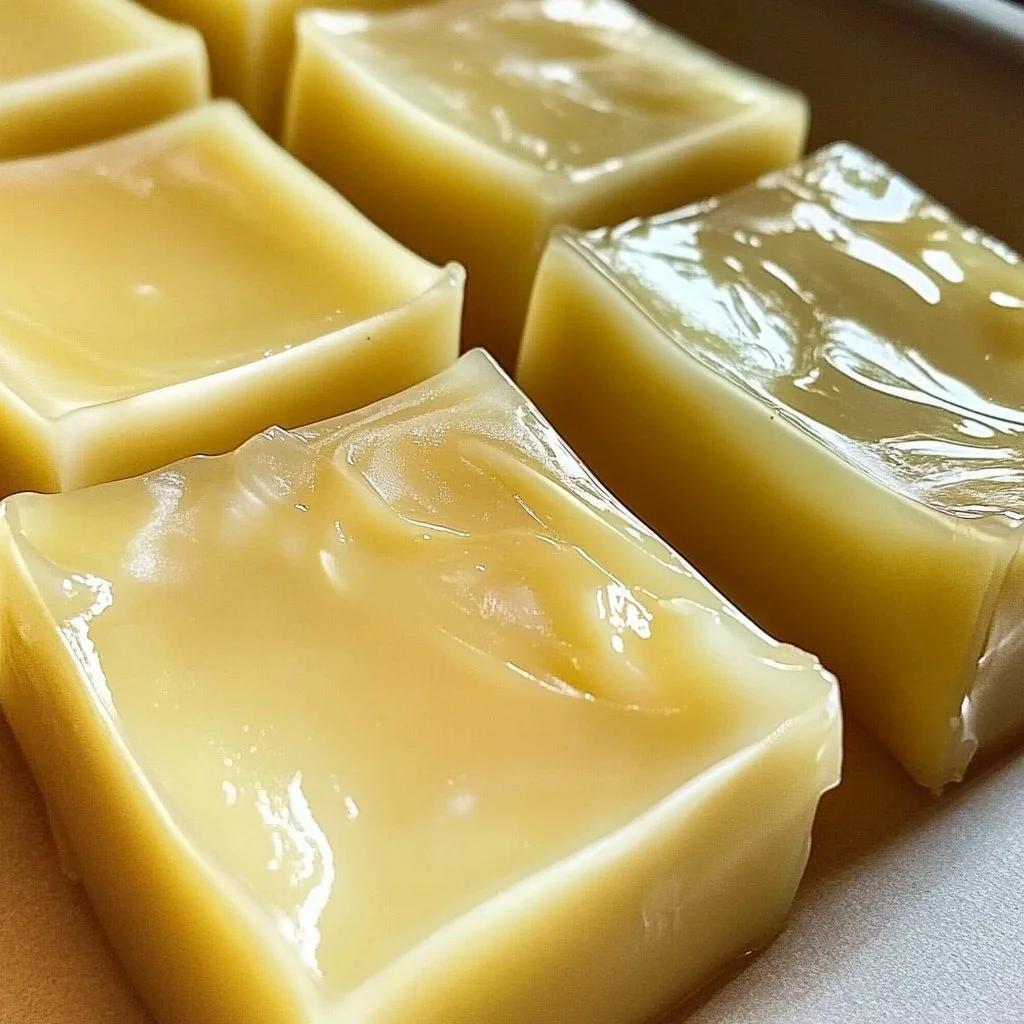
- 1 cup beeswax
- 1/2 cup shea butter
- 1/2 cup coconut oil
- Essential oils (optional, for fragrance and additional benefits)
Substitutes and Alternatives
If you have allergies or dietary restrictions, you can easily modify the ingredients. For example, if you’re allergic to beeswax, you can substitute it with candelilla wax, which is plant-based. Additionally, if you prefer a vegan option, use mango butter instead of shea butter for a similar texture and moisturizing qualities.
Those with nut allergies can replace coconut oil with sunflower oil or another seed-based oil. Just be sure to check for any personal sensitivities and always do a patch test on your skin before using new products.
How to Make Lotion Bars: 7 Magical Recipes for Soft, Glowing Skin – Step-by-Step Directions
Step 1 – Prepare Ingredients
Gather all ingredients and equipment. Ensure you have a double boiler, measuring cups, and molds ready to go. This will streamline your process.
Step 2 – Cook the Base
In a double boiler, combine the beeswax, shea butter, and coconut oil. Heat gently, stirring continuously until everything is melted and well combined. This could take around 5-10 minutes, so keep an eye on the mixture.
Step 3 – Add Essential Oils
Once the mixture is fully melted, remove it from the heat. If desired, add a few drops of your chosen essential oils. Stir well to evenly distribute the fragrance throughout the mixture.
Step 4 – Pour Mixture into Molds
Carefully pour the warm mixture into your chosen molds. You can use silicone molds for easy removal or even muffin tins if you want larger bars.
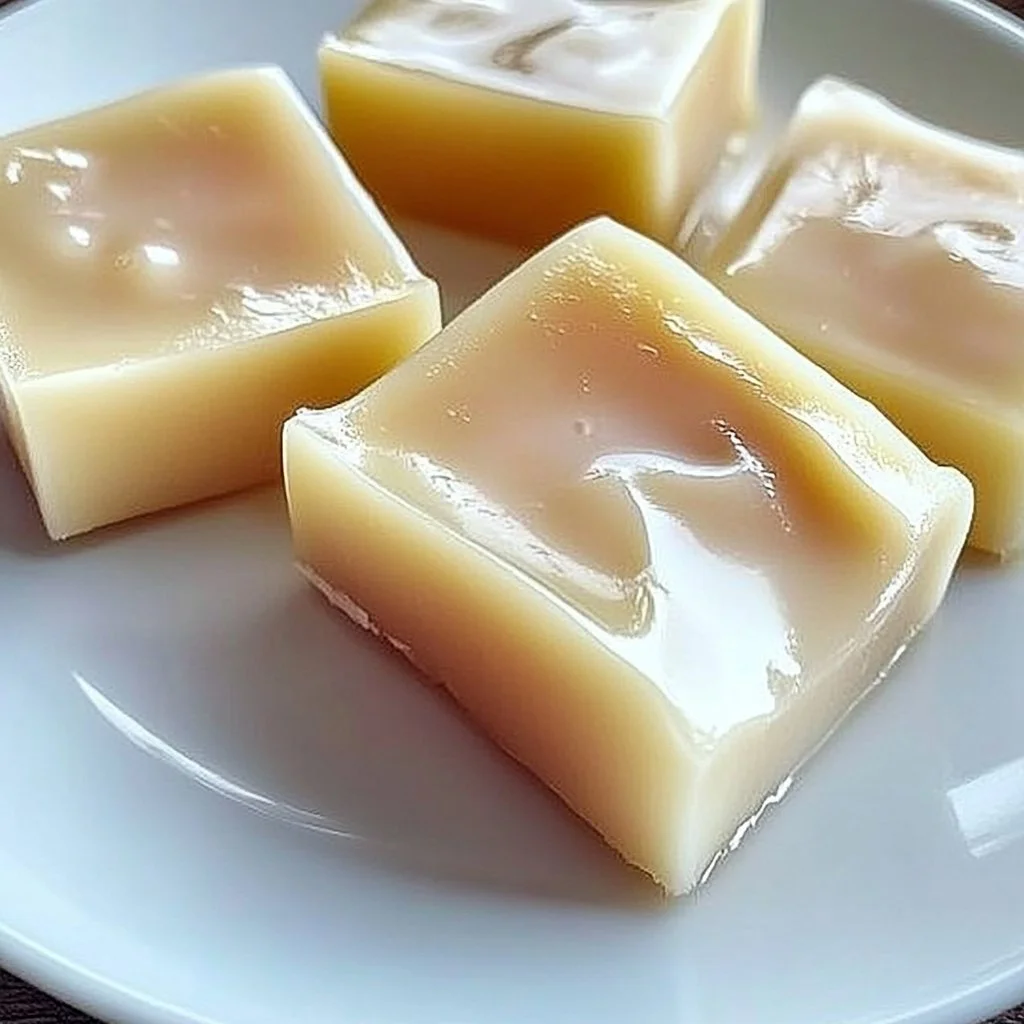
Step 5 – Let Cool Until Solid
Allow the mixture to cool at room temperature. This usually takes about 1-2 hours. Avoid moving the molds during this time to ensure even setting.
Step 6 – Remove from Molds
Once fully cooled and solid, gently pop the lotion bar out of the molds. If they resist, you can place them in the refrigerator for a few minutes to help them release more easily.
Step 7 – Store the Lotion Bars
Place the lotion bar in a cool, dry place away from direct sunlight. A sealed container or cloth bag works perfectly for maintaining their consistency.
Step 8 – Enjoy!
Your homemade lotion bar are now ready to use! Simply rub one between your hands to warm it slightly and apply it to dry areas of your skin for instant hydration.
Serving Suggestions for Lotion Bars: 7 Magical Recipes for Soft, Glowing Skin
Best Occasions to Serve This Dish
Lotion bars are perfect for any occasion! Use them during the dry winter months to combat harsh weather. They make fantastic holiday gifts wrapped in pretty packaging or as part of a pampering gift set.
What to Serve With It
Pair lotion bars with a calming herbal tea or a cozy bath for the ultimate self-care experience. You can also complement them with sugar scrubs or bath bombs for an all-around spa-like retreat at home.
How to Store Lotion Bars: 7 Magical Recipes for Soft, Glowing Skin Properly
Best Storage Practices
To prolong the life of your lotion bars, store them in a sealed container in a cool, dry place. Avoid the refrigerator as it can make them too hard to use comfortably.
If you live in a warm climate, consider keeping them in the fridge. This prevents them from melting and losing their shape but does make them harder to apply straight from the fridge.
Reheating and Freezing Tips
If your lotion bars become soft, you can gently re-melt them in a double boiler and pour them back into molds for reshaping. If you’ve created larger batches, you can freeze them in portions for later use. Just let them thaw at room temperature before applying.
Tips & Tricks for Lotion Bars: 7 Magical Recipes for Soft, Glowing Skin
Mistakes to Avoid
- Not measuring accurately: A precise balance of ingredients ensures the right texture and effectiveness.
- Using high heat: Melting ingredients too quickly could lead to separation, resulting in an uneven texture.
- Skipping the essential oils: Adding these gives additional benefits and makes the bars enjoyable to use.
- Pouring too quickly: Allow the mixture to cool slightly before pouring to avoid air bubbles.
- Neglecting to test on skin: Always patch test new ingredients to avoid reactions.
Extra Tips for Better Results
- Experiment with different essential oils such as lavender for relaxation or citrus for energy.
- Use natural colorants like beetroot powder for a beautiful appearance.
- Add a bit of vitamin E oil for its skin-nourishing properties and a longer shelf life.
Recipe Variations of Lotion Bars: 7 Magical Recipes for Soft, Glowing Skin
Creative Twists
- Herbal Infusion: Infuse the oils with dried herbs like calendula or chamomile before starting for added skin benefits.
- Cocoa Butter Bliss: Substitute an equal amount of cocoa butter for the shea butter for a deliciously rich formula.
- Scented with Spice: Consider using essential oils like cinnamon or ginger for a warming, spicy fragrance in cooler months.
Dietary Adjustments
For a vegan option, use plant-based waxes and butters. You can replace shea butter with Cocoa butter or similar vegan ingredients. Ensure that any oils used are vegan-friendly and suitable for your dietary requirements.
Conclusion about Lotion Bars: 7 Magical Recipes for Soft, Glowing Skin
In a world where self-care has never been more crucial, trying your hand at Lotion Bars: 7 Magical Recipes for Soft, Glowing Skin is a perfect choice. Not only do they provide nourishment to your skin, but they also allow you to indulge your creativity. By choosing natural ingredients, you’re making a conscious choice to care for your skin without harmful additives. Whether you’re looking to remedy dry patches, create personalized gifts, or simply enjoy the process of crafting something uniquely yours, lotion bars are a recipe worth embracing. Minimalist yet effective, these bars can trend to your specific needs while providing deep hydration and softness. Make a batch today and experience the magic for yourself!
FAQs about Lotion Bars: 7 Magical Recipes for Soft, Glowing Skin
Can I use these lotion bars during summer?
Yes, you can use lotion bar year-round. They might feel a bit heavier in summer, so it’s best to store them in a cooler place.
How long do homemade lotion bars last?
When stored properly in a cool, dry place, these lotion bar can last up to a year.
Can I customize the essential oils?
Absolutely! You can mix and match essential oils according to your preferences or skin needs.
What if my lotion bars are too hard?
If they are too hard, melt them down slightly and add a bit more coconut oil to adjust the texture.
Is it safe to use on sensitive skin?
Yes, when using gentle, high-quality ingredients, these lotion bar are safe for sensitive skin.
Can I add color to the lotion bars?
Yes, you can add natural colorants like beetroot powder. Just be mindful of the amount you use.
Can I make lotion bar as gifts?
Definitely! They make thoughtful personalized gifts and can be beautifully packaged.
Are these lotion bar biodegradable?
Yes, since they are made from natural ingredients, they are biodegradable and environmentally friendly.

Lotion Bars
Ingrédients
Main Ingredients
- 1 cup beeswax Can be substituted with candelilla wax for a vegan option.
- 1/2 cup shea butter For a vegan option, substitute with mango butter.
- 1/2 cup coconut oil Can be substituted with sunflower oil or another seed-based oil for nut allergies.
- as desired drops essential oils Optional, for fragrance and additional benefits.
Instructions
Preparation
- Gather all ingredients and equipment. Ensure you have a double boiler, measuring cups, and molds ready.
Cook the Base
- In a double boiler, combine the beeswax, shea butter, and coconut oil. Heat gently, stirring continuously until everything is melted and well combined (about 5-10 minutes).
Add Essential Oils
- Remove from heat and add essential oils if desired, stirring well to distribute.
Pour Mixture into Molds
- Carefully pour the warm mixture into molds, using silicone molds or muffin tins.
Let Cool Until Solid
- Allow the mixture to cool at room temperature for about 1-2 hours without moving the molds.
Remove from Molds
- Once solid, gently pop the lotion bars out. If they resist, refrigerate for a few minutes.
Store the Lotion Bars
- Store in a cool, dry place away from direct sunlight in a sealed container or cloth bag.
Enjoy!
- Rub a bar between your hands to warm, then apply to dry areas of your skin for instant hydration.