

Table of Contents
Introduction to Rocky Road
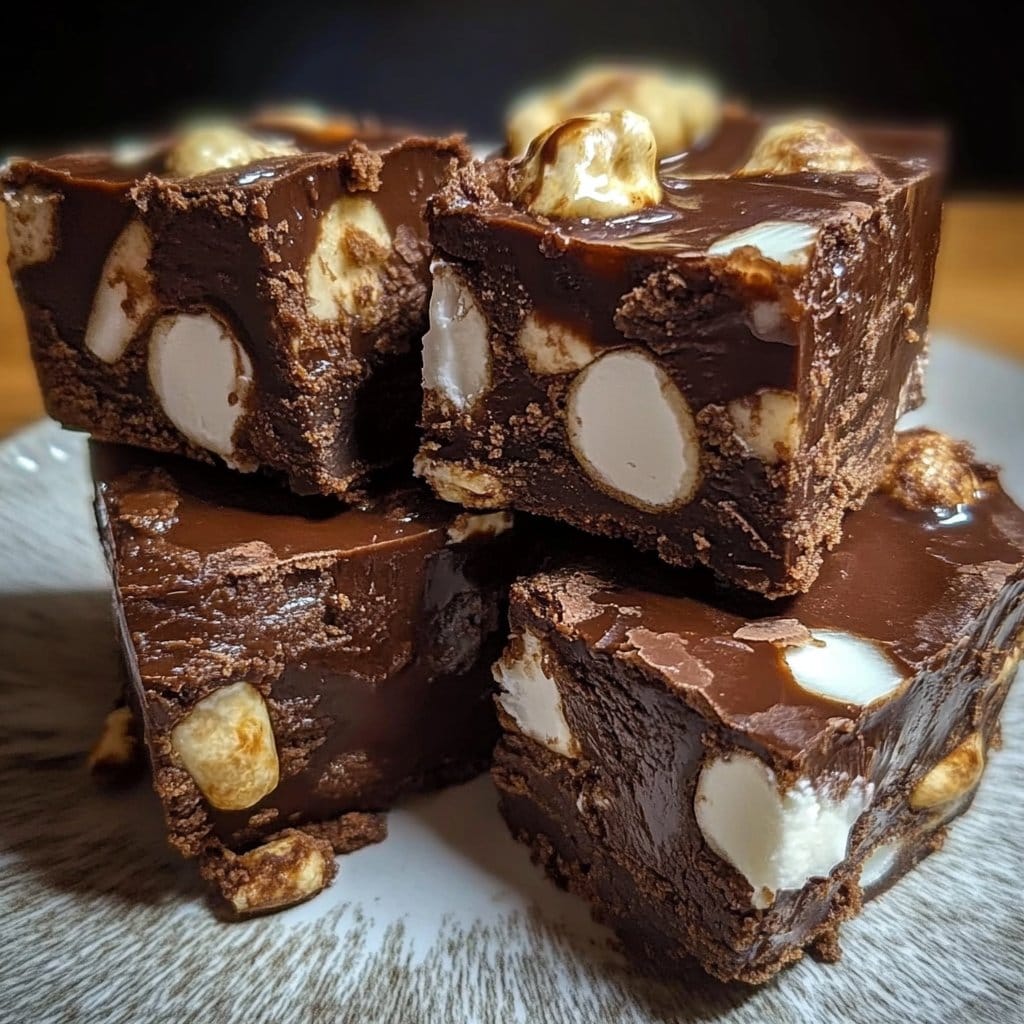
Who doesn’t love a sweet treat that’s as comforting as a warm hug? If you haven’t dived into the world of Rocky Road yet, you are in for a delightful surprise. This classic dessert has a special place in the hearts of many, combining the rich, luscious flavors of chocolate with cheerful bits of marshmallow and crunchy nuts. Whether you enjoy it after a meal or just as an afternoon pick-me-up, Rocky Road is a recipe that brings smiles.
What sets Rocky Road apart from other desserts is its irresistible combination of textures. The smooth, creamy chocolate melds beautifully with the soft marshmallows and the satisfying crunch of nuts, making each bite a delightful experience. What’s more, this recipe is beautifully versatile. You can easily adjust the ingredients to suit your tastes or dietary needs. With no complex processes involved, Rocky Road stands as a beacon of simplicity and deliciousness in dessert-making.
The best part? This recipe is easy enough for anyone—beginners in the kitchen or seasoned bakers. If you’re ever in need of a quick treat to impress your friends and family, this Rocky Road recipe is your answer. It doesn’t just taste fantastic; it is also perfect for celebrations, potlucks, or simply indulging on a cozy evening at home. So, what are we waiting for? Let’s dive into this delicious Rocky Road recipe together!
Key Benefits of Rocky Road
Why You’ll Love This Recipe
- Easy to Make: No baking required, making it a quick and simple dessert.
- Customizable Ingredients: Adjust with your favorite nuts or add extra goodies.
- Crowd-Pleaser: Loved by people of all ages, making it ideal for gatherings.
- No Special Equipment Needed: Just a saucepan and a dish; no fancy gadgets required.
- Perfect Texture: The combination of creamy chocolate with crunchy nuts is sensational.
- Quick to Prepare: Can be made in under 30 minutes, plus chilling time.
What Makes It Stand Out
Rocky Road is not just another dessert; it boasts a history that adds to its charm. Originally created during the Great Depression, it was a way to use up excess chocolate and create something delightful to lift spirits. This historical background gives it personality, making it more than just a treat to enjoy.
Customization is another key feature that makes Rocky Road stand out. You can switch up the nuts or even use flavored chocolate to create different versions. This adaptability allows this dessert to fit seamlessly into various occasions—whether it’s a casual family gathering or an elegant dinner party.
Ingredients for Rocky Road
Complete Ingredient List with Measurements
- 2 cups chocolate chips (semi-sweet or milk chocolate)
- 1 cup mini marshmallows (or larger ones cut into small pieces)
- 1 cup chopped nuts (e.g., walnuts or almonds)
- 1 cup graham cracker crumbs (for a crunchy base)
- 1/2 cup butter (unsalted preferred)
Substitutes and Alternatives
If you’re looking to make Rocky Road but have dietary restrictions, don’t fret! You can easily substitute the chocolate chips with dairy-free or dark chocolate options. For those allergic to nuts, consider using seeds like sunflower seeds for that crunch without the allergens. If graham crackers aren’t your thing, any similar cookie can work well—just ensure it’s crushed into fine crumbs for that classic base.
How to Make Rocky Road – Step-by-Step Directions
Step 1 – Prepare Ingredients
Gather all your ingredients before you begin. This will make the process go smoothly. Measure out the chocolate chips, butter, graham cracker crumbs, nuts, and marshmallows, and have them ready to go.
Step 2 – Cook the Base
In a medium saucepan, melt the butter and chocolate chips over low heat. Stir frequently until the mixture is completely melted and smooth. Be cautious not to overheat as it can scorch the chocolate, affecting the texture and flavor.
Step 3 – Combine Ingredients
Once the chocolate and butter mixture is melted, remove it from the heat. Stir in the graham cracker crumbs, nuts, and marshmallows. Mix well until everything is evenly coated with the chocolate.
Step 4 – Prepare the Dish
Take a greased 9×9 inch baking dish. This will help prevent the Rocky Road from sticking. Use a spatula to press the chocolate mixture firmly into the dish. Ensure it’s evenly spread for uniform thickness.
Step 5 – Chill to Set
Place the dish in the refrigerator for about 2 hours. This chilling process will help your Rocky Road firm up, making it easier to cut into squares once set.
Step 6 – Cut into Squares
After 2 hours, remove the dish from the refrigerator. Use a sharp knife to cut the Rocky Road into squares or rectangles, depending on your preference. It’s often easier to wipe the knife with a cloth between cuts for clean edges.
Step 7 – Serve and Enjoy
Once cut, you can serve your delicious Rocky Road immediately, or store it for later enjoyment. This treat might not last long, but that’s the beauty of making this delight!
Serving Suggestions for Rocky Road
Best Occasions to Serve This Dish
Rocky Road is perfect for countless occasions. It’s excellent for birthdays, barbecues, or any festive gathering where dessert is a must. The colorful marshmallows and rich chocolate make it visually appealing, sure to catch the eye of guests.
It also makes a thoughtful homemade gift. Pack some in a decorative box or jar, and it becomes a charming present for friends, family, or coworkers.
What to Serve With It
When enjoying Rocky Road, consider pairing it with a scoop of vanilla ice cream. The cold, creamy texture complements the rich chocolate wonderfully. For drinks, consider serving with a hot chocolate or a simple cup of coffee to balance out the sweetness.
How to Store Rocky Road Properly
Best Storage Practices
To store your Rocky Road, simply cover the dish with plastic wrap or transfer the squares to an airtight container. Keeping it in the refrigerator can extend its freshness for up to a week. Just make sure to separate layers with parchment paper if stacking, to prevent them from sticking together.
Reheating and Freezing Tips
If you have leftover Rocky Road, freezing is a great option! Place squares in a single layer on a baking sheet. Once frozen, transfer them to a freezer bag. They can last in the freezer for up to three months. When you’re ready to enjoy it again, simply thaw it in the refrigerator for a few hours.
Tips & Tricks for Rocky Road
Mistakes to Avoid
- Overheating the Chocolate: Make sure to melt the chocolate slowly to avoid burning.
- Not Pressing Firmly Enough: Ensure you press the mixture well into the dish for firm squares.
- Using Stale Ingredients: Fresh marshmallows and nuts are key for optimal flavor and texture.
- Skipping the Chill Time: This step is essential for the Rocky Road to set properly.
- Cutting Too Soon: Allow it to chill fully before cutting to maintain shape.
Extra Tips for Better Results
To add extra flavor, consider mixing in a dash of vanilla extract into the melted chocolate. Adding a sprinkle of sea salt on top after cutting can enhance the sweetness and make it even more delightful.
Recipe Variations of Rocky Road
Creative Twists
- Peanut Butter Rocky Road: Swirl in some creamy peanut butter for a nostalgic flavor that many adore.
- Mint Rocky Road: Add mint extract and green food coloring to create a refreshing mint chocolate twist.
- S’mores Rocky Road: Incorporate additional graham cracker and swap out the nuts for toasted coconut to mimic that classic campfire treat.
Dietary Adjustments
To make it vegan, choose dairy-free chocolate and replace butter with coconut oil. For a gluten-free option, ensure the graham crackers are gluten-free, and you can use gluten-free cookies as an alternative.
Conclusion about Rocky Road
In summary, Rocky Road is an indulgent and customizable dessert that is sure to please anyone’s palate. It’s straightforward to make, requiring no baking and relying on just a few simple ingredients. The blend of chocolate, marshmallows, and nuts offers a unique harmony of flavors and textures that elevates it above ordinary treats.
Whether you’re hosting a cheerful gathering, looking to create a heartfelt gift, or simply satisfying a craving, this Rocky Rooad recipe stands out as a must-try. Don’t hesitate to explore variations that suit your tastes, and remember to savor every bite of this delightful dessert!
FAQs about Rocky Road
How long can I keep Rocky Rooad in the fridge?
You can keep Rocky Rooad in the fridge for about a week in an airtight container.
Can I make Rocky Rooad in advance?
Yes, you can make Rocky Rooad a day or two ahead of time and keep it in the refrigerator.
What can I use instead of butter in Rocky Rooad?
Coconut oil is a great substitute for butter, especially if you’re looking for a dairy-free option.
Is there a way to make Rocky Rooad healthier?
You can use dark chocolate, reduce the sugar content, or substitute nuts for seeds for a healthier version.
Can I freeze Rocky Rooad?
Absolutely! Freeze it in an airtight container for up to three months. Just let it thaw in the refrigerator before enjoying.
What’s the best type of chocolate to use in Rocky Rooad?
Semi-sweet chocolate chips are ideal, but milk chocolate or dark chocolate can also be used based on your preference.
How do I stop the marshmallows from sinking?
Coating the marshmallows in flour before mixing them into the chocolate can help keep them suspended in the mixture.
Can I add other toppings to Rocky Rooad?
Yes, you can add toppings like crushed candies, coconut, or even a drizzle of caramel for a unique twist.

Rocky Road
Ingrédients
Main ingredients
- 2 cups chocolate chips (semi-sweet or milk chocolate)
- 1 cup mini marshmallows (or larger ones cut into small pieces)
- 1 cup chopped nuts (e.g., walnuts or almonds)
- 1 cup graham cracker crumbs (for a crunchy base)
- 1/2 cup butter (unsalted preferred)
Instructions
Preparation
- Gather all your ingredients before you begin to make the process go smoothly.
- Measure out the chocolate chips, butter, graham cracker crumbs, nuts, and marshmallows, and have them ready.
Cooking
- In a medium saucepan, melt the butter and chocolate chips over low heat, stirring frequently until smooth.
- Be cautious not to overheat, as it can scorch the chocolate.
- Once the mixture is melted, remove it from heat and stir in the graham cracker crumbs, nuts, and marshmallows until everything is evenly coated.
Assembly
- Take a greased 9×9 inch baking dish and press the chocolate mixture firmly into the dish using a spatula.
- Ensure it’s evenly spread for uniform thickness.
Chilling
- Place the dish in the refrigerator for about 2 hours to firm up.
Serving
- Once set, remove from the refrigerator and cut into squares or rectangles.
- Serve immediately or store for later enjoyment.