
Table of Contents
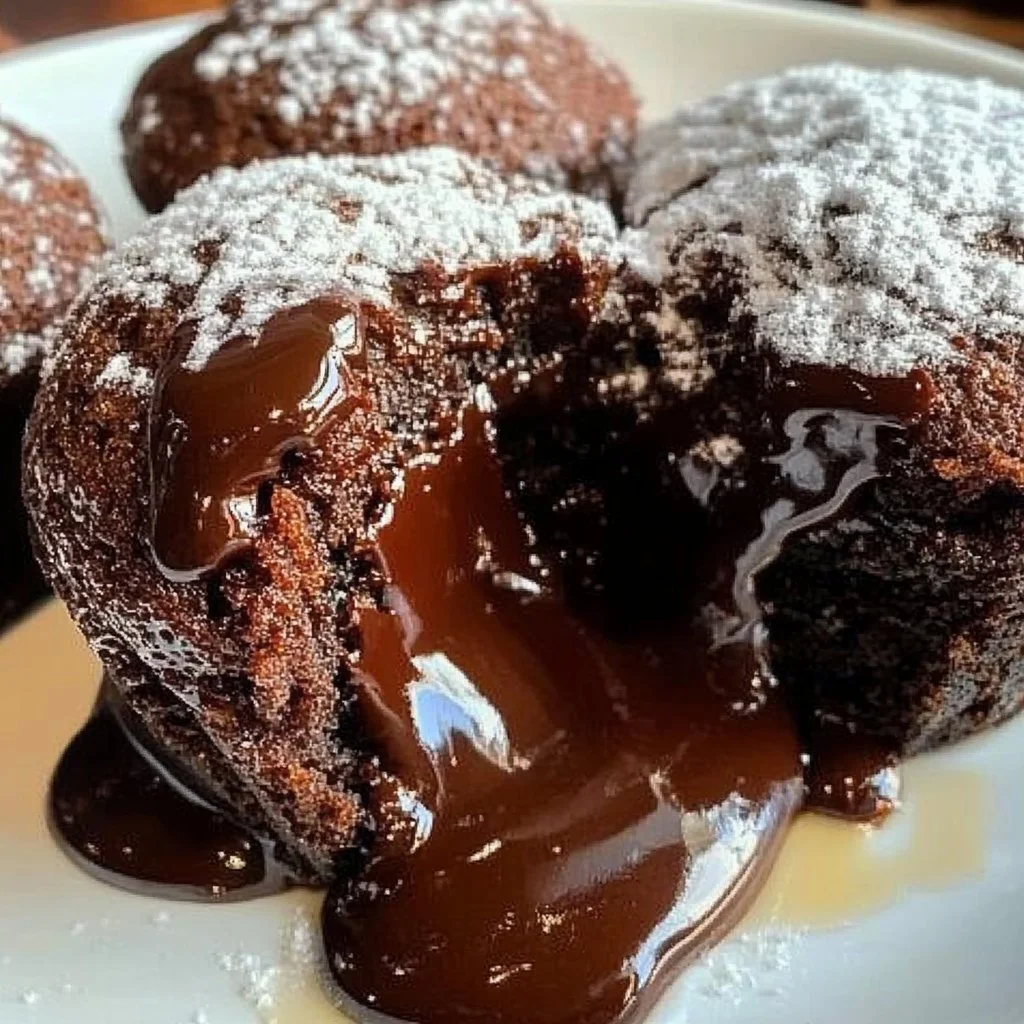
Is there anything more delightful than a warm, gooey chocolate dessert? When it comes to satisfying your sweet tooth, nothing beats the experience of enjoying Molten Chocolate Lava Cupcakes: 7 Steps to Sweet Bliss. The sheer joy of breaking into a cupcake to reveal a flowing chocolate center is a sensation that never gets old. These cupcakes are not just a treat for the taste buds; they also provide a feast for the senses. The rich aroma of dark chocolate fills the air, making every bite a memorable journey.
One of the things that make this recipe so special is its simplicity. You don’t need to be a professional baker to achieve decadent results. With just a handful of ingredients and a few straightforward steps, you can create an impressive dessert that will wow your family and friends. Whether you’re hosting a dinner party or simply indulging yourself, these cupcakes are a perfect choice.
Imagine serving a dessert that looks intricate but is actually easy to prepare. The Molten Chocolate Lava Cupcakes: 7 Steps to Sweet Bliss are just that—an apparent masterpiece that hides a delicious secret. The best part? They take only about 14 minutes in the oven! This speedy cooking time means you can whip them up even on busy weekday nights or for last-minute gatherings.
Versatility is another key benefit. These cupcakes can be enjoyed on various occasions, from birthdays and anniversaries to simple family dinners. They pair wonderfully with a scoop of vanilla ice cream or a dollop of whipped cream. The option to customize flavors and toppings makes them even more appealing. Do you prefer a dash of espresso in your chocolate? No problem. Want a hint of orange zest? Go for it!
In a world filled with complicated dessert recipes, the Molten Chocolate Lava Cupcakes: 7 Steps to Sweet Bliss stand out. They offer a time-efficient solution without compromising taste. So, why wait? Dive into the process of making these cupcakes that promise an explosion of flavors, warmth, and happiness.
Key Benefits of Molten Chocolate Lava Cupcakes: 7 Steps to Sweet Bliss
- Decadent Flavor: Rich, dark chocolate creates an indulgent taste that satisfies even the strongest cravings.
- Simplicity: This recipe has straightforward steps that even novice bakers can master easily.
- Quick Preparation: Less than 15 minutes in bake time means you’ll be enjoying your cupcakes in no time.
- Versatile Serving Options: Perfect for a wide range of occasions, from casual snacks to formal gatherings.
- Customizable: Adjust flavors, toppings, or even the base ingredients to suit your taste or dietary preferences.
What Makes It Stand Out
The originality of Molten Chocolate Lava Cupcakes: 7 Steps to Sweet Bliss lies in the magical combination of textures and flavors. The contrast between the warm, gooey center and the cake-like exterior creates an experience that is truly unforgettable. Every bite is a delightful surprise that keeps you coming back for more.
Customization is another exciting aspect. You can put your spin on these cupcakes by incorporating different flavors. Want a hint of sea salt? Go for it. Prefer peppermint or raspberry? Add it in! This recipe allows for endless creativity, making it perfect for special occasions where you want to impress.
As for occasions, these cupcakes shine at birthday parties, holiday celebrations, or even as a simple treat at home. They elevate any gathering and add a touch of elegance while still being utterly comforting.
Ingredients for Molten Chocolate Lava Cupcakes: 7 Steps to Sweet Bliss
- 1 cup dark chocolate, chopped
- 1/2 cup unsalted butter
- 1 cup powdered sugar
- 2 large eggs
- 2 egg yolks
- 1 teaspoon vanilla extract
- 1/2 cup all-purpose flour
- 1/4 teaspoon salt
These ingredients come together to create a beautifully rich dessert that feels indulgent yet remains simple. The dark chocolate provides bold flavors, while the butter and sugar balance it out nicely. Don’t forget to make the most of the vanilla extract—the fragrant notes will elevate your cupcakes.
Complete Ingredient List with Measurements
- Dark Chocolate: 1 cup, chopped. Use high-quality chocolate for the richest flavor.
- Unsalted Butter: 1/2 cup. This ensures you control the salt content in your cupcakes.
- Powdered Sugar: 1 cup. It dissolves quickly into the batter for a smooth texture.
- Large Eggs: 2. They provide moisture and richness.
- Egg Yolks: 2. Extra yolks help create that wonderfully soft texture.
- Vanilla Extract: 1 teaspoon. It adds warmth and depth to your dessert.
- All-Purpose Flour: 1/2 cup. Just enough to provide structure without overwhelming the chocolate.
- Salt: 1/4 teaspoon. A pinch of salt intensifies the chocolate flavor.
Substitutes and Alternatives
If you’re looking for alternatives due to dietary restrictions, there are options to consider. For a gluten-free version, you can easily swap out all-purpose flour for almond flour or a gluten-free flour blend. This will maintain a soft texture while catering to those with gluten sensitivities.
Dairy-free eaters can replace unsalted butter with coconut oil or a vegan butter substitute. Be sure to check that the dark chocolate you choose is dairy-free as well. For those who want a sugar-free option, consider using a sugar substitute like erythritol or monk fruit sweetener.
How to Make Molten Chocolate Lava Cupcakes: 7 Steps to Sweet Bliss – Step-by-Step Directions
Step 1 – Prepare Ingredients
Start by gathering all your ingredients. Measure everything in advance, so you can move smoothly through the recipe. This step helps you avoid any last-minute surprises. Preheat your oven to 425°F (220°C) as well.
Step 2 – Grease the Muffin Tin
Before diving into the mixing, grease your muffin tin with cooking spray. This ensures your cupcakes pop out easily after baking. If you prefer, you can also use muffin liners for convenience.
Step 3 – Melt Chocolate and Butter
In a microwave-safe bowl or over a double boiler, melt the dark chocolate and unsalted butter together. Stir until completely smooth and combined. Be careful not to overheat the mixture; this can cause the chocolate to seize.
Step 4 – Mix in Powdered Sugar
Once your chocolate and butter are melted and cooled slightly, stir in the powdered sugar. Mix until the mixture is smooth and homogenous, creating a deliciously sweet base.
Step 5 – Add Eggs and Yolks
Next, incorporate the two large eggs and additional egg yolks into the mixture. Beat them in until fully combined. This will enrich the batter, ensuring a luxurious texture.
Step 6 – Mix in Vanilla
Now, add the teaspoon of vanilla extract. This step is crucial, as it introduces a lovely aroma and flavor that complements the chocolate perfectly.
Step 7 – Fold in Flour and Salt
Finally, gently fold in the flour and salt. Be careful not to overmix; you want just enough incorporation for the dry ingredients to be absorbed. The batter should be thick but pourable.
Step 8 – Pour Batter into Muffin Cups
Fill each muffin cup halfway with the batter. A little goes a long way here. Once filled, bake in your preheated oven for 12 to 14 minutes. The edges should start to firm up, while the centers remain gooey.
Step 9 – Cool and Serve
After baking, let the cupcakes cool in the pan for about one minute. Then, carefully invert them onto serving plates. Serve warm for the best lava effect.
Serving Suggestions for Molten Chocolate Lava Cupcakes: 7 Steps to Sweet Bliss
Best Occasions to Serve This Dish
These delectable treats are perfect for almost any occasion! Serve them at family gatherings, holiday celebrations, or even a romantic dinner for two. Their elegance makes them a fantastic choice for special events, yet their simplicity allows you to enjoy them casually at home.
What to Serve With It
- Ice Cream: A scoop of vanilla or mint chocolate chip ice cream complements the warm chocolate beautifully.
- Whipped Cream: A dollop of freshly whipped cream adds lightness and balances the rich chocolate.
- Fresh Berries: Strawberries or raspberries offer a refreshing contrast to the sweetness.
How to Store Molten Chocolate Lava Cupcakes: 7 Steps to Sweet Bliss Properly
Best Storage Practices
To store leftover cupcakes, simply let them cool completely. Place them in an airtight container, and they can be kept in the fridge for up to three days. If you wish to indulge in them later, they can be stored in the freezer.
Reheating and Freezing Tips
When warming up your cupcakes, place them in a microwave-safe dish for about 10–15 seconds if they are in the fridge. For frozen cupcakes, allow them to thaw in the fridge overnight before reheating. A quick microwave zap ensures that the centers retain their gooey texture.
Tips & Tricks for Molten Chocolate Lava Cupcakes: 7 Steps to Sweet Bliss
Mistakes to Avoid
- Overbaking: Keep an eye on your cupcakes, as even a minute too long can solidify the center.
- Under-mixing the Batter: Ensure all ingredients are well combined for an even texture.
- Skipping Vanilla: Don’t overlook this ingredient; it elevates the overall flavor.
- Not Greasing Properly: This can lead to cupcakes sticking, making them difficult to remove.
- Using Low-Quality Chocolate: High-quality chocolate makes a significant difference in flavor.
Extra Tips for Better Results
Consider experimenting with different chocolate types, such as semi-sweet or even white chocolate for a unique twist. You can also enhance presentation by dusting cupcakes with cocoa powder or powdered sugar before serving. Adding a sprinkle of sea salt on top can create an enticing contrast and amplify flavors.
Recipe Variations of Molten Chocolate Lava Cupcakes: 7 Steps to Sweet Bliss
Creative Twists
- White Chocolate Lava Cupcakes: Replace dark chocolate with white chocolate for a sweet, creamy alternative that still features a molten center.
- Nutty Delight: Add crushed nuts like pistachios or hazelnuts into the batter for added texture and flavor.
- Fruit Infusion: Fold in a few tablespoons of raspberry puree into the batter for a fruity twist that pairs surprisingly well with chocolate.
Dietary Adjustments
For those looking to make this recipe vegan, substitute eggs with flaxseed meal and use vegan dark chocolate. As mentioned earlier, gluten-free flour is a great option for those avoiding gluten. Using coconut cream instead of butter will maintain a rich texture without the dairy.
Conclusion about Molten Chocolate Lava Cupcakes: 7 Steps to Sweet Bliss
In summary, the Molten Chocolate Lava Cupcakes: 7 Steps to Sweet Bliss are a must-try for anyone who loves chocolate. Their rich, gooey centers and simple preparation make them perfect for any occasion. You can customize them to your liking, ensuring they fit nearly every dietary need. The joy of presenting these delightful treats, which appear lavish while being easy to make, is rewarding.
Whether you’re baking for a party or simply indulging yourself at home, these cupcakes promise to impress. The next time you find yourself craving something sweet, look no further than this enchanting recipe. You won’t regret diving into this delightful dessert.
FAQs about Molten Chocolate Lava Cupcakes: 7 Steps to Sweet Bliss
Can I prepare it ahead of time?
Yes, you can prepare the batter and refrigerate it. Just remember to bake it fresh when you’re ready to serve.
Can I freeze it?
Absolutely! You can freeze the baked cupcakes, ensuring they remain delicious for later enjoyment.
How long does it last?
They can last up to three days in the fridge or up to a month in the freezer.
What are the best substitutions?
For gluten-free versions, use gluten-free flour. You can also substitute unsalted butter with coconut oil.
Is this recipe family-friendly?
Definitely! Kids and adults alike will love these delicious molten treats.
Can I add flavors to the chocolate?
Yes, consider adding orange zest, espresso, or even flavors like peppermint for a fun twist.
What kind of chocolate is best?
Dark chocolate is preferred for its rich flavor, but you can choose semi-sweet or even milk chocolate depending on your preference.
Can I make mini lava cakes using this recipe?
Absolutely! Just adjust the baking time down for mini versions to achieve the same molten effect.
Molten Chocolate Lava Cupcakes
Ingrédients
For the Cupcakes
- 1 cup dark chocolate, chopped Use high-quality chocolate for the richest flavor.
- 1/2 cup unsalted butter Ensure you control the salt content.
- 1 cup powdered sugar Dissolves quickly into the batter.
- 2 large eggs Provides moisture and richness.
- 2 large egg yolks Extra yolks help create a tender texture.
- 1 teaspoon vanilla extract Adds warmth and aroma.
- 1/2 cup all-purpose flour Provides structure.
- 1/4 teaspoon salt Enhances chocolate flavor.
Instructions
Preparation
- Gather all ingredients and preheat oven to 425°F (220°C).
- Grease a muffin tin with cooking spray or use muffin liners.
- Melt dark chocolate and unsalted butter together until smooth.
- Stir in powdered sugar until mixture is smooth.
- Incorporate eggs and yolks, beating until fully combined.
- Add the vanilla extract and mix well.
- Gently fold in flour and salt until combined, but do not overmix.
Baking
- Fill muffin cups halfway with batter.
- Bake for 12 to 14 minutes until edges are firm but centers are gooey.
- Let cool in the pan for 1 minute before inverting onto serving plates.