
Table of Contents
Do you ever get a craving for something sweet, decadent, and just downright irresistible? If so, look no further than the delightful No Bake Buckeye Bars Recipe: 6 Simple Steps to Bliss. These bars blend creamy peanut butter and rich chocolate into a convenient, no-bake treat that’s perfect for any occasion. The beauty of this recipe lies in its simplicity and the joy it brings with every bite. Isn’t it amazing when you can create something so delicious without firing up the oven?
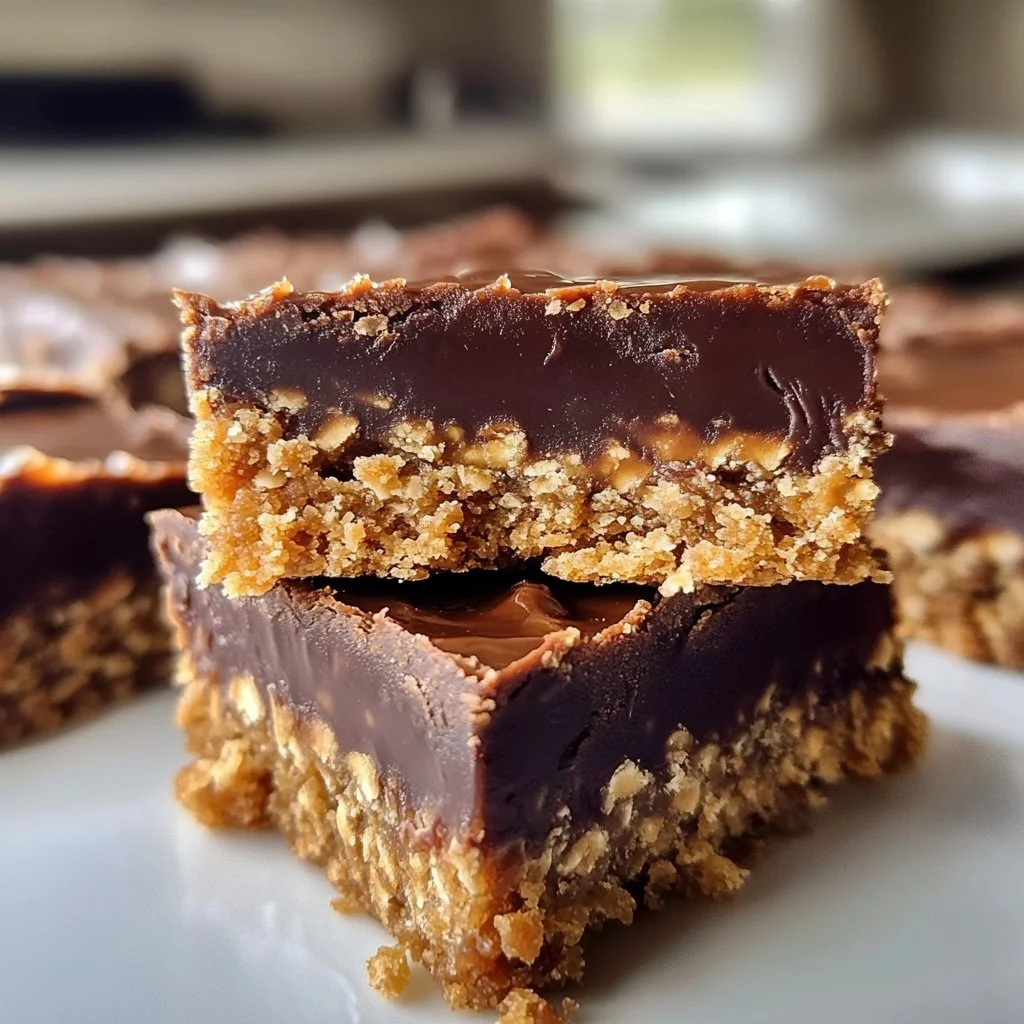
Picture this: a luscious layer of peanut butter mixed with graham cracker crumbs, topped with a smooth chocolate glaze. It’s a heavenly combination that reminds you of the classic buckeye candies, but in a bar form. Isn’t that just the epitome of bliss? Whether you are hosting a party, looking for a quick dessert, or simply satisfying your sweet tooth, this recipe is sure to become a go-to favorite. It’s easy enough for beginner cooks and satisfies even the most sophisticated palates.
One of the many reasons why the No Bake Buckeye Bars Recipe: 6 Simple Steps to Bliss is so special is its versatility. You can modify it to suit dietary preferences, and it still retains its deliciousness. Most importantly, it’s about the joy of sharing food with the people you love. So, are you ready to whip up a batch of these delightful bars? Let’s dive deeper into the many reasons why this dessert is a must-try!
Key Benefits of No Bake Buckeye Bars Recipe: 6 Simple Steps to Bliss
Why do people rave about this recipe? Here’s why you’ll love it:
- Flavor Explosion: The combination of peanut butter and chocolate is a classic that never goes out of style.
- Simplicity: With just six steps, this recipe is straightforward enough for anyone to master.
- No Baking Required: Perfect for warm days or when you want to avoid using the oven.
- Family-Friendly: Kids and adults alike will adore these bars.
- Customizable: Easily switch ingredients to cater to dietary restrictions.
- Great for Occasions: Whether it’s a birthday, holiday, or just a regular treat, these bars fit right in.
What Makes It Stand Out
The No Bake Buckeye Bars Recipe: 6 Simple Steps to Bliss stands out for several reasons. First, it’s an original twist on the traditional buckeye candy that many people adore. The bar format makes it easier to serve and share without the fuss of rolling individual candies.
Customization is another fantastic feature. You can experiment with different types of chocolate or even add toppings like crushed nuts or sprinkles to make it your own. This recipe is perfect for various occasions—from picnics to holiday gatherings, or simply as a sweet surprise for friends or family at home.
Ingredients for No Bake Buckeye Bars Recipe: 6 Simple Steps to Bliss
Here’s everything you’ll need to create these creamy, dreamy bars:
- 1 cup creamy peanut butter
- 1/2 cup unsalted butter, softened
- 1 cup powdered sugar
- 2 cups graham cracker crumbs
- 2 cups semi-sweet chocolate chips
- 1 tablespoon vegetable oil
These ingredients are generally simple to find and offer the perfect balance of flavor and texture. The creamy peanut butter pairs beautifully with the crunchy graham cracker crumbs, resulting in a delightful experience.
Substitutes and Alternatives
Not everyone can enjoy peanut butter due to allergies, and that’s perfectly okay! You can swap the creamy peanut butter for almond butter or sunbutter for a nut-free version. If you’re looking to cut back on sugar, consider using a sugar substitute in place of powdered sugar.
For a lower-fat option, you can use Greek yogurt mixed with a bit of peanut butter to achieve a similar flavor without the extra calories. Whatever your dietary needs, this recipe can be easily adapted!
How to Make No Bake Buckeye Bars Recipe: 6 Simple Steps to Bliss – Step-by-Step Directions
Step 1 – Prepare Ingredients
Gather all your ingredients first. This makes the process smoother and more enjoyable. Make sure your butter is softened to room temperature for easy mixing.
Step 2 – Mix Peanut Butter and Butter
In a mixing bowl, combine the creamy peanut butter and softened butter. Stir until smooth and creamy, ensuring there are no lumps. This step is crucial for a uniform texture in your bars.
Step 3 – Add Dry Ingredients
Next, sprinkle in the powdered sugar and graham cracker crumbs. Mix thoroughly until everything is well combined. The mixture should form a thick, sticky dough that holds together well.
Step 4 – Press the Mixture into the Dish
Line a 9×13 inch baking dish with parchment paper for easy removal. Press the peanut butter mixture evenly into the bottom of the dish. Use the back of a spatula or your hands to flatten it down firmly.
Step 5 – Melt the Chocolate
In a microwave-safe bowl, add the semi-sweet chocolate chips and vegetable oil. Heat in short intervals, stirring in between, until completely melted and smooth. Be careful not to overheat the chocolate.
Step 6 – Pour Chocolate Over Peanut Butter Layer
Once the chocolate is melted, pour it over the peanut butter layer in the baking dish. Use a spatula to spread it evenly across the top. This glossy chocolate layer is what makes these bars so luscious.
Step 7 – Chill in the Refrigerator
Cover the dish with plastic wrap and refrigerate for at least 2 hours. This step allows the bars to set properly. You’ll know they’re ready when the chocolate is firm to the touch.
Step 8 – Cut and Serve
After chilling, remove the bars from the dish by lifting the parchment paper. Cut into squares or rectangles, and serve. These bars can be enjoyed fresh or stored for later.
Serving Suggestions for No Bake Buckeye Bars Recipe: 6 Simple Steps to Bliss
Best Occasions to Serve This Dish
The No Bake Buckeye Bars Recipe: 6 Simple Steps to Bliss is great for various occasions. They shine at birthday parties, where their sweet combination pleases most palates.
Holiday gatherings also offer the perfect backdrop for these treats. Whether it’s Thanksgiving or Christmas, they make a delightful dessert that adds a festive spirit.
On casual afternoons, they serve well as a pick-me-up snack with coffee or tea, making them ideal for family gatherings or casual get-togethers with friends.
What to Serve With It
Pair your no-bake bars with any of the following:
- Fresh fruit, like strawberries or bananas
- A scoop of vanilla ice cream
- Whipped cream for added creaminess
- Coffee or tea to complement the sweetness
How to Store No Bake Buckeye Bars Recipe: 6 Simple Steps to Bliss Properly
Best Storage Practices
Store your No Bake Buckeye Bars Recipe: 6 Simple Steps to Bliss in an airtight container in the refrigerator. They can last up to a week, but they’re so delicious they might not last that long!
Reheating and Freezing Tips
If you’ve made a large batch, consider freezing some for later. Cut the bars into pieces, layer them with parchment paper in a freezer-safe container, and store for up to three months. To enjoy, simply thaw them in the fridge for a few hours before serving.
Tips & Tricks for No Bake Buckeye Bars Recipe: 6 Simple Steps to Bliss
Mistakes to Avoid
- Using Cold Butter: Always use softened butter for easier mixing.
- Overheating Chocolate: Melt in short intervals to prevent burning.
- Skipping Refrigeration: Allowing time to chill is crucial for texture.
- Not Greasing the Pan: Ensure parchment paper is used to avoid sticking.
- Not Mixing Well Enough: Make sure all ingredients are thoroughly combined.
Extra Tips for Better Results
- Consider adding a pinch of salt to the peanut butter mixture to enhance flavor.
- Experiment with different types of chocolate, like dark or white chocolate, for variety.
- Top with crushed nuts or sprinkles for additional texture and visual appeal.
Recipe Variations of No Bake Buckeye Bars Recipe: 6 Simple Steps to Bliss
Creative Twists
- Coconut Buckeye Bars: Mix shredded coconut into the peanut butter layer for a tropical twist.
- Mint Chocolate Buckeyes: Add a few drops of mint extract to the chocolate layer for a refreshing flavor.
- Cookie Dough Buckeye Bars: Fold in pieces of edible cookie dough into the peanut butter layer for a fun texture.
- Chili Chocolate Buckeyes: Sprinkle a little cayenne pepper in the chocolate for a spicy kick that contrasts beautifully with the sweetness.
Dietary Adjustments
For a vegan version, swap out the butter for coconut oil and use vegan chocolate chips. Substitute the graham cracker crumbs with a gluten-free option, and you have a delicious dessert that everyone can enjoy!
Conclusion about No Bake Buckeye Bars Recipe: 6 Simple Steps to Bliss
If you haven’t tried the No Bake Buckeye Bars Recipe: 6 Simple Steps to Bliss, you’re definitely missing out! The ease of preparation, combined with the irresistible flavors of peanut butter and chocolate, creates a dessert that brings joy in every bite. With just a few ingredients and simple steps, you can make a crowd-pleasing treat suitable for any occasion. Why wait? Gather your ingredients and start making these delicious bars today; your taste buds will thank you!
FAQs about No Bake Buckeye Bars Recipe: 6 Simple Steps to Bliss
Can I prepare it ahead of time? Absolutely! These bars can be made a few days in advance and stored in the fridge.
Can I freeze it? Yes, you can freeze the bars for up to three months.
How long does it last? When stored properly in an airtight container, they can last about a week in the fridge.
What are the best substitutions? You can use almond butter or sunbutter instead of peanut butter if allergies are a concern.
Is this recipe family-friendly? Definitely! Both kids and adults love the flavors and texture.
Can I use crunchy peanut butter? Yes, feel free to use crunchy peanut butter for added texture.
What’s a good topping? Consider adding crushed peanuts or drizzled chocolate as a topping for enhanced flavor.
How do I make it gluten-free? Use gluten-free graham crackers in the recipe to meet dietary needs.
What can I do with leftover bars? Leftover bars can be used as toppings for ice cream or blended into smoothies for a protein boost.
Can I add protein powder? Yes, you can blend in protein powder into the peanut butter mixture for a healthy boost.

No Bake Buckeye Bars
Ingrédients
For the Peanut Butter Layer
- 1 cup creamy peanut butter Can substitute with almond butter or sunbutter for nut-free option.
- 1/2 cup unsalted butter, softened Make sure it is at room temperature for easy mixing.
- 1 cup powdered sugar Can use a sugar substitute for a lower-sugar version.
- 2 cups graham cracker crumbs Use gluten-free crumbs for gluten-sensitive variation.
For the Chocolate Layer
- 2 cups semi-sweet chocolate chips Can substitute with dark or white chocolate.
- 1 tablespoon vegetable oil This helps to smooth out the chocolate.
Instructions
Preparation
- Gather all your ingredients first.
- In a mixing bowl, combine the creamy peanut butter and softened butter. Stir until smooth and creamy.
- Sprinkle in the powdered sugar and graham cracker crumbs. Mix thoroughly until well combined.
- Line a 9×13 inch baking dish with parchment paper. Press the peanut butter mixture evenly into the bottom of the dish.
- In a microwave-safe bowl, combine the semi-sweet chocolate chips and vegetable oil. Heat in short intervals, stirring in between, until melted and smooth.
- Pour the melted chocolate over the peanut butter layer and spread it evenly.
- Cover and refrigerate for at least 2 hours to set. Cut into squares or rectangles to serve.