
Table of Contents
Introduction to Valentine’s Day Kitchen Sink Cookies: 7 Irresistible Tips
Valentine’s Day is a time for love, appreciation, and heartfelt gestures, and what better way to express your feelings than with the delectable delight of homemade cookies? The Valentine’s Day Kitchen Sink Cookies: 7 Irresistible Tips is not just any cookie recipe; it’s a sweet adventure packed with flavors and textures that will make your taste buds dance. Have you ever wondered how one cookie could hold all the goodness of chocolate, nuts, and fruits? This recipe truly combines everything delightful, making it a perfect treat for your loved ones.
What makes these cookies stand out is their customization potential. You can mix and match ingredients based on your preferences or what’s left in your pantry. The flexibility of this recipe means that whether your sweetheart loves chocolate, nuts, or a touch of fruity tartness, there’s something for everyone. Imagine creating a cookie that reflects your own love story. Now that’s something special!
Not only do these cookies taste fantastic, but they are also easy to make. For novice bakers and seasoned pros alike, the Valentine’s Day Kitchen Sink Cookies: 7 Irresistible Tips is straightforward and fuss-free. Each step is carefully laid out to ensure that anyone can whip up a batch in no time. Plus, baking together could even become a sweet Valentine’s Day date activity. So, let’s dive into what makes these cookies special!
Key Benefits of Valentine’s Day Kitchen Sink Cookies: 7 Irresistible Tips
Why You’ll Love This Recipe
- Flavor Explosion: A perfect blend of sweet and savory ingredients.
- Quick and Easy: Simple steps make baking a joy, not a chore.
- Versatile: Customize with your favorite mix-ins.
- Perfect for Sharing: Ideal for gifts and parties.
- Festive Touch: Perfect for celebrating Valentine’s Day in style.
- Crowd-Pleaser: Everyone loves cookies; there’s something for every palate.
What Makes It Stand Out
One of the biggest advantages of the Valentine’s Day Kitchen Sink Cookies: 7 Irresistible Tips is its originality. Unlike standard chocolate chip cookies, this recipe allows for a bit of creativity. You can add extra ingredients like dried fruit, coconut, or even different types of chocolate for a twist on the classic cookie.
The customization aspect makes it suitable for various occasions, not just Valentine’s Day. They can be a delightful addition to any holiday celebration, birthday treat, or even an afternoon snack. The warm, delicious aroma wafting through your kitchen will draw everyone in, ensuring these cookies are a hit no matter when you serve them.
Ingredients for Valentine’s Day Kitchen Sink Cookies: 7 Irresistible Tips
Complete Ingredient List with Measurements
- 1 cup unsalted butter, softened
- 1 cup brown sugar
- 1/2 cup granulated sugar
- 2 large eggs
- 1 teaspoon vanilla extract
- 2 1/2 cups all-purpose flour
- 1 teaspoon baking soda
- 1/2 teaspoon salt
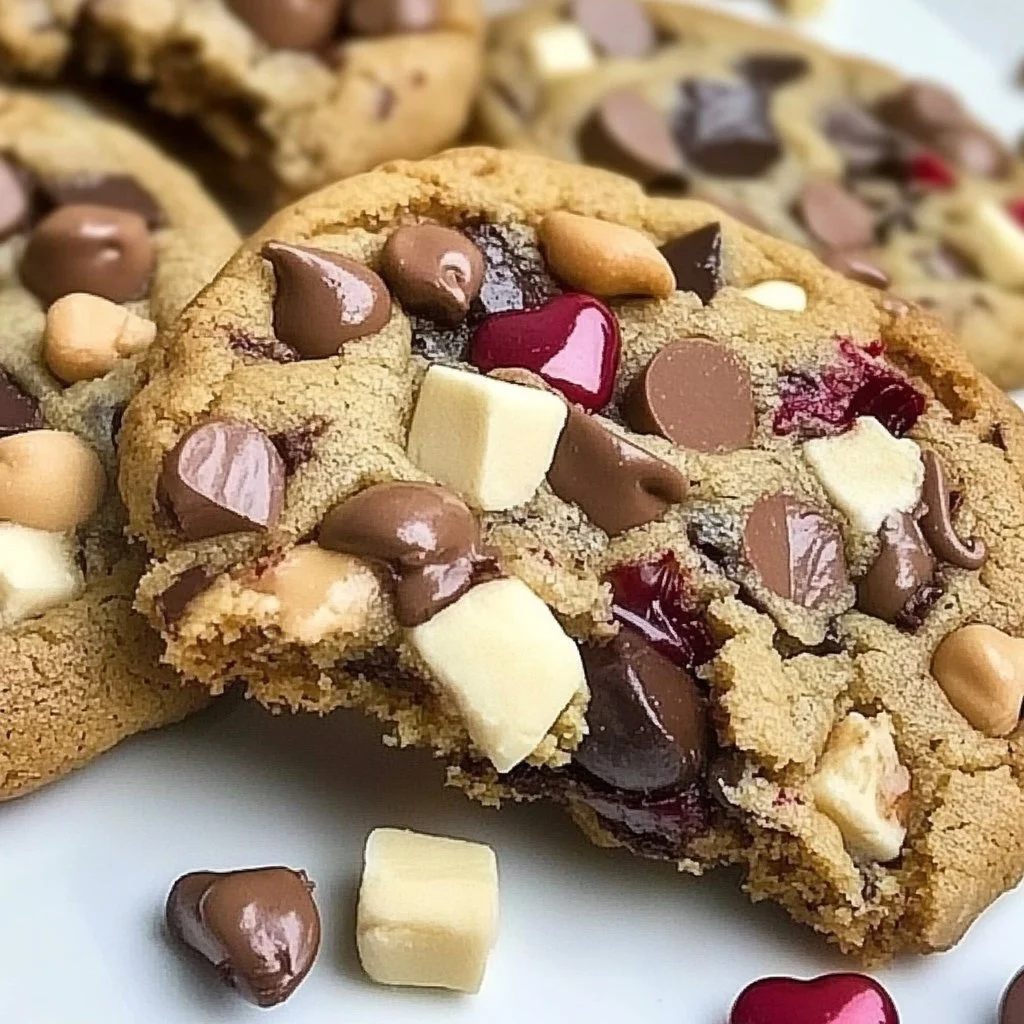
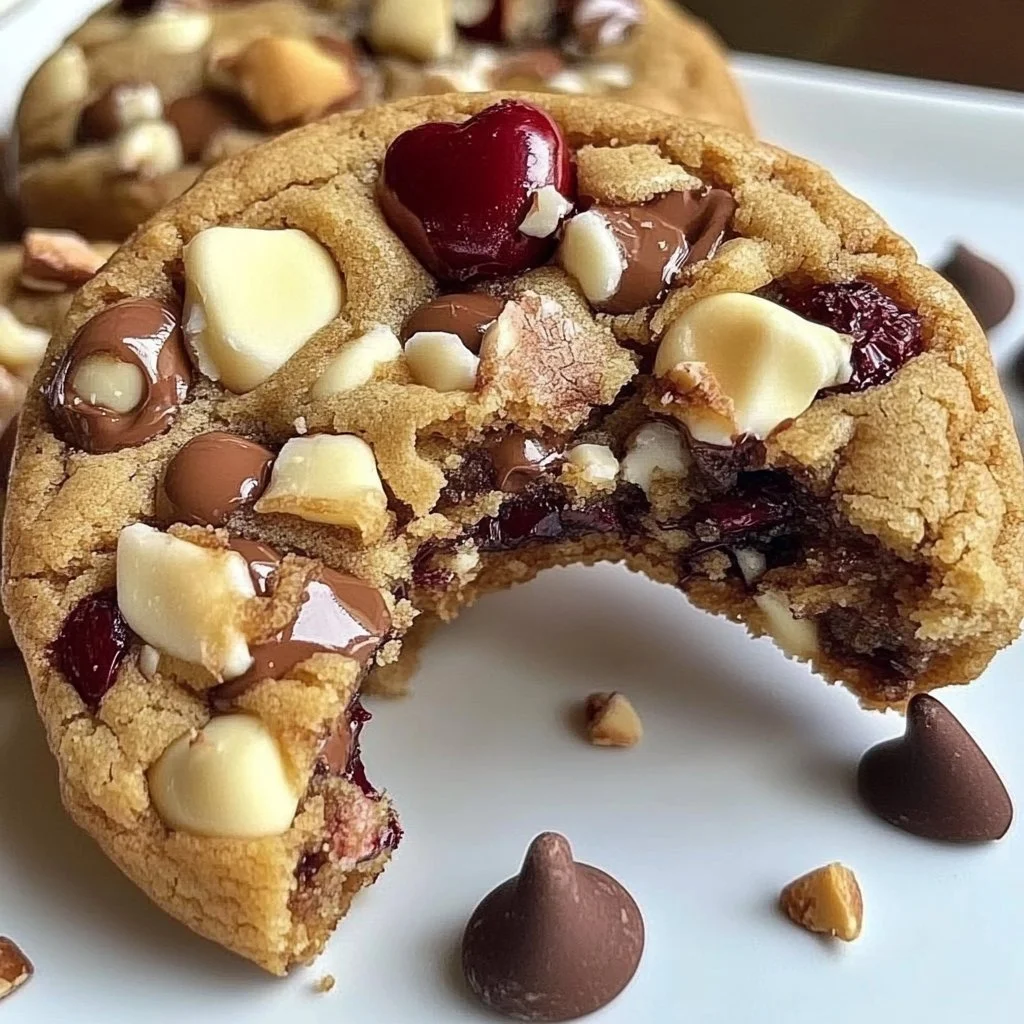
- 1 cup chocolate chips
- 1 cup white chocolate chips
- 1/2 cup chopped nuts (like walnuts or pecans)
- 1/2 cup dried cranberries
Substitutes and Alternatives
If you have allergies or dietary restrictions, there are lots of swaps you can make to adapt the Valentine’s Day Kitchen Sink Cookies: 7 Irresistible Tips to meet your needs. For instance, instead of unsalted butter, you can use coconut oil for a dairy-free version. To make it gluten-free, simply substitute the all-purpose flour with a gluten-free flour blend.
For a healthier option, consider using reduced-sugar chocolate chips or replace some of the chocolate chips with oats for added texture. You can also omit the nuts or cranberries if you’re dealing with nut allergies or prefer a simpler cookie. Personalizing these treats makes them all the more special!
How to Make Valentine’s Day Kitchen Sink Cookies: 7 Irresistible Tips – Step-by-Step Directions
Step 1 – Prepare Ingredients
Begin by gathering all your ingredients on the countertop. This will streamline the baking process and keep you organized. Make sure your butter is soft enough to cream easily with the sugars.
Step 2 – Cream the Butter and Sugars
In a large mixing bowl, cream together the softened unsalted butter, brown sugar, and granulated sugar until the mixture is light and fluffy. This step is crucial as it incorporates air into the batter, making the cookies tender.
Step 3 – Add Eggs and Vanilla
Add in the two large eggs, one at a time, mixing well after each addition. Stir in the teaspoon of vanilla extract. The combination of vanilla and sugar creates a fantastic aroma that will get you excited about the baking process.
Step 4 – Combine Dry Ingredients
In a separate bowl, whisk together the all-purpose flour, baking soda, and salt. This mixes the dry ingredients evenly, preventing any clumps and ensuring consistency in the cookies.
Step 5 – Mix Dry with Wet
Gradually add the dry mixture to the wet ingredients while mixing gently. Stop as soon as the flour is incorporated to avoid overmixing, which can lead to tough cookies. The dough should be thick and slightly sticky.
Step 6 – Stir in Mix-Ins
Fold in the chocolate chips, white chocolate chips, chopped nuts, and dried cranberries. This is where you can customize your cookies further by adding or replacing ingredients according to your taste.
Step 7 – Prepare Baking Sheet
Line your baking sheets with parchment paper. This helps prevent the cookies from sticking and promotes even cooking.
Step 8 – Scoop Dough
Using a tablespoon or cookie scoop, drop spoonfuls of dough onto the prepared baking sheet, leaving enough space between each one to allow for spreading while baking.
Step 9 – Bake Cookies
Preheat your oven to 350°F (175°C) if you haven’t done so yet. Place the cookie sheets in the oven and bake for 10-12 minutes or until golden brown. Keep an eye on the cookies in the last few minutes to avoid overbaking.
Step 10 – Cool and Serve
Once baked, remove the cookies from the oven and let them cool on the baking sheet for a few minutes before transferring to a wire rack. Allow them to cool completely before serving or packing them up.
Serving Suggestions for Valentine’s Day Kitchen Sink Cookies: 7 Irresistible Tips
Best Occasions to Serve This Dish
These cookies are ideal for celebrating Valentine’s Day, as their vibrant colors and rich flavors resonate with the spirit of love. Additionally, they’re perfect for birthday parties, holiday gatherings, or cozy family movie nights. The versatile nature of these cookies also makes them suitable for bake sales or gift baskets.
What to Serve With It
Pair your cookies with a glass of milk or a warm cup of coffee for a delightful treat. For a more festive twist, consider serving them alongside a scoop of vanilla ice cream. You can also package them in decorative tins as gifts for friends and family.
How to Store Valentine’s Day Kitchen Sink Cookies: 7 Irresistible Tips Properly
Best Storage Practices
To keep your cookies fresh, store them in an airtight container at room temperature. If you live in a humid environment, consider refrigerating the cookies, but remember they may dry out slightly. For extended freshness, you can also keep them in the freezer.
Reheating and Freezing Tips
If you prefer warm cookies, you can gently reheat them in the microwave for about 10-15 seconds. If you’ve stored the cookies in the freezer, let them thaw at room temperature or pop them into the microwave for a quick warm-up.
Tips & Tricks for Valentine’s Day Kitchen Sink Cookies: 7 Irresistible Tips
Mistakes to Avoid
1 – Overmixing the Dough
Overmixing can lead to tough cookies. Mix just until combined for a tender texture.
2 – Not Measuring Ingredients Accurately
Baking is a science! Make sure you measure your ingredients accurately for consistent results.
3 – Skipping Chilling the Dough
If time permits, chilling the dough for 30 minutes can help prevent spreading and create thicker cookies.
4 – Ignoring Oven Temperature
Always preheat your oven. Use an oven thermometer to ensure accurate temperatures for perfect baking.
5 – Not Using Parchment Paper
Skipping parchment paper can cause cookies to stick. It also helps with even baking.
Extra Tips for Better Results
For a different flavor profile, consider adding a pinch of cinnamon or coffee granules to the batter. These small additions enhance the overall flavor and pair beautifully with chocolate. You can also drizzle melted chocolate on top of cooled cookies for added flair.
Recipe Variations of Valentine’s Day Kitchen Sink Cookies: 7 Irresistible Tips
Creative Twists
1 – Nutty Delight: Add almond or hazelnut pieces instead of walnuts for a different nutty flavor that compliments the chocolates well.
2 – Tropical Version: Introduce shredded coconut and dried pineapple for a fun, tropical twist.
3 – Spiced Cookies: Consider adding spices like nutmeg or ginger for a warm, comforting flavor, especially during winter months.
Dietary Adjustments
To make the cookies vegan, replace the eggs with flax eggs and use a dairy-free chocolate. For gluten-free options, use almond flour mixed with coconut flour as a base to create a similar texture to the original recipe. Always test different combinations to find what works best for your taste!
Conclusion about Valentine’s Day Kitchen Sink Cookies: 7 Irresistible Tips
Baking cookies doesn’t just satisfy a sweet craving; it’s also a way to create memories and show love. The Valentine’s Day Kitchen Sink Cookies: 7 Irresistible Tips is the perfect recipe to share with friends and family, combining various flavors and ingredients that everyone can enjoy. Whether you’re indulging on a cozy night in, celebrating a special occasion, or simply expressing your affection, these cookies are sure to delight. Try this recipe today and experience the joy of baking and sharing delicious treats!
FAQs about Valentine’s Day Kitchen Sink Cookies: 7 Irresistible Tips
How long can I store these cookies?
You can store the cookies at room temperature for up to a week in an airtight container.
Can I freeze cookie dough?
Yes, you can freeze the dough before baking. Scoop them into balls, freeze them on a tray, and then transfer them to a freezer bag.
What’s the best way to thaw frozen cookies?
Allow frozen cookies to thaw at room temperature for about 15–20 minutes before enjoying.
Can I use other mix-ins?
Absolutely! You can get creative with add-ins like toffee bits, M&Ms, or even seeds like pumpkin or sunflower for a crunch.
Is there a way to make the cookies chewier?
For chewier cookies, try reducing the baking time slightly and using more browns sugar than granulated sugar.
Can I adjust the sweetness level?
Yes! You can decrease the sugar in the recipe to make them less sweet. Just be cautious as it may affect the texture.
What temperature should the butter be at?
The butter should be softened but not melted. Leave it out for about 30 minutes before you start.
Can I omit the nuts?
Yes! Feel free to skip the nuts if you or someone you’re serving has a nut allergy. The cookies will still taste amazing.

Valentine’s Day Kitchen Sink Cookies
Ingrédients
Wet Ingredients
- 1 cup unsalted butter, softened Make sure the butter is soft enough to cream with the sugars.
- 1 cup brown sugar
- 1/2 cup granulated sugar
- 2 large eggs Add eggs one at a time.
- 1 teaspoon vanilla extract Adds a fantastic aroma.
Dry Ingredients
- 2 1/2 cups all-purpose flour Can be substituted with gluten-free flour.
- 1 teaspoon baking soda
- 1/2 teaspoon salt
Mix-Ins
- 1 cup chocolate chips
- 1 cup white chocolate chips
- 1/2 cup chopped nuts (like walnuts or pecans) Can be omitted for nut allergies.
- 1/2 cup dried cranberries Can be substituted with other dried fruits.
Instructions
Preparation
- Gather all your ingredients on the countertop.
- Cream together the softened unsalted butter, brown sugar, and granulated sugar until light and fluffy.
- Add eggs one at a time, mixing well after each addition, and stir in vanilla extract.
- In a separate bowl, whisk together the all-purpose flour, baking soda, and salt.
- Gradually add the dry mixture to the wet ingredients, mixing gently until just combined.
- Fold in the chocolate chips, white chocolate chips, chopped nuts, and dried cranberries.
Baking
- Preheat your oven to 350°F (175°C).
- Line your baking sheets with parchment paper.
- Using a tablespoon or cookie scoop, drop spoonfuls of dough onto the baking sheet, leaving space between each.
- Bake for 10-12 minutes or until golden brown.
- Allow cookies to cool on the baking sheet for a few minutes before transferring to a wire rack.