
Table of Contents
Introduction about Halloween Cookies
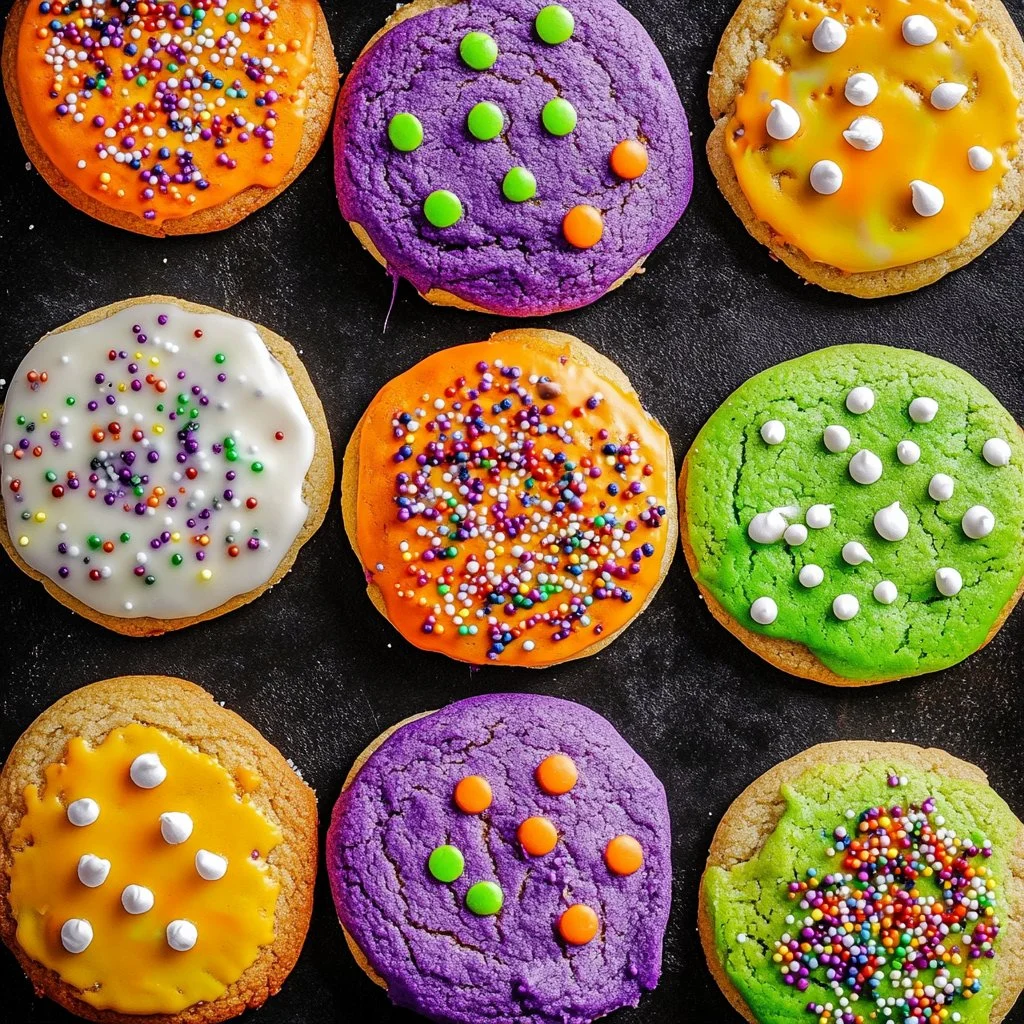
Halloween is a magical time of year filled with festive fun, spooky decorations, and, of course, delicious treats! When it comes to Halloween festivities, what could be more delightful than a batch of colorful Halloween cookies? Imagine the smiles on your family’s faces as they bite into these soft, chewy cookies, bursting with white chocolate chips and vibrant hues of purple, lime green, and orange.
Have you ever wanted to impress your friends at a Halloween party with something special? These Halloween cookies are not only visually stunning but incredibly simple to make. Whether you’re decorating for a party or just craving a sweet snack, this recipe is perfect for anyone who wants to bake something unique and festive. Plus, they’re a great way to get the kids involved in the kitchen!
With their bright colors and sweet flavors, Halloween cookies are sure to be a hit with guests of all ages. Let’s dive into what makes this recipe so special and how you can whip up a batch that will delight everyone.
Key Benefits of Halloween Cookies
Why you’ll love this recipe
- Deliciously Sweet: The blend of white chocolate and sugars creates a heavenly taste that’s hard to resist.
- Easy to Make: With simple steps and common ingredients, anyone can bake these cookies!
- Family-Friendly: This recipe is perfect for kids and adults alike, making it ideal for family bonding.
- Quick Preparation: Spend less than 30 minutes preparing and get to the fun part—decorating!
- Customizable Colors: Use different food coloring to match your Halloween theme or even to create a fun twist any time of the year.
- Fun Decoration Options: Sprinkles or edible glitter can make the cookies even more appealing to children and guests.
What makes it stand out
This Halloween cookie recipe isn’t just another set of cookies; it brings seasonal joy in a simple and colorful package. The vibrant colors make it eye-catching and perfect for any Halloween-themed event, be it a family gathering, a school party, or a cozy night in watching scary movies.
Another standout feature of this recipe is its adaptability. While the classic version calls for white chocolate chips and bold colors, you can mix it up with different flavors or decorations depending on your preferences. With just a few tweaks, you could also enjoy these cookies during other festive seasons—just imagine Christmas cookies in red and green, or pastels for Easter!
Ingredients for Halloween Cookies
Complete ingredient list with measurements
To whip up your delicious Halloween cookies, you’ll need the following ingredients:
- 2 3/4 cups all-purpose flour
- 1 teaspoon baking soda
- 1/2 teaspoon salt
- 1 cup unsalted butter, softened
- 1 1/2 cups granulated sugar
- 1 cup brown sugar, packed
- 2 large eggs
- 2 teaspoons vanilla extract
- 1 cup white chocolate chips
- Purple, lime green, and orange food coloring
- Sprinkles or edible glitter for decoration (optional)
Substitutes and alternatives
If you have dietary restrictions or personal preferences, here are some common substitutes you may use:
- Flour: For a gluten-free option, you can use a 1:1 gluten-free flour blend.
- Butter: Coconut oil or vegan butter works well for dairy-free cookies.
- Sugar: You can use coconut sugar or a sugar substitute if you’re looking to reduce calories.
- Eggs: Unsweetened applesauce or flax eggs can replace eggs for vegan versions.
- Chocolate chips: Semi-sweet or dark chocolate chips can provide a different flavor profile.
How to Make Halloween Cookies – Step-by-Step Directions
Step 1 – Prep your workspace and ingredients
Begin by gathering your ingredients and measuring them out. Make sure you have a clean workspace, as a tidy area is vital for baking success. Preheat your oven to 350°F (175°C), so it’s hot and ready when your cookies are ready to bake.
Step 2 – Mix dry ingredients
In a medium bowl, whisk together 2 3/4 cups of all-purpose flour, 1 teaspoon baking soda, and 1/2 teaspoon salt. This mixture ensures your cookies will have the right texture and rise nicely. Setting it aside for now allows the flavors to distribute evenly when mixed with the wet ingredients.
Step 3 – Cream butter and sugars
In a large bowl, use an electric mixer to cream together 1 cup of softened unsalted butter, 1 1/2 cups of granulated sugar, and 1 cup of packed brown sugar. Beat them until the mixture is light and fluffy—this usually takes about 2 to 3 minutes. The goal is to incorporate air into the mix, making your cookies tender.
Step 4 – Add eggs and vanilla
Next, beat in the 2 large eggs, one at a time, mixing well after each addition. Then stir in 2 teaspoons of vanilla extract. The vanilla adds a lovely flavor that balances out the sweetness of the sugars.
Step 5 – Combine wet and dry ingredients
Gradually fold in the flour mixture into the butter and sugar mixture. Mix until just combined; be careful not to overmix as this can lead to tough cookies. The dough will be thick and slightly sticky.
Step 6 – Add food coloring
Divide the dough into three equal portions. In separate bowls, tint each portion using purple, lime green, and orange food coloring. A few drops will do; you can add more if you desire a brighter shade.
Step 7 – Fold in the white chocolate chips
Gently fold 1 cup of white chocolate chips into each colored portion of dough. Make sure the chips are evenly distributed so that each cookie has a delicious piece of chocolate in every bite.
Step 8 – Drop spoonfuls of dough onto baking sheets
Using a spoon or cookie scoop, drop spoonfuls of dough onto baking sheets lined with parchment paper. Make sure to leave enough space between the cookie dough mounds, as they will spread while baking.
Step 9 – Bake the cookies
Place the baking sheets in the preheated oven and bake for 10-12 minutes. Keep an eye on them—you’re looking for the edges to become slightly golden while the centers look soft.
Step 10 – Cool and decorate
Once baked, remove the sheets from the oven and allow the cookies to cool on the sheets for about 5 minutes before transferring them to wire racks. This prevents them from breaking apart. If desired, sprinkle with edible glitter or sprinkles while the cookies are still warm.
Serving Suggestions for Halloween Cookies
Best occasions to serve this dish
These Halloween cookies are perfect all through the spooky season, especially during Halloween parties, school events, and autumn gatherings. They can also be a delightful addition to a fun family movie night with classic Halloween films.
What to serve with it
To complement your Halloween cookies, consider pairing them with:
- Milk: Classic and comforting, a glass of milk pairs wonderfully with cookies.
- Hot chocolate: For those chilly fall nights, serve your cookies with a cozy cup of hot chocolate.
- Coffee or tea: A warm beverage balances the sweetness of the cookies beautifully.
- Ice cream: For an indulgent treat, serve the cookies alongside a scoop of vanilla or pumpkin ice cream.
Storing Halloween Cookies Properly
Best storage practices
To keep your Halloween cookies fresh, store them in an airtight container at room temperature. They can last for up to 1 week this way. If you need to store them longer, you can freeze them for up to 3 months.
Reheating and freezing tips
- To freeze: Arrange cookies on a baking sheet and freeze for about 1 hour. Once frozen, transfer them to a zip-top freezer bag.
- To thaw: Simply take them out of the freezer and let them sit at room temperature for 30 minutes before enjoying.
- For reheating: Preheat your oven to 300°F (150°C), and warm the cookies for about 5-8 minutes to bring back that fresh-from-the-oven softness.
Tips & Tricks for Halloween Cookies
Mistakes to avoid
- Overmixing the dough: This can result in tougher cookies. Mix until just combined for the best texture.
- Not preheating the oven: Make sure your oven is hot when you put the cookies in; this helps them to rise correctly.
- Skipping the parchment paper: This can lead to sticking and hard-to-clean sheets. Always line your baking sheets!
- Too much food coloring: A little goes a long way. Add gradually to avoid overly bright or unappealing colors.
Extra tips for better results
- Use room temperature ingredients: Eggs and butter mix better when they’re at room temperature, leading to a smoother dough.
- Chill the dough: If you find your dough is too sticky, chill it for 30 minutes before baking.
- Experiment with flavors: Don’t hesitate to mix in different kinds of chips like caramel or peanut butter for a unique twist.
Recipe Variations of Halloween Cookies
Creative twists
- Nutty Additions: Consider mixing in some chopped nuts like pecans or walnuts for added texture.
- Spices: A dash of cinnamon or nutmeg can elevate the flavor and bring a lovely autumn warmth.
- Seasonal Flavors: Add a hint of pumpkin spice for fall or peppermint for winter holidays.
Dietary adjustments
- Make it gluten-free: Substitute all-purpose flour with a gluten-free flour blend and ensure all other ingredients are also gluten-free.
- Dairy-free/Vegan: Substitute butter with plant-based options and eggs with applesauce or flax eggs.
- Sugar-free options: Use sugar substitutes like erythritol for a healthier version while still making these fun cookies.
Conclusion about Halloween Cookies
In conclusion, Halloween cookies are a delightful treat that can elevate any fall gathering or Halloween celebration. With their bright colors, sweet flavors, and chewy texture, they are not just tasty but visually stunning as well. This recipe is designed to be easy, making it perfect for everyone, from seasoned bakers to kitchen novices.
So, whether you’re treating the family after a day of pumpkin picking or preparing for a Halloween party, I encourage you to give this recipe a try. Share your delightful creations and experiences with friends and family, and create sweet memories that will last! Enjoy the process, and most importantly, enjoy your Halloween cookies!
FAQs about Halloween Cookies
What if it doesn’t turn out right?
If your cookies spread too much or aren’t fluffy, check your measurements. Paying attention to the right ratios and not overmixing can ensure your cookies turn out perfectly.
Can I prepare it ahead of time?
Absolutely! You can prepare the dough in advance and refrigerate it for up to 3 days before baking. This could save time when you need quick treats.
What are the best ingredient substitutions?
The best substitutions usually depend on individual dietary needs; you can use gluten-free flour for those who are gluten-sensitive and plant-based butter for dairy-free options.
How long can it be stored?
These cookies can be stored in an airtight container at room temperature for about 1 week, or in the freezer for up to 3 months.
Can I use store-bought dough or crust?
While homemade cookies are highly recommended for freshness and flavor, you can use store-bought cookie dough. However, they may lack that personal touch.
Is this recipe kid-friendly or family-appropriate?
Yes! This recipe is perfect for kids. It’s fun, colorful, and can be great for family baking sessions.
Can I make this recipe allergen-free?
Yes! By adapting the ingredients (using gluten-free flour, dairy-free butter, and egg substitutes), you can make this cookie recipe allergen-friendly for those with dietary restrictions.

Halloween Cookies
Ingrédients
Dry Ingredients
- 2 3/4 cups all-purpose flour Can substitute with gluten-free flour for a gluten-free option.
- 1 teaspoon baking soda
- 1/2 teaspoon salt
Wet Ingredients
- 1 cup unsalted butter, softened Can substitute with coconut oil or vegan butter for dairy-free options.
- 1 1/2 cups granulated sugar Coconut sugar can be used as an alternative.
- 1 cup brown sugar, packed
- 2 large eggs Can be replaced by unsweetened applesauce or flax eggs for vegan versions.
- 2 teaspoons vanilla extract
Mix-Ins and Coloring
- 1 cup white chocolate chips Semi-sweet or dark chocolate chips can also be used.
- 1 set Purple, lime green, and orange food coloring
- to taste none Sprinkles or edible glitter for decoration Optional but recommended for festive appeal.
Instructions
Preparation
- Gather your ingredients and measure them out. Preheat your oven to 350°F (175°C).
- In a medium bowl, whisk together flour, baking soda, and salt; set aside.
- In a large bowl, cream together butter, granulated sugar, and brown sugar until light and fluffy.
- Beat in eggs one at a time, mixing well after each addition. Stir in vanilla extract.
Mixing
- Gradually fold in the flour mixture into the butter and sugar mixture until just combined.
- Divide the dough into three portions and tint each with the respective food coloring.
- Fold in the white chocolate chips into each colored portion.
Baking
- Drop spoonfuls of the dough onto baking sheets lined with parchment paper.
- Bake for 10-12 minutes, until edges are slightly golden and centers are soft.
- Let cookies cool on sheets for 5 minutes before transferring to wire racks.
- Decorate with sprinkles or edible glitter while still warm, if desired.