
Table of Contents
Introduction to Twix Thumbprint Cookies
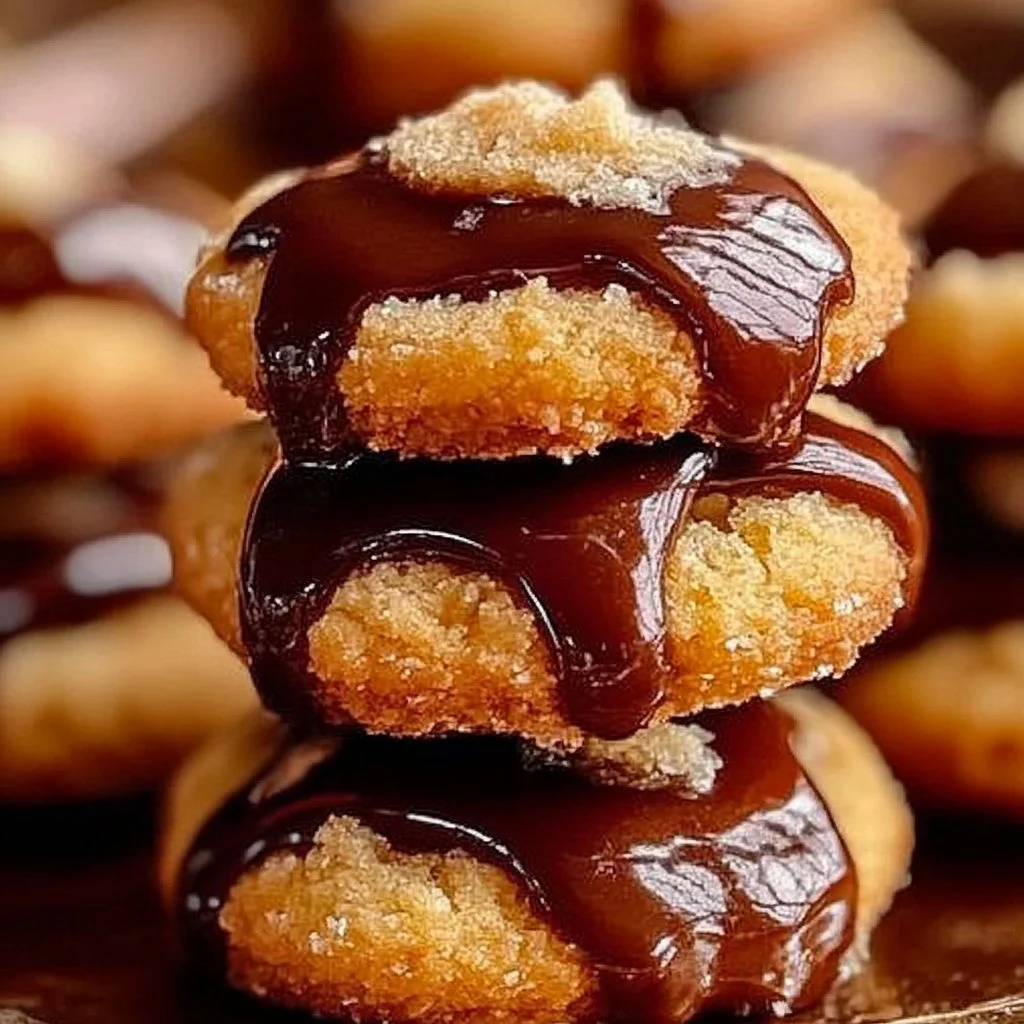
Have you ever craved a cookie that combines the softness of a classic cookie, the chewiness of caramel, and the richness of chocolate? Twix Thumbprint Cookies are the answer to that delicious craving. These delightful treats are not just another cookie; they are an experience. They bring together the beloved flavors of a Twix candy bar right into a soft, buttery cookie.
What makes Twix Thumbprint Cookies so special? The soft, melt-in-your-mouth cookie base pairs remarkably with a gooey caramel center, all topped with chocolate. Each bite showcases a perfect blend of textures and flavors, making them irresistible. Whether you are preparing for a festive occasion, a bake sale, or simply indulging in a sweet treat at home, Twix Thumbprint Cookies will surely please everyone. And the best part? They’re easy to make, which means you can whip up a batch quickly without feeling overwhelmed.
Imagine the joy of sharing these cookies with family and friends. With each cookie being a miniature version of the famous candy bar, you’ll be the star of any gathering. Plus, the fun thumbprint indentation invites a creative flair, allowing you to personalize your cookie experience. It’s not just about the taste; it’s about making memories, sharing joy, and creating delicious moments.
Key Benefits of Twix Thumbprint Cookies
Why You’ll Love This Recipe
- Delicious Flavor: The mix of buttery cookies, sweet caramel, and rich chocolate provides a flavor explosion in every bite.
- Simple Preparation: With easy-to-follow steps, you can have freshly baked cookies without the complexity of many traditional recipes.
- Versatile: Perfect for various occasions, from holidays to casual gatherings.
- Customizable: Feel free to tweak ingredients or toppings to match personal preferences or dietary needs.
- Unique Presentation: The thumbprint creates a charming and inviting look, making them perfect for parties or gifts.
- Appeals to All Ages: Kids and adults alike will enjoy these cookies, making them a universal favorite.
What Makes It Stand Out
Twix Thumbprint Cookies stand out thanks to their unique combination of flavors that mimic a popular candy bar. Unlike standard cookies, this recipe features an inviting thumbprint indentation that not only holds a generous dollop of caramel but also adds an artistic touch.
They are incredibly versatile and can easily adapt to various tastes. Want to add a sprinkle of sea salt on top for a sweet-salty contrast? Go for it! Feeling adventurous? Replace milk chocolate with dark chocolate or even white chocolate. This flexibility allows you to unleash your creativity, ensuring each batch can be unique.
These cookies are not just treats; they’re a way to celebrate moments. Whether for a birthday party, a holiday feast, or just a cozy afternoon at home, Twix Thumbprint Cookies will enhance the occasion. The shared experience of baking and enjoying these cookies can create lasting memories with loved ones.
Ingredients for Twix Thumbprint Cookies
Complete Ingredient List with Measurements
- 1 cup (226 g) unsalted butter, softened
- ½ cup (100 g) granulated sugar
- ¼ cup (50 g) brown sugar
- 1 large egg
- 1 teaspoon vanilla extract
- 2 ¼ cups (280 g) all-purpose flour
- ¼ teaspoon salt
- 20 soft caramel candies
- 2 tablespoons heavy cream
- ¾ cup milk chocolate chips
- 1 teaspoon coconut oil or vegetable oil
Substitutes and Alternatives
If you have allergies or dietary preferences, there are several substitutions you can make while still achieving amazing Twix Thumbprint Cookies. For those who are lactose intolerant, consider using a plant-based butter in place of unsalted butter.
If you’re gluten-sensitive, substituting the all-purpose flour with a gluten-free blend can work well, ensuring you get that classic cookie texture. Additionally, if you prefer a vegan option, using a flax egg or store-bought egg replacer can replace the egg, and you can explore vegan chocolate options.
How to Make Twix Thumbprint Cookies – Step-by-Step Directions
Step 1 – Prepare Ingredients
Start by gathering all your ingredients. Make sure your butter is softened as it blends better with the sugars, ensuring a light and fluffy texture. Preheat your oven to 350°F (175°C) and line two baking sheets with parchment paper for easy cleanup.
Step 2 – Cook the Base
In a large bowl, beat together the softened butter, granulated sugar, and brown sugar until the mixture is light and fluffy. This should take about 2 minutes. It’s crucial to achieve this airy consistency for the perfect cookie.
Step 3 – Mix in Egg and Vanilla
Once you’ve got that fluffy mixture, add in the egg along with the vanilla extract. Mix until smooth, ensuring that all the ingredients are well incorporated. The vanilla will add a delightful aroma to your cookie dough.
Step 4 – Add Flour and Salt
Gradually mix in the all-purpose flour and salt. It’s important to mix just until a soft dough forms to avoid overworking the flour, which can lead to tough cookies. The dough should be soft yet firm enough to hold its shape.
Step 5 – Form Cookie Balls
Scoop the dough into 1½-tablespoon balls and roll them between your palms to create a smooth surface. Ensure that each ball is uniform in size for even baking.
Step 6 – Place on Baking Sheets
Place the dough balls on your prepared baking sheets, ensuring they are spaced about 2 inches apart. This space allows them to spread slightly while baking without merging into one another.
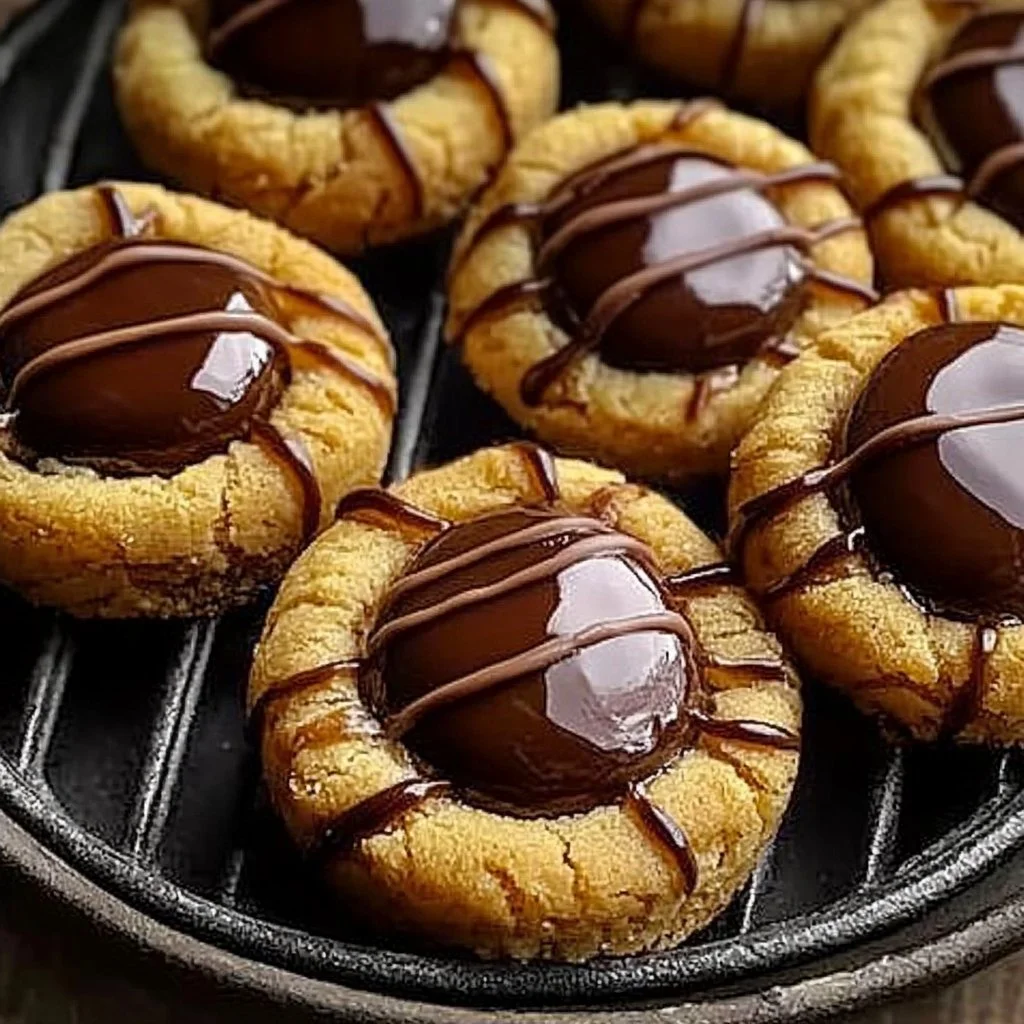
Step 7 – Create a Thumbprint
Using your thumb or the back of a teaspoon, press firmly into the center of each ball to create an indentation. This is crucial as it will hold the caramel later, ensuring a deliciously gooey center.
Step 8 – Bake the Cookies
Bake in the preheated oven for about 12–14 minutes, or until the edges are lightly golden. Keep an eye on your cookies, as baking times may vary slightly based on your oven’s characteristics.
Step 9 – Prepare the Caramel Filling
While the cookies are baking, combine soft caramel candies with heavy cream in a small saucepan over low heat. Stir continuously until the mixture is smooth. This will be the luscious filling for your cookies.
Step 10 – Fill Cookies and Add Chocolate
Remove the cookies from the oven and let them cool for about 10 minutes. Spoon the warm caramel into the centers of the cookies. For the finishing touch, melt chocolate chips with the coconut oil and drizzle or spoon it over the caramel layer.
Serving Suggestions for Twix Thumbprint Cookies
Best Occasions to Serve This Dish
These cookies shine at various occasions. They make fantastic holiday treats, especially during Christmas when everyone loves a good sweet to share. You can also bake them for birthday parties or gatherings where sweet delights are on the table.
Since they are visually appealing and deliciously indulgent, serving them at a coffee break or as dessert at a dinner party will impress your guests. Just imagine the compliments you’ll receive for such a delightful and original creation!
What to Serve With It
Twix Thumbprint Cookies pair wonderfully with a cup of coffee or a glass of milk, enhancing their sweetness. If you’re feeling adventurous, try serving them with a scoop of vanilla ice cream or alongside a rich chocolate mousse for an unforgettable dessert experience.
You could also serve them at a whimsical tea party with an assortment of beverages, making them a delightful centerpiece.
How to Store Twix Thumbprint Cookies Properly
Best Storage Practices
To keep your Twix Thumbprint Cookies fresh and delicious, store them in an airtight container at room temperature. They can last for about a week without losing their flavor. If you want to maintain their optimal freshness, consider layering them with parchment paper to prevent sticking.
Reheating and Freezing Tips
If you want to enjoy your cookies warm later, simply reheat them in the microwave for a few seconds. For longer storage, you can freeze Twix Thumbprint Cookies. Make sure they are layered in an airtight container with parchment paper in between to prevent them from sticking together. Thaw them at room temperature before enjoying.
Tips & Tricks for Twix Thumbprint Cookies
Mistakes to Avoid
- Overmixing the Dough: Mixing too much can lead to tough cookies. Mix just until combined for a softer texture.
- Skipping the Parchment Paper: Baking directly on the pan can cause cookies to stick. Always line your baking sheets.
- Not Pressing the Thumbprint Firmly Enough: A shallow indentation won’t hold the caramel well. Make sure to press down firmly.
- Misjudging Baking Time: Keep an eye on your cookies. The edges should be golden, and the centers slightly soft.
- Not Letting Cookies Cool: Filling cookies with caramel while they’re too hot can cause it to leak. Always let them cool for the right amount of time.
Extra Tips for Better Results
- Use Fresh Ingredients: Ensure your baking ingredients, like baking soda and chocolate, are fresh for the best flavors.
- Experiment with Fillings: Don’t hesitate to try different fillings like fruit jams or nut butters in place of caramel for a unique twist.
- Presentation Matters: For an elegant look, consider drizzling chocolate on top and sprinkling a little sea salt or crushed nuts before serving.
Recipe Variations of Twix Thumbprint Cookies
Creative Twists
- Nutty Delight: Incorporate finely chopped nuts into the dough for a crunchier texture. Walnuts or pecans pair beautifully with the caramel.
- Seasonal Flavors: Add spices like cinnamon or pumpkin spice during fall to switch up the flavors. This gives a seasonal twist to your cookies.
- Chocolate Chip Addition: Mix in some chocolate chips directly into the dough for an extra chocolaty experience.
Dietary Adjustments
For a vegan version, swap out the butter for coconut oil and use flax eggs instead of regular eggs. For those needing gluten-free options, choose a gluten-free flour blend to ensure everyone can enjoy these treats.
Conclusion about Twix Thumbprint Cookies
In a world filled with a myriad of cookie recipes, Twix Thumbprint Cookies stand out as a delightful and unique treat. Their beautiful presentation, irresistible flavors, and simple recipe make them a joy to bake and share. As you explore this recipe, don’t hesitate to get creative with variations based on personal preferences and occasions.
Imagine the happiness as you bite into a soft cookie, the caramel filling spilling deliciously as you savor each moment. Whether for a special celebration or a casual snack, there’s no denying the charm of Twix Thumbprint Cookies. Try this recipe today, and you’ll soon wonder how you ever lived without this fantastic dessert in your life!
FAQs about Twix Thumbprint Cookies
How long do Twix Thumbprint Cookies last?
When stored properly in an airtight container, Twix Thumbprint Cookies can last up to a week at room temperature.
Can I make these cookies ahead of time?
Yes, you can prepare the dough ahead of time and refrigerate it for up to 3 days before baking. Just allow the dough to warm slightly before scooping and baking.
Can I freeze Twix Thumbprint Cookies?
Absolutely! They freeze well. Just make sure they are in a single layer in an airtight container with parchment paper between layers.
What can I substitute for caramel candies?
If you don’t have caramel candies, you could use homemade caramel sauce or even chocolate ganache for a different twist.
Can I use different chocolate types?
Yes! This recipe allows for creativity. Dark chocolate or white chocolate can provide a unique flavor experience.
How do I prevent the cookies from spreading too much?
Chill the dough for about 30 minutes before baking if you notice them spreading too much.
What can I use instead of heavy cream for the caramel?
You may use half-and-half or coconut cream as a lighter alternative if heavy cream is not available.
How do I know when the cookies are done?
The edges should be lightly golden while the centers look slightly underbaked. They will firm up as they cool.

Twix Thumbprint Cookies
Ingrédients
For the cookie base
- 1 cup unsalted butter, softened Use plant-based butter for a dairy-free version.
- ½ cup granulated sugar
- ¼ cup brown sugar
- 1 large egg Replace with flax egg for vegan.
- 1 teaspoon vanilla extract
- 2 ¼ cups all-purpose flour Use gluten-free blend for gluten-free version.
- ¼ teaspoon salt
For the caramel filling
- 20 pieces soft caramel candies Can use homemade caramel.
- 2 tablespoons heavy cream Substitute with half-and-half or coconut cream.
For the chocolate topping
- ¾ cup milk chocolate chips Dark or white chocolate can be used.
- 1 teaspoon coconut oil or vegetable oil
Instructions
Preparation
- Gather all your ingredients. Make sure the butter is softened. Preheat your oven to 350°F (175°C) and line two baking sheets with parchment paper.
- In a large bowl, beat together the softened butter, granulated sugar, and brown sugar until light and fluffy, about 2 minutes.
- Add in the egg and vanilla extract, mixing until smooth and well incorporated.
- Gradually mix in the all-purpose flour and salt until a soft dough forms.
Baking
- Scoop the dough into 1½-tablespoon balls, rolling them into smooth shapes.
- Place the dough balls on the prepared baking sheets, spaced about 2 inches apart.
- Create a thumbprint in each ball using your thumb.
- Bake for about 12–14 minutes or until the edges are lightly golden.
- While the cookies are baking, combine the caramel candies with heavy cream in a saucepan over low heat, stirring until smooth.
- Remove the cookies from the oven and let cool for 10 minutes. Fill the thumbprint with warm caramel.
- Melt the chocolate chips with the coconut oil, then drizzle or spoon it over the caramel on each cookie.