

Table of Contents
Introduction to Homemade Chocolate Gifts
Are you looking for the perfect way to show someone you care? Have you ever considered the joy of creating delectable treats right from your kitchen? Homemade Chocolate Gifts might just be the answer. These treats not only satisfy sweet cravings but also carry heartfelt intentions. Imagine the warm glow of gratitude when your loved ones receive beautifully shaped chocolates crafted with your own hands.
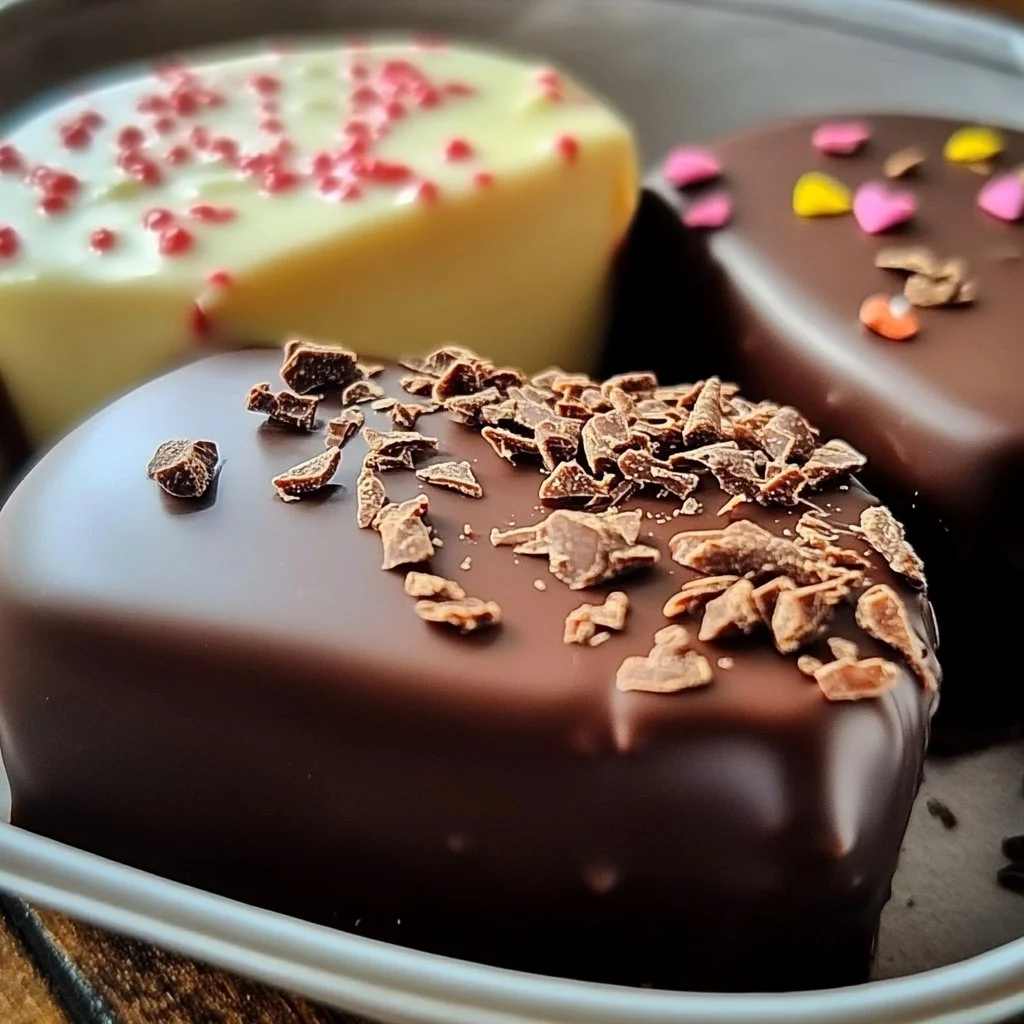
What makes this Homemade Chocolate Gifts recipe so special? It’s simplicity. You can whip up a batch in just a handful of steps, choosing from dark, milk, or white chocolate. You have the freedom to add your favorite toppings, making each piece a unique creation. This versatility means you can cater to different tastes and dietary preferences, all while providing a delightful treat.
Whether it’s for a birthday, holiday, or just because, these treats can elevate any occasion. Your friends and family will appreciate not just the thought behind the gift but also the exquisite taste of homemade chocolates. Are you ready to embark on this delicious journey?
Key Benefits of Homemade Chocolate Gifts
Why You’ll Love This Recipe
- Easy to make with minimal ingredients.
- Customizable with your favorite toppings.
- Perfect for any occasion, from birthdays to holidays.
- Adds a personal touch to gifting.
- Can accommodate dietary restrictions (with simple swaps).
- Fantastic flavor that exceeds store-bought options.
What Makes It Stand Out
Homemade Chocolate Gifts stand out due to their originality. Unlike store-bought chocolates often filled with artificial flavors and preservatives, these treats feature pure ingredients that you select. Personalization is a key element; whether you want to create something for a chocolate lover or satisfy someone with a nut allergy, you have full control over what goes into each piece.
Additionally, these chocolates can be a wonderful bonding activity. Invite friends or family members to join in the chocolate-making process, making it a fun and memorable experience. The chance to get creative and experiment in the kitchen is an extra bonus of this recipe.
Ingredients for Homemade Chocolate Gifts
Complete Ingredient List with Measurements
- Dark chocolate: 200g
- Milk chocolate: 200g
- White chocolate: 200g
- Add-ins: nuts, dried fruits, or sprinkles (½ cup each recommended)
- Molds for shaping chocolates
- Gift packaging (optional)
Substitutes and Alternatives
If you have allergies or dietary restrictions, don’t worry. For those who are lactose intolerant or vegan, you can find excellent dairy-free chocolate alternatives available in stores. Dark chocolate, in particular, often comes without milk ingredients.
For nut allergies, simply skip the nuts and opt for dried fruits or even various flavors of sprinkles. The best part is that you can tailor the Homemade Chocolate Gifts recipe to suit anyone’s needs.
How to Make Homemade Chocolate Gifts – Step-by-Step Directions
Step 1 – Prepare Ingredients
Gather all your ingredients and ensure you have your molds ready. It’s essential to work with chocolate that has room temperature, allowing easier melting.
Step 2 – Cook the Base
Melt the dark chocolate in the microwave or double boiler. This process typically takes about 1-2 minutes, ensuring you stir intermittently to achieve a smooth texture.
Step 3 – Prepare Molds
Once melted, pour the dark chocolate into your molds, filling them halfway. Make sure you give the molds gentle taps against the counter to eliminate air bubbles.
Step 4 – Add Toppings
Sprinkle your favorite nuts, dried fruits, or sprinkles into the chocolate-filled molds. This step allows you to customize your chocolates based on personal preferences and dietary needs.
Step 5 – Finish with Chocolate
Cover the add-ins with more melted chocolate until the molds are filled to the top. This sealing ensures that all toppings are incorporated and the flavors meld beautifully.
Step 6 – Refrigerate
Let the chocolates cool in the refrigerator until completely set. This usually takes about 30-60 minutes, depending on the size of your molds.
Step 7 – Remove from Molds
Once set, gently remove the chocolates from the molds. Take your time to avoid breaking them.
Step 8 – Package for Gifting
If desired, you can package them in decorative boxes or bags, creating a thoughtful presentation for your Homemade Chocolate Gifts.
Serving Suggestions for Homemade Chocolate Gifts
Best Occasions to Serve This Dish
These chocolates are wonderful for various occasions. Birthdays become more special with personalized treats. During holidays like Valentine’s Day and Christmas, these chocolates can be a heartfelt symbol of affection. They also work perfectly as a simple gesture to say “thank you” or “I appreciate you.”
What to Serve With It
Consider serving your Homemade Chocolate Gifts alongside a warm cup of coffee or tea for the ultimate sweet experience. They can also be delightful complements to a dessert buffet, providing a touch of elegance and sweetness that appeals to everyone.
How to Store Homemade Chocolate Gifts Properly
Best Storage Practices
Store your chocolates in an airtight container at room temperature for optimal freshness. If the weather is particularly warm, consider refrigeration to prevent melting.
Reheating and Freezing Tips
If you ever need to repurpose or thaw your chocolates, let them sit at room temperature for a couple of hours. This ensures they regain their perfect texture. Do not microwave to reheat, as this can alter the chocolate’s quality.
Tips & Tricks for Homemade Chocolate Gifts
Mistakes to Avoid
- Overheating the chocolate: Always melt chocolate gently to prevent burning.
- Not using a double boiler: This method provides better temperature control.
- Skipping the refrigeration step: Allowing chocolates to set is crucial for proper texture.
- Pouring too fast: Go slow to reduce air bubbles in your molds.
- Forgetting to grease the molds: If not using silicone molds, a light grease helps with removal.
Extra Tips for Better Results
Use high-quality chocolate for the best flavor. Experiment with various add-ins like spices or sea salt to elevate your chocolates. Also, consider decorating the finished chocolates with edible glitter or gold leaf for a luxurious touch.
Recipe Variations of Homemade Chocolate Gifts
Creative Twists
- Mint Chocolate: Add a few drops of peppermint extract for a refreshing twist.
- Spicy Chocolate: Incorporate a dash of chili powder to give your chocolates a kick.
- Fruit Infusion: Blend in flavors like raspberry or orange zest into the melted chocolate for a fruity touch.
Dietary Adjustments
For vegan versions, swap out dairy chocolates for plant-based alternatives. You can use gluten-free chocolate to cater to gluten-sensitive guests, ensuring everyone can indulge in these delightful Homemade Chocolate Gifts.
Conclusion about Homemade Chocolate Gifts
In conclusion, Homemade Chocolate Gifts are not just delicious; they are a heartfelt way of showing love and appreciation. With their customizable nature and ease of preparation, anyone can create these delightful treats. Whether you’re celebrating a special occasion or simply want to brighten someone’s day, these chocolates are sure to impress. By choosing your ingredients and experimenting with flavors, you create something unique and special. So why not dive into this lovely culinary experience? You’ll enjoy every moment of creating and sharing these delightful homemade gifts.
FAQs about Homemade Chocolate Gifts
Can I make these chocolates ahead of time?
Yes, you can prepare these in advance. They stay fresh for about two weeks if stored correctly.
How do I store leftover chocolates?
Store leftover chocolates in an airtight container in a cool, dry place to maintain their quality.
Can I freeze Homemade Chocolate Gifts?
Yes, chocolates can be frozen, but make sure they are well-wrapped in an airtight container.
What type of chocolate is best to use?
Using high-quality chocolate is recommended for the best flavor. Brands with high cocoa content tend to work well.
Can I substitute the chocolate for something else?
You can use dairy-free chocolate for a vegan version or even experiment with flavored chocolate melts.
How do I prevent the chocolate from seizing?
Ensure your bowls and utensils are completely dry and avoid water contact while melting chocolate.
What is the best way to melt chocolate?
A double boiler or microwave on low power, stirring frequently, is effective for melting chocolate without burning it.
Why are my chocolates sticking to the molds?
If you’re not using silicone molds, greasing them lightly before pouring in the chocolate can help prevent sticking.

Homemade Chocolate Gifts
Ingrédients
Chocolates Base
- 200 g dark chocolate Use high-quality chocolate for the best flavor.
- 200 g milk chocolate For a dairy-free option, use dairy-free chocolate.
- 200 g white chocolate Ensure it is high-quality for better results.
Add-ins
- ½ cup nuts Skip for nut allergies.
- ½ cup dried fruits Choose your favorite types.
- ½ cup sprinkles Great for color and fun.
Miscellaneous
- 1 set molds for shaping chocolates Silicone molds work best.
- as needed gift packaging For presenting your chocolates.
Instructions
Preparation
- Gather all your ingredients and ensure you have your molds ready.
- Make sure the chocolate is at room temperature for easier melting.
Cooking
- Melt the dark chocolate in the microwave or double boiler, stirring intermittently for 1-2 minutes.
- Pour the melted dark chocolate into molds, filling them halfway.
- Tap molds gently against the counter to eliminate air bubbles.
- Sprinkle your chosen nuts, dried fruits, or sprinkles into the chocolates.
- Cover add-ins with more melted chocolate until molds are full.
- Refrigerate until completely set, approximately 30-60 minutes.
- Gently remove the chocolates from the molds once set.
- Package the chocolates in decorative boxes or bags for gifting.