
Table of Contents
Introduction to Homemade Chocolates
Who doesn’t adore the sweet, melting pleasure of chocolate? Homemade chocolates hold a special place in our hearts, especially when they are crafted with care in our very own kitchens. Imagine creating your own delicious treats, bursting with flavor and entirely customizable. What could be better than indulging in rich, creamy bites that you’ve made yourself? This recipe for Homemade Chocolates is not just a simple endeavor; it’s an experience, an art form that brings joy both in the making and the sharing.
The magic of Homemade Chocolates lies in their ease of preparation. With just a handful of ingredients, you can whip up a batch that rivals any store-bought confectionery. Dark chocolate and milk chocolate combine to create a delightful balance of bitterness and creaminess, while the addition of heavy cream transforms them into a velvety-smooth filling. The touch of vanilla elevates the flavor, transforming ordinary chocolate into something truly extraordinary.
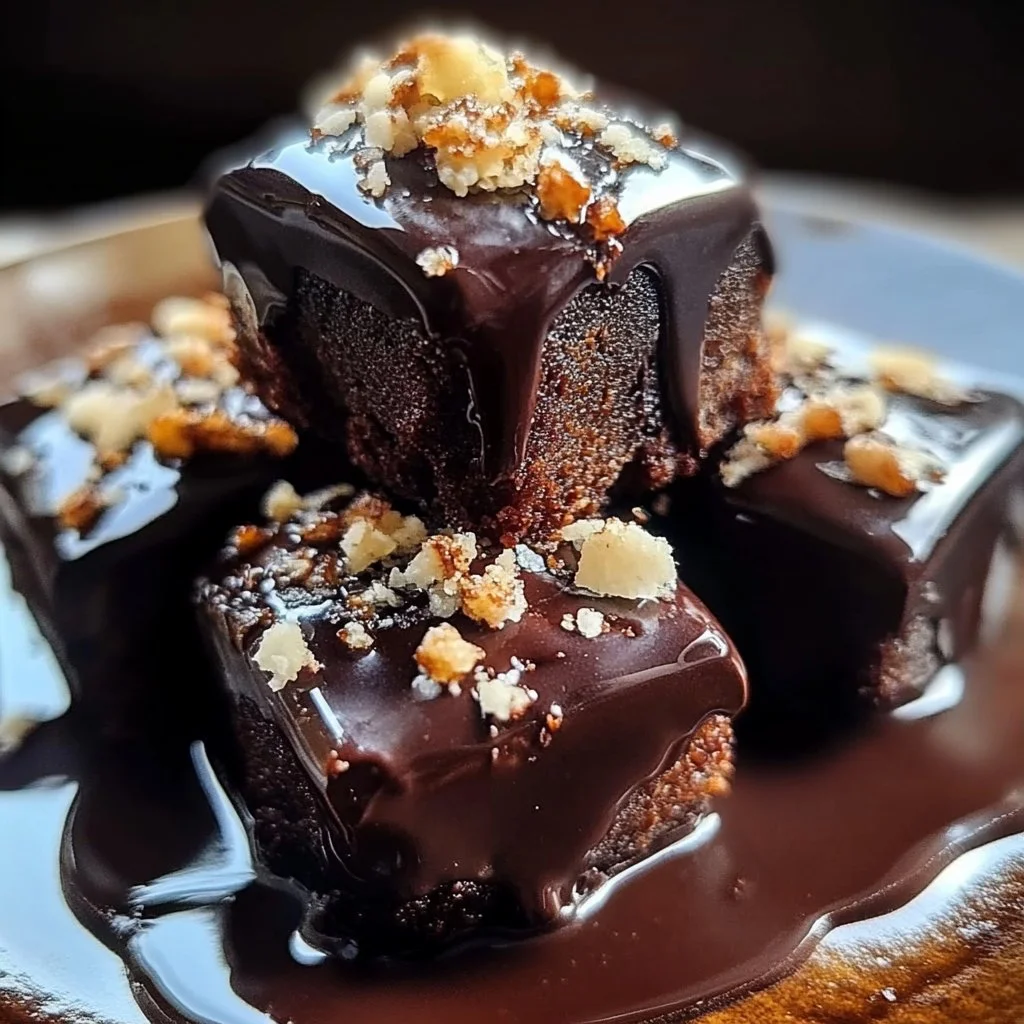
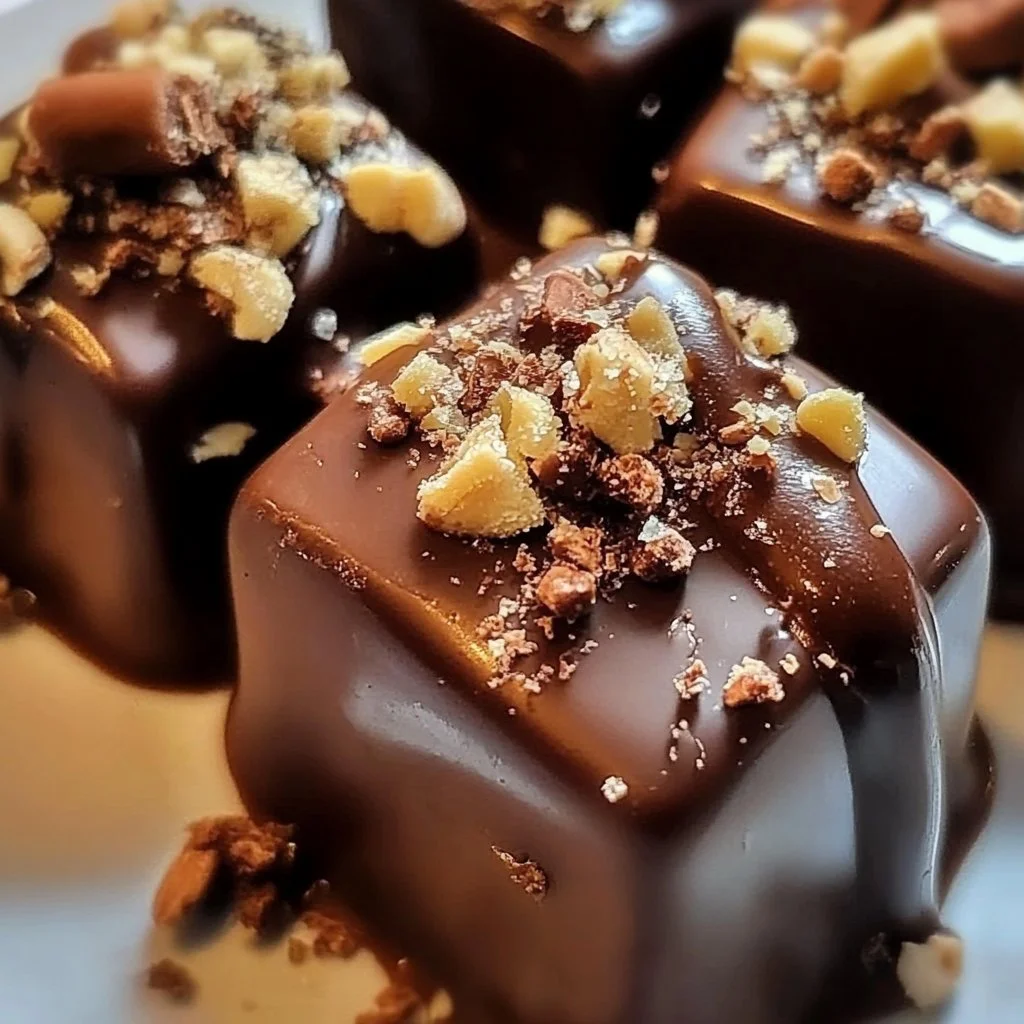
But the best part? You have complete control over the toppings! Whether you prefer the crunch of nuts, the sweetness of sprinkles, or the elegance of sea salt, the possibilities are endless. These homemade delights not only cater to your taste buds but also allow for personal touches that make them unique to your style. Next time you’re hosting a gathering, or simply want to pamper yourself, Homemade Chocolates will surely impress and satisfy.
Key Benefits of Homemade Chocolates
Why You’ll Love This Recipe
- Flavor Explosion: The combination of dark and milk chocolate creates a rich flavor profile everyone will love.
- Simplicity: With just a few ingredients, this recipe is easy to follow, perfect for beginners.
- Versatility: Customize with your favorite toppings for a truly unique treat.
- Freshness: Enjoy the delicious taste of chocolates made from fresh ingredients in your kitchen.
- Gift-Worthy: Package them beautifully for a personal touch—ideal for gifts.
- Fun Activity: Making chocolates can be a delightful family or friends’ activity, spreading joy and creativity.
What Makes It Stand Out
Homemade Chocolates stand out due to their adaptability. You can mix and match chocolates, adjust the sweetness, and play with flavors, ensuring that every batch is a little different from the last. This customization allows you to cater to various tastes or dietary preferences, making it a versatile option for any occasion. Whether it’s a birthday, a holiday, or simply a Tuesday, Homemade Chocolates bring a touch of indulgence to the everyday.
What truly sets this recipe apart is the magic of creating something delicious from scratch. This experience invites creativity and exploration into the kitchen. You can try various toppings, flavors, and designs, unleashing your inner chocolatier. With homemade chocolates, you’re not just making candy; you’re crafting memories!
Ingredients for Homemade Chocolates
Complete Ingredient List with Measurements
- 200g dark chocolate
- 100g milk chocolate
- 100g heavy cream
- 1 teaspoon vanilla extract
- Toppings of your choice (nuts, sprinkles, sea salt, etc.)
Substitutes and Alternatives
If you’re looking for substitutes due to dietary restrictions, there are several options available. For those who are dairy-free, you can replace heavy cream with coconut cream or a dairy-free alternative. For a fully vegan version, dark chocolate that’s labeled as dairy-free can be used in place of the chocolate types listed. If you’re gluten intolerant, this recipe is naturally gluten-free, ensuring everyone can enjoy the treat without worry.
For sweetness adjustments, you can add a bit of honey or maple syrup if you prefer a hint of natural sweetness. The beauty of Homemade Chocolates is that they accommodate various dietary needs while still delivering that beloved chocolate flavor.
How to Make Homemade Chocolates – Step-by-Step Directions
Step 1 – Prepare Ingredients
Start by chopping the dark and milk chocolate into small, even pieces. This will ensure that they melt uniformly when combined with the cream. Place the chopped chocolate in a heat-proof bowl, making sure it’s ready for the next step.
Step 2 – Cook the Base
In a small saucepan, gently heat the heavy cream over medium heat until it is hot but not boiling. This should take around 3–5 minutes. Once heated, pour the cream over the chopped chocolate and let it rest for about a minute. This resting period allows the chocolate to melt effectively.
Step 3 – Combine Mixtures
After the minute has passed, use a spatula or a whisk to stir the mixture. Begin gently mixing, starting at the center and gradually working your way outwards. Continue stirring until the mixture transforms into a smooth and creamy texture.
Step 4 – Add Flavor
Once the chocolate and cream combine beautifully, add in the teaspoon of vanilla extract. This will enhance the flavor profile of your chocolates, adding a delightful aromatic component.
Step 5 – Mold the Chocolates
Pour the luscious chocolate mixture into your chosen candy molds or a lined tray. Make sure to fill each mold evenly to achieve uniform shapes. If using a tray, you may want to smooth it out with a spatula for an even surface.
Step 6 – Add Toppings
Before the mixture sets, sprinkle your favorite toppings over the chocolates. This is the time to get creative! Whether it’s nuts for crunch, fun sprinkles for color, or a dash of sea salt for a sweet-salty contrast, make them your own.
Step 7 – Refrigerate Until Firm
Place the molds or tray in the refrigerator and let the chocolates set for at least 1–2 hours, or until they are firm to the touch. This step is crucial for achieving that perfect texture.
Step 8 – Pop Them Out and Enjoy
Once the chocolates are completely firm, carefully pop them out of the molds or cut them into pieces from the tray. The excitement of unveiling your Homemade Chocolates is unbeatable!
Serving Suggestions for Homemade Chocolates
Best Occasions to Serve This Dish
Homemade Chocolates are the perfect treat for many occasions. Birthdays and anniversaries can be brightened with a personalized box of chocolates. They’re also an excellent option for holiday gatherings, bringing joy and sweetness to festive celebrations. Don’t forget casual get-togethers with friends; a plate of these treats can elevate any snack time into a special affair.
What to Serve With It
When serving Homemade Chocolates, you might consider pairing them with a variety of beverages. A robust cup of coffee complements the deep flavors of dark chocolate beautifully. For a lighter option, serve with a glass of milk or a fruity herbal tea. You can also offer fresh fruits or a light cheese platter to contrast the richness of the chocolates and create a delightful snack spread.
How to Store Homemade Chocolates Properly
Best Storage Practices
To ensure your Homemade Chocolates remain fresh, store them in an airtight container in the fridge. This will help maintain their texture and flavor. Ideally, keep the chocolates separated via parchment paper to prevent them from sticking together.
Reheating and Freezing Tips
If you need to store the chocolates long-term, consider freezing them. Place the chocolates in a freezer-safe container, separating layers with parchment paper. To thaw, simply move them to the fridge for a few hours before consuming. Avoid reheating them; enjoying them cold or at room temperature enhances their flavor and delight.
Tips & Tricks for Homemade Chocolates
Mistakes to Avoid
- Overheating the Cream: Ensure the cream is hot but not boiling, which could spoil the chocolate texture.
- Not Chopping Chocolate Evenly: Uneven pieces will melt at different rates, leading to a lumpy mixture.
- Skipping the Rest Period: Allowing the chocolate to sit with the cream is essential for smooth melting.
- Overfilling Molds: Take care not to overfill to avoid messy edges and difficulty in removing chocolates.
- Ignoring Temperature: Chocolates should completely cool and firm up before being removed from molds.
- Rushing the Topping: Adding your toppings too late can result in them sinking into the mixture.
Extra Tips for Better Results
Consider flavoring the creams with spices or liqueurs for added depth. A pinch of sea salt can enhance sweetness, creating a delightful contrast. For a gourmet touch, drizzle melted chocolate on top of the finished chocolates for a decorative finish.
Recipe Variations of Homemade Chocolates
Creative Twists
For a fun twist on the classic recipe, try adding flavored extracts like almond or peppermint to the chocolate mixture. You can also fold in toasted coconut, dried fruits, or even crushed cookies to the chocolate mix for added texture. Another exciting variation is to create layered chocolates by filling molds with one type of chocolate before adding another layer after cooling slightly.
Dietary Adjustments
For a vegan and dairy-free option, use coconut cream and dairy-free chocolates. You can also explore gluten-free toppings, ensuring all choices align with dietary needs while maintaining delicious flavors.
Conclusion about Homemade Chocolates
Making Homemade Chocolates is not just about satisfying a sweet tooth; it’s about creativity, customization, and fostering a connection with loved ones. There’s something profoundly rewarding about creating these delightful treats in the comfort of your home. The process is as enjoyable as the end product, allowing you to experiment with flavors and designs.
Whether you make them to share at parties or indulge yourself, these chocolates promise to impress. With easy-to-follow directions and simple ingredients, you can create something that feels both indulgent and heartfelt. So, don’t hesitate—dive into the world of Homemade Chocolates and discover the joy of handmade confections that are made just the way you love them.
FAQs about Homemade Chocolates
How long do Homemade Chocolates last?
Homemade Chocolates can last for about two weeks in the fridge when stored in an airtight container.
Can I use milk chocolate instead of dark chocolate?
Yes, you can substitute all dark chocolate with milk chocolate if you prefer a sweeter chocolate flavor.
Can I make Homemade Chocolates ahead of time?
Absolutely! You can prepare Homemade Chocolates a few days in advance. Just store them in the fridge until you’re ready to serve.
What are the best toppings to use for Homemade Chocolates?
Some of the best toppings include chopped nuts, sea salt, coconut flakes, sprinkles, and crushed cookies.
Can I freeze Homemade Chocolates?
Yes, you can freeze them. Pack them in an airtight container, separating layers with parchment paper.
What is the best way to melt chocolate?
The best method is using a double boiler. You can also melt chocolate in the microwave in short bursts, stirring in between.
Can I add flavored extracts to the chocolate mixture?
Yes, you can enhance the flavor by adding extracts like peppermint, almond, or orange to the chocolate mixture.
How do I ensure my chocolates look professional?
Ensure even melting and proper cooling. Using high-quality chocolate and letting the chocolates set fully will enhance their appearance.
Can I use non-dairy cream?
Certainly! You can use coconut cream or other non-dairy alternatives for a dairy-free version of Homemade Chocolates.
What is the best way to serve Homemade Chocolates?
Serve them in a decorative box, alongside a coffee or tea pairing to enhance the tasting experience.

Homemade Chocolates
Ingrédients
For the Chocolate Base
- 200 g dark chocolate Chopped into small pieces
- 100 g milk chocolate Chopped into small pieces
- 100 g heavy cream Heat until hot but not boiling
- 1 teaspoon vanilla extract For flavor enhancement
Toppings (Optional)
- nuts Chopped or whole, for crunch
- sprinkles For color and fun
- sea salt For a sweet-salty contrast
Instructions
Preparation
- Chop the dark and milk chocolate into small, even pieces.
- Place the chopped chocolate in a heat-proof bowl.
Cook the Base
- In a small saucepan, gently heat the heavy cream over medium heat until hot but not boiling (about 3-5 minutes).
- Pour the cream over the chopped chocolate and let it rest for about a minute.
Combine Mixtures
- Stir the mixture gently with a spatula or a whisk until smooth and creamy.
Add Flavor
- Add the teaspoon of vanilla extract to the chocolate mixture.
Mold the Chocolates
- Pour the chocolate mixture into candy molds or a lined tray.
- Fill each mold evenly for uniform shapes.
Add Toppings
- Sprinkle your desired toppings over the mixture before it sets.
Refrigerate
- Place the molds or tray in the refrigerator for at least 1-2 hours until firm.
Enjoy
- Once firm, carefully pop the chocolates out of the molds or cut them into pieces.