
Table of Contents
Introduction to Homemade Pop Tarts with Pie Crust: 5 Reasons to Indulge
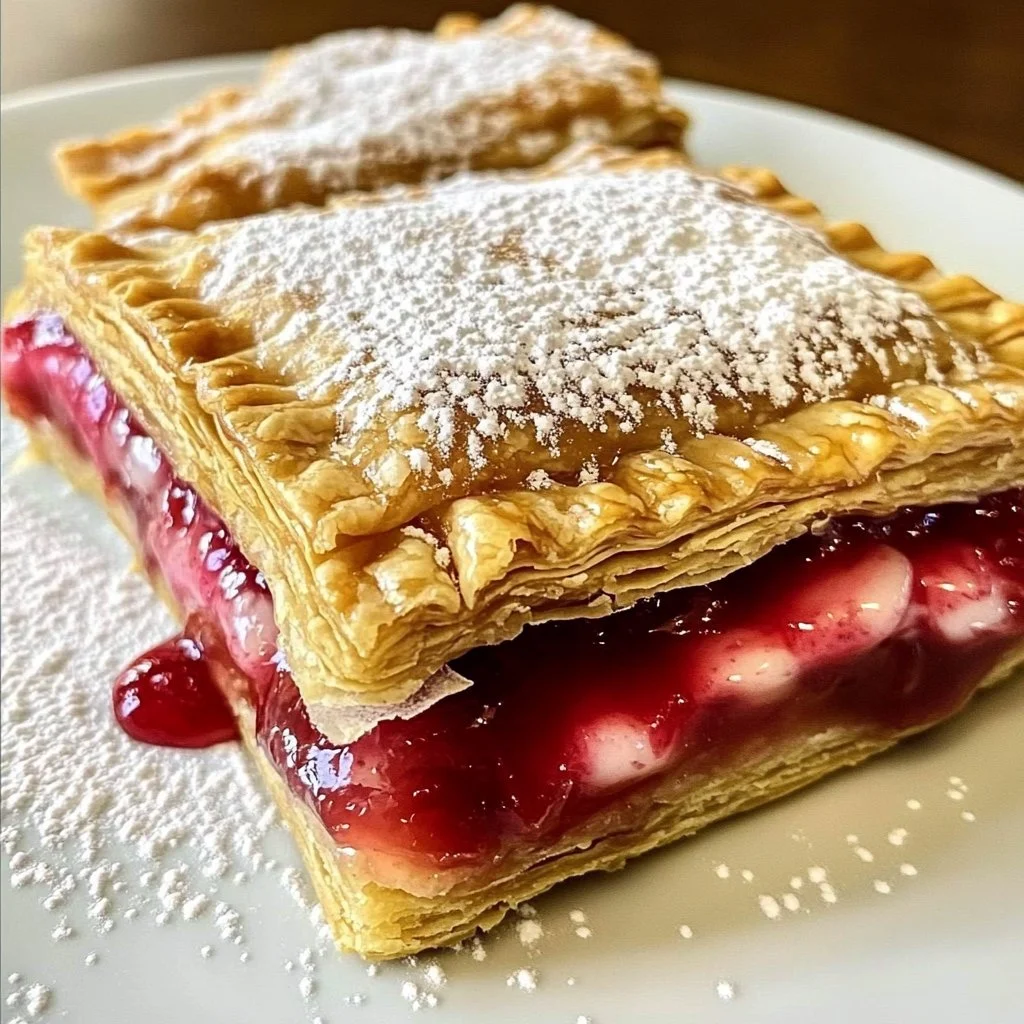
Have you ever enjoyed a warm, flaky pastry filled with delicious fruit jam, all while reminiscing about simpler times? If you have a fondness for sweet, nostalgic treats, then you’ll want to give Homemade Pop Tarts with Pie Crust: 5 Reasons to Indulge a try. This fun and customizable recipe captures the essence of childhood memories while providing a delightful homemade twist.
Homemade pop tarts offer a unique opportunity to get creative in the kitchen. Instead of reaching for a store-bought pastry filled with artificial ingredients, why not create your own with fresh fillings made from real fruit? Imagine biting into a golden-brown crust that melts in your mouth, paired with a burst of your favorite jam or fruit filling. Doesn’t that sound delicious?
What sets this recipe apart is not just the amazing taste but the simplicity involved in making them, using ingredients likely found in your pantry. The combination of all-purpose flour, butter, and sugar creates a manageable dough that you can roll out and shape with ease. The choices for fillings are virtually endless, allowing you to customize each pop tart to suit your cravings.
Furthermore, Homemade Pop Tarts with Pie Crust: 5 Reasons to Indulge is a fantastic way to bring family and friends together. They make great treats for a cozy brunch, a whimsical dessert, or even festive gatherings. The excitement of creating pop tarts filled with everyone’s favorite flavors is a wonderful way to unite in the spirit of indulgence.
As you embark on this culinary adventure, you’ll discover not only how delicious these homemade pastries are but also the joy they bring to you and your loved ones. So, gather your ingredients, roll up your sleeves, and let’s dive into the delightful world of homemade pop tarts!
Key Benefits of Homemade Pop Tarts with Pie Crust: 5 Reasons to Indulge
Why You’ll Love This Recipe
- Flavor Explosion: The homemade filling provides a burst of flavor that store-bought options can’t match.
- Simple Ingredients: Most of the ingredients are pantry staples, making this recipe easy to whip up.
- Versatile Customization: Fillings can match various taste preferences, from sweet jams to savory options.
- Nostalgic Comfort: This recipe evokes memories of childhood treats, offering a comforting bite of nostalgia.
- Fun Activity: Making pop tarts can be an enjoyable experience for families or groups, perfect for bonding.
What Makes It Stand Out
These homemade pop tarts are not just your average pastry; they are a blank canvas for flavors. The ability to choose your own fillings transforms a simple recipe into a personalized treat. Want strawberry jam today? Go for it! Craving something more adventurous like lemon curd or chocolate ganache tomorrow? Your pop tarts, your rules!
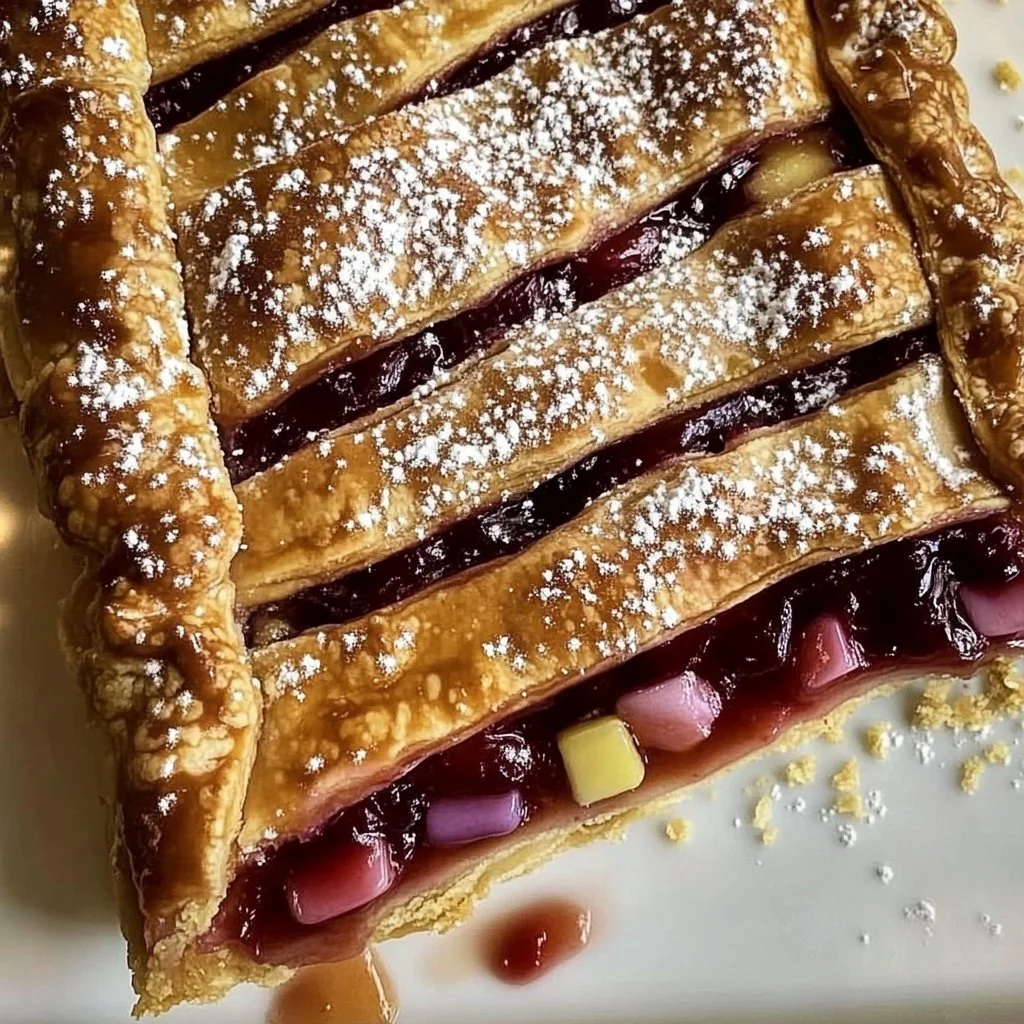
Moreover, the flaky texture of the pie crust is a significant upgrade from the usual pop tart variety. With Homemade Pop Tarts with Pie Crust: 5 Reasons to Indulge, you enjoy a satisfying crunch before diving into the lovely, sweet filling. The feeling of accomplishment from crafting these pastries from scratch is a bonus that elevates the entire experience.
Ingredients for Homemade Pop Tarts with Pie Crust: 5 Reasons to Indulge
Complete Ingredient List with Measurements
- 2 cups all-purpose flour
- 1 teaspoon salt
- 1 tablespoon sugar
- 1 cup unsalted butter, chilled and diced
- 6 to 8 tablespoons ice water
- 1 cup fruit jam or filling of your choice
- 1 egg
- 1 tablespoon milk
- Powdered sugar for icing
Substitutes and Alternatives
If you have specific dietary concerns or allergies, this recipe can be easily adapted. For those avoiding gluten, a gluten-free flour blend can work well as a substitute. Make sure to check that your jam or filling is gluten-free as well. If a dairy-free option is needed, use plant-based butter instead of regular butter, and an egg replacement such as flaxseed or a commercial egg replacer can help maintain the recipe’s structure.
If you’re aiming for reduced sugar, you could opt for low-sugar fruit spreads or homemade fruit fillings that use less sugar or natural sweeteners. There are plenty of ways to make Homemade Pop Tarts with Pie Crust: 5 Reasons to Indulge while catering to dietary needs.
How to Make Homemade Pop Tarts with Pie Crust: 5 Reasons to Indulge – Step-by-Step Directions
Step 1 – Prepare Ingredients
Start by gathering all your ingredients. Measure out the flour, salt, sugar, and butter. Ensure your butter is chilled for that perfect flaky crust.
Step 2 – Cook the Base
In a mixing bowl, combine the flour, salt, and sugar. Use a pastry cutter or fork to cut in the chilled butter until the mixture resembles coarse crumbs. It’s essential to handle the butter as little as possible to keep the dough light and flaky.
Step 3 – Mix the Dough
Stir in the ice water, adding a tablespoon at a time, until the mixture forms a cohesive ball. Don’t over-mix; you want a tender pastry.
Step 4 – Chill the Dough
Wrap the dough ball in plastic wrap and refrigerate it for at least 30 minutes. Chilling helps solidify the butter, which leads to a flakier crust once baked.
Step 5 – Roll Out Dough
After chilling, remove the dough from the fridge. Place it on a floured surface and roll it out to about 1/8 inch thick. Try to maintain an even thickness throughout for consistent baking.
Step 6 – Cut into Shapes
Using a sharp knife or pastry cutter, cut the rolled-out dough into rectangles, approximately 3×4 inches. You should have an equal number of top and bottom pieces for creating the pockets.
Step 7 – Fill and Seal
Spread your chosen jam or filling on half of the dough rectangles, leaving a bit of space at the edges. Place the remaining rectangles on top and seal the edges with a fork to ensure the filling stays inside during baking.
Step 8 – Prepare for Baking
In a small bowl, beat an egg with milk. Brush this egg wash over the top of each pop tart. This step gives you a beautiful golden color once baked.
Step 9 – Bake
Preheat your oven to 350°F (175°C). Lay the pop tarts on a baking sheet lined with parchment paper. Bake for 20-25 minutes, or until the edges turn golden brown. Keep an eye on them to avoid overcooking.
Step 10 – Cool and Ice
Once baked, let the pop tarts cool on a wire rack. After they’ve cooled, drizzle an icing made from powdered sugar and a little water over the top for an extra sweet touch.
Serving Suggestions for Homemade Pop Tarts with Pie Crust: 5 Reasons to Indulge
Best Occasions to Serve This Dish
Homemade pop tarts are perfect for various occasions. They shine brightly at brunch gatherings, accompanied by coffee or tea. Since they are handheld treats, they work wonderfully as snacks during road trips or picnics. They also make delightful desserts to serve after dinner, providing a sweet ending to any meal.
What to Serve With It
Pair your homemade pop tarts with whipped cream, fresh berries, or a scoop of ice cream for an indulgent dessert. They complement a refreshing fruit salad or a rich cup of hot chocolate, making for a comforting combination on a chilly day.
How to Store Homemade Pop Tarts with Pie Crust: 5 Reasons to Indulge Properly
Best Storage Practices
To maintain their freshness, store your homemade pop tarts in an airtight container at room temperature. They can stay good for 2-3 days this way. If you prefer them to last longer, consider refrigerating them, which can extend their shelf life slightly.
Reheating and Freezing Tips
If you want to enjoy them warm, pop them in the toaster for a minute or so. If you have leftovers or want to make a big batch, you can freeze the filled but unbaked pop tarts for up to three months. Just bake them straight from the freezer; you may need to add a couple of extra minutes to the baking time.
Tips & Tricks for Homemade Pop Tarts with Pie Crust: 5 Reasons to Indulge
Mistakes to Avoid
1 – Overworking the Dough
Overmixing can lead to tough pop tarts. Handle everything gently to keep them light.
2 – Skipping the Chill
Chilling the dough is crucial for achieving a flaky crust. Don’t skip this step!
3 – Using Warm Butter
Ensure your butter is ice-cold. Warm butter can ruin the texture.
4 – Filling Too Much
Avoid overfilling the pop tarts, as this can cause them to burst during baking. A thin layer is usually perfect.
5 – Ignoring Egg Wash
Egg wash not only promotes a golden color but also adds a slight sheen. Don’t leave this detail out!
Extra Tips for Better Results
For an added touch, try infusing the sugar with vanilla or cinnamon for a unique flavor twist. You can also sprinkle a little coarse sugar on top before baking for extra crunch and sweetness.
Recipe Variations of Homemade Pop Tarts with Pie Crust: 5 Reasons to Indulge
Creative Twists
- Chocolate Hazelnut: Use chocolate hazelnut spread instead of jam for a nutty and indulgent filling.
- Savory Options: Fill with cream cheese and herbs for a savory pop tart perfect for appetizer tables.
- S’mores Delight: Add a layer of chocolate and mini marshmallows to capture the flavors of s’mores in pop tart form.
Dietary Adjustments
For a vegan version, substitute the butter with vegan butter and use a plant-based milk. To make it gluten-free, a solid gluten-free flour blend can be used while ensuring your fillings are also safe for gluten intolerance.
Conclusion about Homemade Pop Tarts with Pie Crust: 5 Reasons to Indulge
Homemade Pop Tarts with Pie Crust: 5 Reasons to Indulge are not just pastries; they’re an experience that evokes nostalgia, creativity, and, most importantly, indulgence. With a simple base recipe, you can craft these delicious treats to fit any occasion or preference. The beauty of this recipe lies in its versatility; you can fill them with your favorite jams, secure them with a flaky crust, and enjoy a bite-sized delight that warms the soul.
The joy of making these homemade pastries together with family or friends adds to the delightful experience. With ample opportunities to customize, there’s always a chance to make each batch special and unique. So why not gather your ingredients and enjoy the pleasures of creating something delicious with loved ones?
FAQs about Homemade Pop Tarts with Pie Crust: 5 Reasons to Indulge
How should I store leftover pop tarts?
Keep them in an airtight container at room temperature for 2-3 days, or refrigerate for a longer shelf life.
Can I freeze pop tarts?
Yes, you can freeze unbaked pop tarts for up to three months. Bake from frozen, but add a few extra minutes to the baking time.
What fillings can I use?
You can use any fruit jam, chocolate spread, or even savory fillings like cream cheese and herbs to customize your pop tarts.
How can I make these pop tarts healthier?
Consider reducing sugar in the filling, using whole grain flour, or opting for lower sugar jams to create a healthier version.
What can I do if the dough is too sticky?
Add a little more flour to the mixture until the dough is manageable and can be rolled out without sticking.
How do I know when pop tarts are done?
They should be golden brown on the edges and slightly firm to the touch.
Can I use a different type of flour?
Yes, you can experiment with whole wheat flour or gluten-free blends, but this may alter the texture slightly.
Is there a way to make pop tarts without an egg?
Absolutely! You can use a plant-based egg replacer, flaxseed meal, or simply omit the egg wash for a different finish.
Homemade Pop Tarts with Pie Crust
Ingrédients
Dough Ingredients
- 2 cups all-purpose flour
- 1 teaspoon salt
- 1 tablespoon sugar
- 1 cup unsalted butter, chilled and diced
- 6 to 8 tablespoons ice water
Filling and Topping
- 1 cup fruit jam or filling of your choice
- 1 large egg
- 1 tablespoon milk
- to taste powdered sugar for icing
Instructions
Preparation of Ingredients
- Gather all your ingredients. Measure flour, salt, sugar, and diced butter.
Making the Dough
- In a mixing bowl, combine flour, salt, and sugar. Cut in the chilled butter until it resembles coarse crumbs.
- Stir in ice water, one tablespoon at a time, until the mixture forms a cohesive ball.
- Wrap the dough in plastic wrap and refrigerate for at least 30 minutes.
Rolling and Shaping
- After chilling, roll out the dough on a floured surface to 1/8 inch thickness.
- Cut the dough into 3×4 inch rectangles.
Filling and Sealing
- Spread your chosen jam on half of the dough rectangles. Place the other rectangles on top and seal the edges with a fork.
Baking
- Preheat the oven to 350°F (175°C). Brush pop tarts with an egg wash mixture of beaten egg and milk.
- Bake for 20-25 minutes, until golden brown.
Cooling and Icing
- Let the pop tarts cool on a wire rack, then drizzle with icing made from powdered sugar and water.