
Table of Contents
Introduction to Valentine’s Day Cakesicles
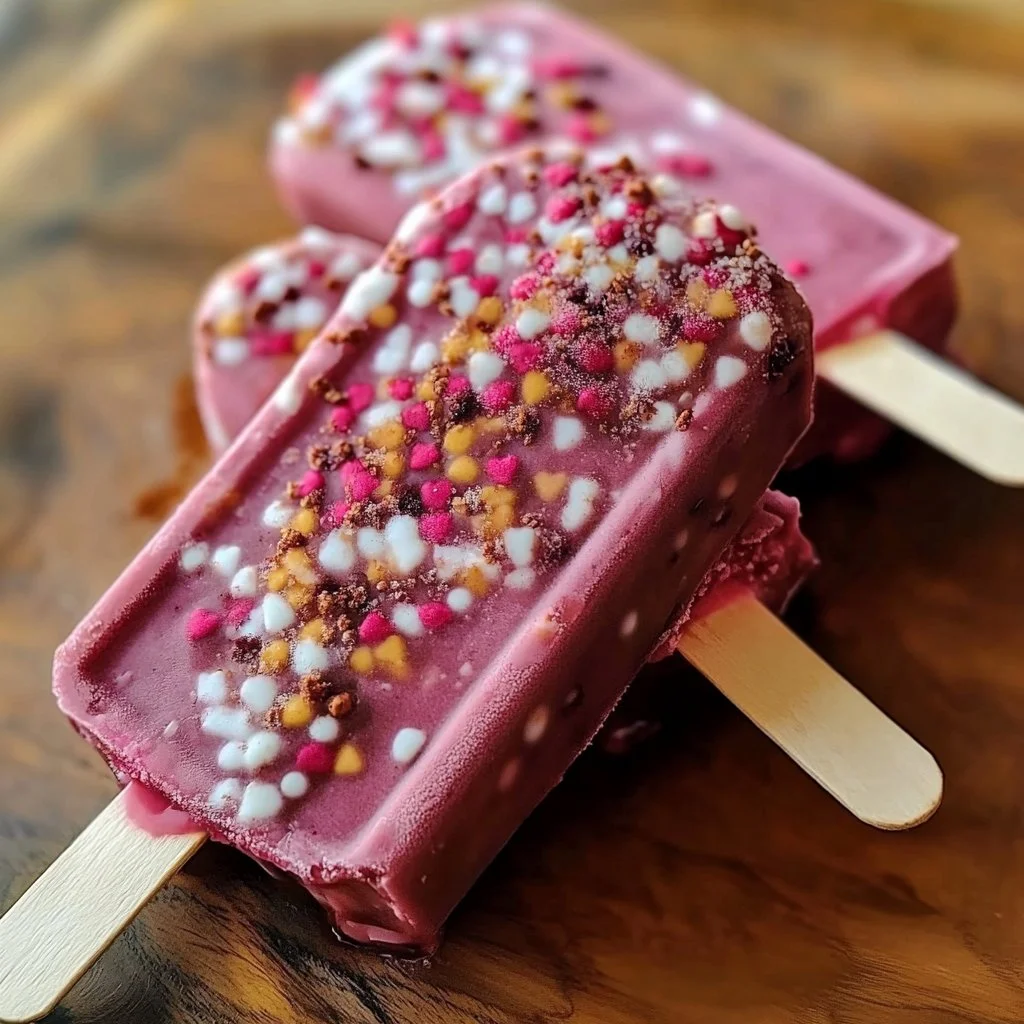
When it comes to expressing affection on Valentine’s Day, what could be better than a sweet treat made with love? Enter Valentine’s Day Cakesicles, the perfect blend of creativity, flavor, and a touch of whimsy. These delightful treats combine the simplicity of cake pops with the fun of frozen desserts, making them an eye-catching addition to any celebration. Have you ever baked a cake only to find yourself wondering what to do with the leftovers? This recipe provides a delectable way to use up that leftover cake and transform it into a fun dessert that’s perfect for sharing.
Valentine’s Day Cakesicles are not only irresistibly cute but also incredibly versatile. You can customize them to match your favorite flavors and colors, filling them with various types of frosting and coating them with a rainbow of chocolate. The best part? They can be made in advance, allowing you to prepare for the holiday without the last-minute stress. Whether you are preparing a romantic dinner for your significant other or throwing a Galentine’s Day party with friends, these cakesicles make for an enticing centerpiece and a delicious treat.
What truly makes this recipe special is its balance of rich flavor and playful presentation. Imagine biting into a chocolate-coated, sprinkle-covered cakesicle that’s bursting with the flavor of your favorite cake and frosting. With each bite, you’ll experience a delightful mix of textures—from the crispy shell to the moist cake inside. This is more than just a recipe; it is an experience in creativity and flavor waiting to happen. Are you ready to impress your loved ones with homemade Valentine’s Day Cakesicles? Let’s jump into the details!
Key Benefits of Valentine’s Day Cakesicles
Why You’ll Love This Recipe
- Delectable Flavors: Choose any cake mix and frosting combination you adore.
- Easy to Make: Even beginners can master this delightful dessert.
- Fun for All Ages: Kids will love helping to decorate with sprinkles.
- Visually Stunning: These cakesicles not only taste good but look great too.
- Customizable: Perfect for personalizing to fit any occasion or taste preferences.
- Make Ahead: Prepare them in advance to save time on the big day.
What Makes It Stand Out
Valentine’s Day Cakesicles stand out because they capture the essence of celebration in a fun, easy-to-make form. They offer the chance to be as creative as you want, allowing for endless flavor combinations that can cater to anyone’s sweet tooth. This is not just a traditional cake but a modern twist that infuses an element of surprise with each bite.
These treats are also perfect for sharing, making them an excellent option for parties or gatherings. Their portable size makes them easy to distribute, whether at a romantic dinner or a festive get-together with friends. You can even create themed cakesicles to match your décor or the spirit of the occasion, elevating your dessert game to new heights.
Ingredients for Valentine’s Day Cakesicles
Complete Ingredient List with Measurements
- 1 box cake mix (any flavor)
- 1 cup frosting (any flavor)
- Chocolate candy melts (for coating)
- Colorful sprinkles (for decoration)
- Cakesicle molds
- Lollipop sticks
Substitutes and Alternatives
If you have dietary needs or preferences, there are plenty of substitutions to consider. For those who are gluten-sensitive, opt for a gluten-free cake mix. Dairy-free frosting and vegan chocolate can also be used for a delicious plant-based version. Just make sure to check the labels to ensure compatibility with your dietary restrictions.
For those avoiding sugar, consider using sugar-free cake mixes and frosted alternatives to maintain the balance of sweetness without compromising health. There are countless ways to modify the ingredients to fit your lifestyle while still enjoying the treat.
How to Make Valentine’s Day Cakesicles – Step-by-Step Directions
Step 1 – Prepare Ingredients
Start by gathering all your ingredients and tools. Ensure your cakesicle molds and lollipop sticks are clean and ready to use. Preheat your oven according to the instructions on the cake mix box. This will help streamline your process.
Step 2 – Cook the Base
Follow the instructions on your box of cake mix to bake the cake. Once baked, remove it from the oven and allow it to cool completely. The texture should be soft but firm enough to crumble easily.
Step 3 – Crumble the Cake
Once the cake is cool, transfer it to a large bowl. Using your hands or a fork, crumble the cake into fine pieces. Aim for small, uniform crumbs to ensure even mixing with the frosting.
Step 4 – Mix in the Frosting
Add the frosting to the crumbled cake. Use a spatula or your hands to mix until fully combined. You want the mixture to be moist but not overly sticky, allowing for easy shaping in the next steps.
Step 5 – Fill the Molds
Spoon the cake and frosting mixture into the cakesicle molds. Press down firmly to fill the molds completely, ensuring there are no air pockets. Leave some room at the top for the sticks.
Step 6 – Insert Lollipop Sticks
Once your molds are filled, take your lollipop sticks and insert them into the center of each molds. Ensure they are upright and secured within the mixture.
Step 7 – Freeze for Solidification
Place the filled molds in the freezer and let them freeze for at least 2 hours. This will set the cakesicles and make them easier to coat in chocolate later.
Step 8 – Melt the Chocolate
In a microwave-safe bowl, melt the chocolate candy melts according to package instructions. Stir until smooth and creamy, checking for consistency.
Step 9 – Dip the Cakesicles
Remove the cakesicles from the freezer once solid. Dip each cakesicle into the melted chocolate, coating completely. Allow any excess chocolate to drip off before moving to the next step.
Step 10 – Add Decorative Touches
Immediately sprinkle colorful sprinkles on top of the chocolate coating before it sets. This will help the sprinkles adhere to the chocolate, adding both flavor and visual appeal.
Step 11 – Final Cooling
Once decorated, place the cakesicles back on a baking sheet lined with parchment paper. Let them cool and harden completely before removing them from the molds.

Serving Suggestions for Valentine’s Day Cakesicles
Best Occasions to Serve This Dish
Valentine’s Day Cakesicles are perfect for various occasions beyond just Valentine’s Day. Think birthday parties, baby showers, or even festive gatherings during holidays. Their charming appearance makes them appropriate for celebrations where you want to impress your guests. They can also serve as a memorable party favor for special events.
What to Serve With It
Serve your cakesicles with a side of homemade whipped cream or a drizzle of chocolate sauce for an extra indulgent experience. Pair them with a glass of cold milk, coffee, or a sweet dessert wine to balance out the sweetness and complement the flavors. These pairings enhance the overall enjoyment of the delicious treats.
How to Store Valentine’s Day Cakesicles Properly
Best Storage Practices
To keep your Valentine’s Day Cakesicles fresh, store them in an airtight container in the refrigerator. They can typically last for up to a week. If you prefer to keep them out of reach, freeze them in an airtight container separated by parchment paper to prevent sticking.
Reheating and Freezing Tips
For best results, enjoy your cakesicles cold or at room temperature straight from the fridge or freezer. If you find they have become too solid in the freezer, simply let them sit at room temperature for a few minutes before enjoying, ensuring they retain their delightful texture.
Tips & Tricks for Valentine’s Day Cakesicles
Mistakes to Avoid
1 – Not Cooling the Cake: Ensure the cake fully cools before crumbling, or it may become too moist.
2 – Overfilling Molds: Avoid stuffing the molds too tightly; leave some space for the sticks.
3 – Chocolate Tempering: Make sure the chocolate is smooth and free of lumps for even coverage.
4 – Skipping Sprinkles: Add them while the chocolate is still wet, or they won’t stick.
5 – Storage Missteps: Store properly to avoid freezer burn or soggy textures.
Extra Tips for Better Results
For enhanced flavor, consider adding a splash of flavored extract to the cake mix, such as vanilla or almond. Experiment with different sprinkles to match various themes or color schemes. Lastly, try different types of chocolate for coating—white, milk, or dark chocolate will all yield unique tastes.
Recipe Variations of Valentine’s Day Cakesicles
Creative Twists
1 – Red Velvet Cakesicles: Use red velvet cake mix and cream cheese frosting for a classic touch.
2 – Stuffed Cakesicles: Before sealing the molds, add small dollops of jam or flavored cream cheese for a surprise filling.
3 – Chocolate Peanut Butter Cakesicles: Swirl peanut butter into the cake mix and coat with chocolate for a decadent treat.
4 – Fruit-Inspired Cakesicles: Use lemon cake mix and a strawberry frosting for a refreshing summer twist.
Dietary Adjustments
For a vegan version of your Valentine’s Day Cakesicles, use plant-based cake mixes and dairy-free frosting. Ensure that your chocolate candy melts are dairy-free as well. For gluten-free options, simply select a gluten-free cake mix that suits your taste.
Conclusion about Valentine’s Day Cakesicles
Valentine’s Day Cakesicles are not just desserts; they are a canvas for creativity and love. With their eye-catching appearance and delicious flavors, they make the perfect treat for any celebration. Easy to customize, they cater to all tastes and dietary needs, ensuring everyone can partake in the joy they bring. So, whether you are treating a loved one or indulging in a sweet moment by yourself, these cakesicles are sure to impress. The next time you’re in the kitchen, consider crafting these delightful morsels and making your Valentine’s Day unforgettable.
FAQs about Valentine’s Day Cakesicles
How long do Valentine’s Day Cakesicles last?
They can last in the refrigerator for up to a week or in the freezer for a couple of months when properly stored.
Can I make Valentine’s Day Cakesicles ahead of time?
Yes, these cakesicles can be made ahead and stored in the freezer until you’re ready to serve.
What type of cake mix works best?
Any cake mix flavor you enjoy will work great, from classic vanilla to chocolate or even red velvet.
How do I thaw frozen cakesicles?
Let the cakesicles sit in the refrigerator overnight or at room temperature for about 10-15 minutes before serving.
What can I use as a substitute for frosting?
You can use chocolate ganache, whipped cream, or even yogurt as a substitute, depending on your preferred flavor profile.
What if I don’t have cakesicle molds?
You can use silicon ice cube trays or cupcake molds as an alternative for shaping the cakesicles.
Can I decorate with anything besides sprinkles?
Absolutely! Consider using drizzled chocolate, edible glitter, or crushed nuts for unique toppings.
Can I use homemade cake and frosting?
Yes, homemade versions can add a personal touch and unique flavors to your Valentine’s Day Cakesicles.
Valentine’s Day Cakesicles
Ingrédients
For the Cakesicles
- 1 box cake mix (any flavor) Choose your favorite flavor.
- 1 cup frosting (any flavor) Opt for your preferred frosting.
- 1 bag chocolate candy melts For coating the cakesicles.
- 1 cup colorful sprinkles For decoration.
- 1 set cakesicle molds Ensure molds are clean.
- 12 sticks lollipop sticks For holding the cakesicles.
Instructions
Preparation
- Start by gathering all your ingredients and tools. Ensure your cakesicle molds and lollipop sticks are clean and ready to use.
- Preheat your oven according to the instructions on the cake mix box.
Cooking the Cake
- Follow the instructions on your box of cake mix to bake the cake.
- Once baked, remove it from the oven and allow it to cool completely.
Crumbling and Mixing
- Once the cake is cool, crumble it into fine pieces in a large bowl.
- Add the frosting to the crumbled cake and mix until fully combined.
Molding
- Spoon the cake and frosting mixture into the cakesicle molds and press down firmly.
- Insert lollipop sticks into the center of each mold.
Freezing
- Place the molds in the freezer and let them freeze for at least 2 hours.
Coating
- Melt the chocolate candy melts according to package instructions in a microwave-safe bowl.
- Dip each cakesicle into the melted chocolate, coating completely.
- Immediately sprinkle colorful sprinkles on top of the chocolate coating.
Final Cooling
- Place the decorated cakesicles on a baking sheet lined with parchment paper and let them cool completely.