

Table of Contents
Introduction to 27 Spring Cookie Decorating Ideas Bursting with Personality
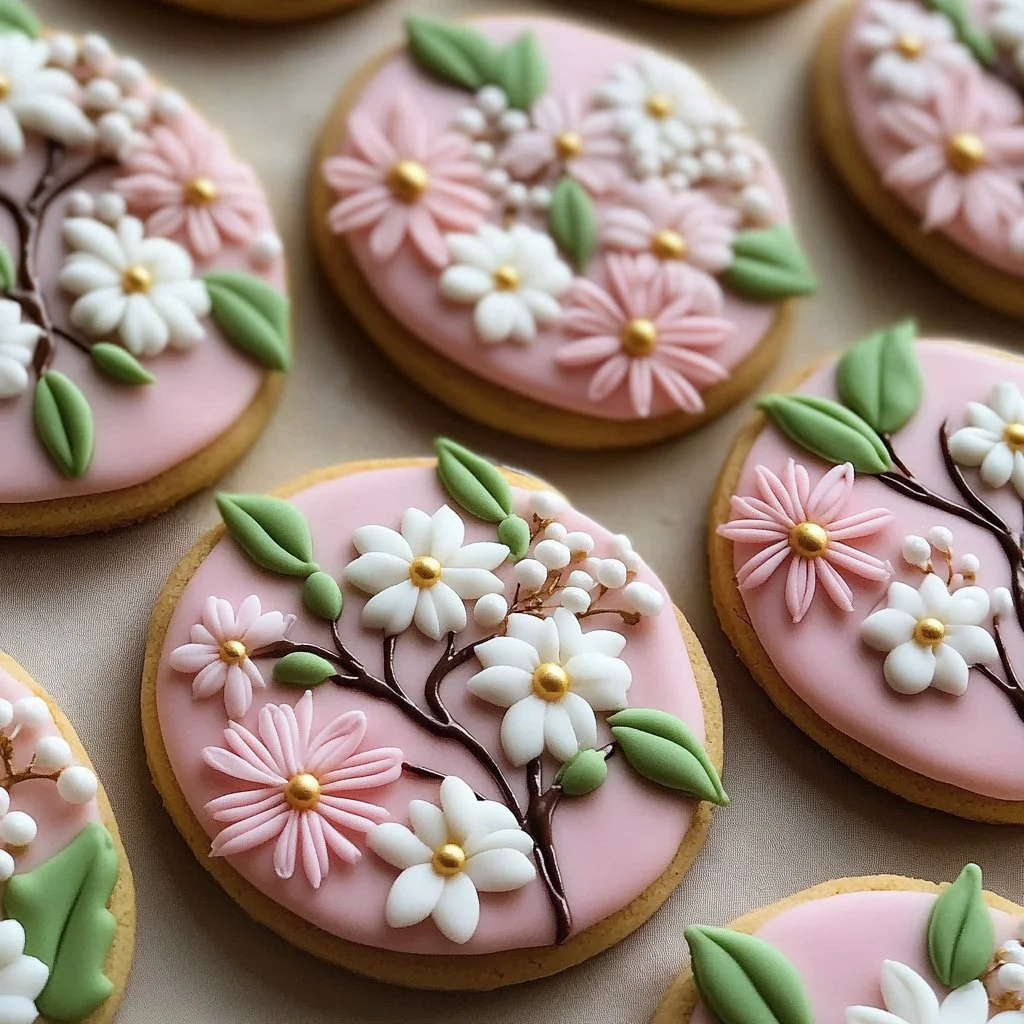
Have you ever noticed how a beautifully decorated cookie can transport you to the joys of spring? The freshness of blooming flowers, the vibrancy of new leaves, and the tantalizing sweetness of spring flavors can all be encapsulated in a single bite. With 27 Spring Cookie Decorating Ideas Bursting with Personality, your cookie creations can take on a life of their own!
Imagine inviting friends over for a spring gathering and surprising them with beautifully decorated cookies that echo the season. Not only are these cookies delightful to look at, but they’re also a canvas for your creativity and culinary skills. The best part? They are easy to make and can be tailored to suit any taste.
The uniqueness of these cookies lies in their versatility. Whether you wish to go for serene pastel shades or bold spring colors, there’s a decorating idea for every personality. Plus, decorating cookies can be a fun activity for the whole family, making lasting memories as you unleash your inner artist.
From floral motifs to cute critters, the ideas presented in 27 Spring Cookie Decorating Ideas Bursting with Personality are designed to inspire your creativity this spring season. Why not make this season special with cookies that are not just delicious but also bursting with personality? After all, who wouldn’t love a cookie that reflects their own flair and spirit?
Key Benefits of 27 Spring Cookie Decorating Ideas Bursting with Personality
- Flavor Variety: These cookies can feature a wide range of flavors, from lemon zest to rich chocolate, appealing to every palate.
- Simplicity: The decorating techniques are easy to master, making it accessible for bakers of all skill levels.
- Customization: You can personalize cookies for various occasions or themes, ensuring they are perfect for any gathering or celebration.
- Family Fun: Decorating cookies is a wonderful activity for families, providing a chance to bond and create together.
- Stunning Visuals: Each cookie becomes a work of art, making your dessert table an eye-catching feature at any event.
- Seasonal Relevance: These cookie ideas capture the essence of spring, making them timely for seasonal celebrations.
What Makes It Stand Out
The beauty of 27 Spring Cookie Decorating Ideas Bursting with Personality lies in their originality. Each decorating technique offers a fresh perspective on the traditional cookie. This allows you to step outside the ordinary and create cookies that are not only tasty but also stunning and filled with personality.
Customization is another highlight. You can create cookies that reflect the personalities of your guests or the theme of your event. From whimsical designs to elegant icing patterns, the options are endless, offering a unique take on springtime festivities.
Best of all, these cookies are perfect for various occasions. Whether you’re hosting a spring tea party, a birthday bash, or a family gathering, these cookies can be themed to fit the event. They provide an impressive yet accessible way to celebrate the season and delight your guests.
Ingredients for 27 Spring Cookie Decorating Ideas Bursting with Personality
Complete Ingredient List with Measurements
For the Cookie Dough:
- 2 ¾ cups all-purpose flour
- 1 tsp baking soda
- ½ tsp baking powder
- 1 cup unsalted butter, softened
- 1 ½ cups white sugar
- 1 egg
- 1 tsp vanilla extract
- ½ tsp almond extract
- A pinch of salt
For the Royal Icing:
- 3 egg whites
- 4 cups powdered sugar
- 1 tsp lemon juice
- Food colorings of choice
Substitutes and Alternatives
For those with dietary restrictions, there are several easy swaps available. If you need a gluten-free option, substitute all-purpose flour with a gluten-free blend that works in baking. Instead of eggs, you can use flaxseed meal mixed with water or a store-bought egg replacer for the icing, keeping your cookies vegan.
Dairy-free butter is also an excellent substitute for those sensitive to lactose. Always check the labels and ensure the ingredients align with your dietary needs while keeping the delicious taste intact.
How to Make 27 Spring Cookie Decorating Ideas Bursting with Personality – Step-by-Step Directions
Step 1 – Prepare Ingredients
Gather all your ingredients before you start baking. Ensure your butter is softened to room temperature and your eggs are at room temperature for maximum fluffiness.
Step 2 – Cook the Base
In a mixing bowl, cream together the softened butter and sugar until smooth. This should take about 3-5 minutes. Add in the egg and extracts, mixing until well combined. Then, gradually add in the dry ingredients. Mix until a dough forms, being careful not to overmix.
Step 3 – Chill the Dough
Wrap the cookie dough in plastic wrap and refrigerate for at least 1 hour. This helps the dough hold its shape while baking and makes it easier to cut.
Step 4 – Preheat the Oven
While the dough is chilling, preheat your oven to 350°F (175°C). This ensures that the cookies will bake evenly and turn golden brown.
Step 5 – Roll Out the Dough
Once chilled, roll out the dough on a floured surface to about 1/4 inch thick. The thickness can be adjusted based on how you want the cookies to look—thicker for a chewy texture and thinner for crisp cookies.
Step 6 – Cut the Shapes
Use cookie cutters to cut out shapes representing spring themes, such as flowers, bunnies, or butterflies. Place each cut-out on a baking sheet lined with parchment paper.
Step 7 – Bake the Cookies
Bake the cookies in the preheated oven for 8-10 minutes, or until the edges are lightly golden. Be careful not to over-bake, as you want a soft center. Remove from the oven and let them cool completely on a wire rack.
Step 8 – Prepare Royal Icing
While the cookies cool, prepare the royal icing. Beat the egg whites until frothy, then gradually add powdered sugar and beat until the mixture holds stiff peaks. Divide into bowls and color as desired using food coloring.
Step 9 – Decorate the Cookies
Once the cookies have cooled, use piping bags or simple zip-top bags with the corners trimmed to pipe frosting on the cookies. Use brushes or toothpicks to create detailed designs.
Step 10 – Let the Icing Dry
Allow your cookies to dry completely. This may take several hours or overnight depending on the humidity. Once dry, your cookies are ready to be presented and enjoyed!
Serving Suggestions for 27 Spring Cookie Decorating Ideas Bursting with Personality
Best Occasions to Serve This Dish
These cookies shine at any springtime occasion. Whether it’s an Easter celebration, a spring wedding, or a casual picnic in the park, the cookies add a festive touch that brightens the mood. They also make wonderful gifts wrapped in cellophane, perfect for sharing the joys of spring.
What to Serve With It
Pair these delightful cookies with spring-inspired beverages like lemonade, iced tea, or a fresh fruit spritzer. They also work beautifully on dessert platters next to fruit tarts or mini cupcakes to create a full dessert table.
How to Store 27 Spring Cookie Decorating Ideas Bursting with Personality Properly
Best Storage Practices
To keep your cookies fresh, store them in an airtight container at room temperature. If you plan to keep them for an extended period, wrap them tightly in plastic wrap and place them in the freezer.
Reheating and Freezing Tips
If frozen, thaw the cookies in the refrigerator before serving. For a freshly-baked taste, you can warm them slightly in the microwave for about 10-15 seconds. This will also soften the royal icing if it has hardened.
Tips & Tricks for 27 Spring Cookie Decorating Ideas Bursting with Personality
Mistakes to Avoid
1 – Overmixing the Dough: This can lead to tough cookies. Mix until just combined.
2 – Baking at the Wrong Temperature: Always ensure your oven is preheated. Use an oven thermometer if needed.
3 – Not Chilling the Dough: Skipping this step can cause the cookies to spread too much.
4 – Improper Storage: Not using an airtight container can lead to stale cookies.
5 – Undercooking the Cookies: Cookies should be set at the edges but soft in the center.
Extra Tips for Better Results
- Experiment with Flavors: Add zest, extracts, or spices to the dough for added depth.
- Use Quality Food Colorings: Gel colors provide vibrant hues without watering down the icing.
- Practice Piping: If you’re new to decorating, practice on parchment paper before working directly on your cookies.
Recipe Variations of 27 Spring Cookie Decorating Ideas Bursting with Personality
Creative Twists
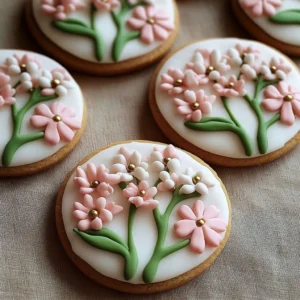
1 – Spring Flower Cookies: Decorate your cookies to resemble blossoms using vivid colors and touch-ups with edible glitter for sparkle.
2 – Easter Egg Cookies: Use egg shapes and color them with pastel shades to embody the Easter spirit.
3 – Animal-Inspired Cookies: Create adorable bunnies, birds, or ladybugs, letting your creativity run wild!
4 – Textured Icing: Use various techniques such as airbrushing or painting to add textures to the icing for a professional finish.
Dietary Adjustments
For vegan adaptations, use flax eggs and plant-based butter. Gluten-free options involve using almond flour or certified gluten-free flour as substitutes. Dairy-free substitutes also work well, with coconut milk or almond milk for creaminess in the icing.
Conclusion about 27 Spring Cookie Decorating Ideas Bursting with Personality
Spring is all about renewal, joy, and color, and what better way to embrace the season than with cookies that reflect its vibrant spirit? With 27 Spring Cookie Decorating Ideas Bursting with Personality, you have the means to create beautiful and unique treats that cater to everyone’s tastes and preferences.
Whether you’re a seasoned baker or someone looking to try their hand at decorating cookies for the first time, this recipe collection provides you with the tools and inspiration needed. The process is simple, the flavors are delightful, and the decorations can be as personal as you like. So gather your loved ones, unleash your creativity, and let the cookies embody the playful essence of spring!
FAQs about 27 Spring Cookie Decorating Ideas Bursting with Personality
How long do these cookies last?
When stored properly in an airtight container, these cookies can last up to a week.
Can I make the dough ahead of time?
Yes, you can prepare the cookie dough ahead of time and keep it in the refrigerator for up to three days before baking.
Is it possible to freeze the cookies?
Absolutely! You can freeze baked cookies for up to three months. Make sure they are completely cooled and stored in an airtight container.
What’s the best way to defrost frozen cookies?
To defrost, simply place the cookies in the refrigerator overnight or let them come to room temperature on your kitchen counter.
Can I use store-bought frosting instead of royal icing?
While store-bought frosting is an option, royal icing provides a firm finish that holds detail better for cookie decorating.
How can I make the icing colors more vibrant?
Using gel food coloring instead of liquid can give you richer and brighter colors for your icing.
What gifts can I make with these cookies?
These cookies make perfect gifts when packaged in beautiful boxes or bags, especially during holidays or special occasions.
Can I use other shapes besides traditional cookie cutters?
Definitely! Get creative and use stencils, templates, or freehand shapes to create personalized designs.
How do I know when the cookies are done baking?
The cookies should be lightly golden around the edges but soft in the center. They will continue to cook a bit after coming out of the oven.
Can I customize the flavors of the cookies?
Yes! Feel free to incorporate different extracts, spices, or zests into the dough to match your flavor preferences.
Spring Cookie Decorating Ideas
Ingrédients
For the Cookie Dough
- 2 ¾ cups all-purpose flour Can substitute with gluten-free flour.
- 1 tsp baking soda
- ½ tsp baking powder
- 1 cup unsalted butter, softened Ensure butter is at room temperature.
- 1 ½ cups white sugar
- 1 ea egg Can substitute with flaxseed meal mixed with water.
- 1 tsp vanilla extract
- ½ tsp almond extract
- a pinch salt
For the Royal Icing
- 3 ea egg whites Can substitute with an egg replacer for a vegan option.
- 4 cups powdered sugar
- 1 tsp lemon juice
- Food colorings of choice
Instructions
Preparation
- Gather all your ingredients before you start baking. Ensure your butter is softened to room temperature and your eggs are at room temperature for maximum fluffiness.
- In a mixing bowl, cream together the softened butter and sugar until smooth. This should take about 3-5 minutes. Add in the egg and extracts, mixing until well combined. Then, gradually add in the dry ingredients. Mix until a dough forms, being careful not to overmix.
- Wrap the cookie dough in plastic wrap and refrigerate for at least 1 hour. This helps the dough hold its shape while baking and makes it easier to cut.
- While the dough is chilling, preheat your oven to 350°F (175°C).
- Once chilled, roll out the dough on a floured surface to about 1/4 inch thick. The thickness can be adjusted based on desired texture.
- Use cookie cutters to cut out shapes representing spring themes, such as flowers, bunnies, or butterflies. Place each cut-out on a baking sheet lined with parchment paper.
Baking
- Bake the cookies in the preheated oven for 8-10 minutes, or until the edges are lightly golden. Remove from the oven and let them cool completely on a wire rack.
Decoration
- While the cookies cool, prepare the royal icing. Beat the egg whites until frothy, then gradually add powdered sugar and beat until the mixture holds stiff peaks. Divide into bowls and color as desired using food coloring.
- Once the cookies have cooled, use piping bags or simple zip-top bags with the corners trimmed to pipe frosting on the cookies. Use brushes or toothpicks to create detailed designs.
- Allow your cookies to dry completely. This may take several hours or overnight depending on the humidity.