

Table of Contents
Introduction to Pink Velvet Buttermilk Cake Recipe
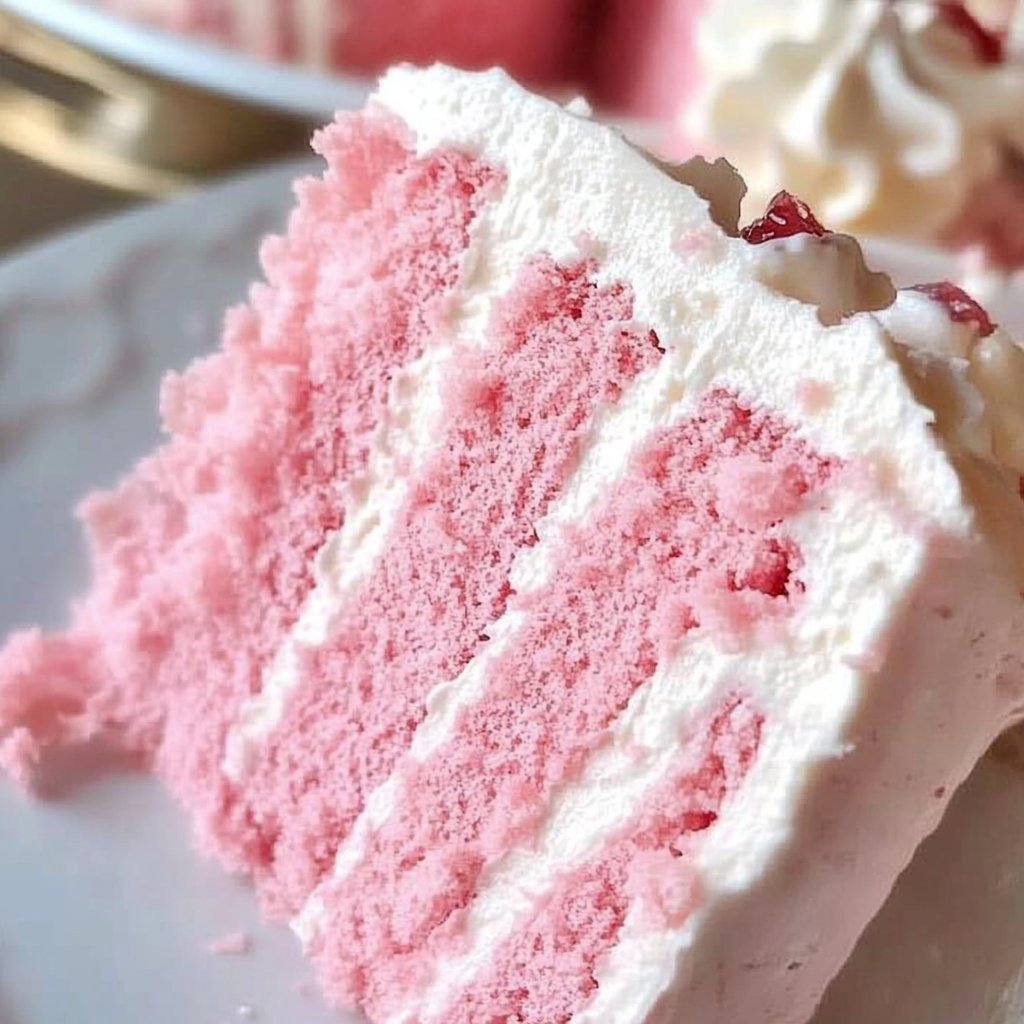
Have you ever encountered a dessert that captivates your senses with its vibrant color and delightful flavor? The Pink Velvet Buttermilk Cake Recipe is one such indulgence that beckons you to take a slice and savor its lusciousness. This cake is not just a feast for the eyes; it’s a flavorful experience that blends the richness of buttermilk with a hint of sweetness and a soft, velvety texture. Imagine digging your fork into a slice, the creamy frosting tantalizing your taste buds as you bite into the moist cake.
What makes this cake so special? It’s all about the unique combination of ingredients that create a harmony of flavors. With the base of buttermilk and a touch of electric pink food coloring, you can even customize it to fit any celebration. Whether it’s a birthday, baby shower, or just a sweet treat for yourself, this cake is sure to impress.
Baking from scratch might seem daunting, but the Pink Velvet Buttermilk Cake Recipe is surprisingly easy. With a few simple steps and readily available ingredients, you’ll be well on your way to creating a masterpiece in your kitchen. The anticipation builds as the cake rises in the oven, turning into a beautifully soft, pink delight that’s perfect for any occasion.
Key Benefits of Pink Velvet Buttermilk Cake Recipe
Why You’ll Love This Recipe
- Moist and Delicious: Buttermilk adds moisture and richness that makes each bite unforgettable.
- Vibrant Color: The electric pink hue is visually stunning and makes it stand out at gatherings.
- Easy to Make: Simple steps and ingredients make this cake accessible to all bakers.
- Versatile Serving Options: Perfect for birthdays, celebrations, or an impressive dessert any night of the week.
- Customizable: You can adjust the flavors and decorations to match your theme or personal taste.
- Stabilized Whipped Cream: Topped with a light, airy whipped cream that stays fluffy thanks to the gelatin.
What Makes It Stand Out
The Pink Velvet Buttermilk Cake is not just another cake; it brings creativity to your table. The vibrant pink color can be adapted for various themes, whether it’s pastel for a spring event or bold for a summer gathering. You can also play with flavors and combinations, such as adding chocolate chips, incorporating lemon zest, or even subtler hints of almond extract for a unique twist.
Lastly, its light and fluffy texture sets it apart from denser cakes, making it a delightful treat for those who prefer something not too heavy. The stabilized whipped cream can be flavored with different extracts, allowing the entire cake experience to be uniquely yours.
Ingredients for Pink Velvet Buttermilk Cake Recipe
Complete Ingredient List with Measurements
- 13 oz cake flour
- 12 oz granulated sugar
- 1 teaspoon salt
- 1 tablespoon baking powder
- ½ teaspoon baking soda
- 5 oz egg whites (room temperature)
- 4 oz vegetable oil
- 10 oz buttermilk (room temperature or slightly warm)
- 6 oz unsalted butter (softened)
- 2 teaspoons vanilla extract
- 2 drops electric pink food coloring
- 24 oz heavy whipping cream
- 4 oz powdered sugar
- 2 teaspoons powdered gelatin
- 1 tablespoon cold water
- 1 teaspoon vanilla extract (for whipped cream)
- 1 teaspoon heavy whipping cream (for gelatin)
- 1 cup fresh raspberries (optional for garnish)
Substitutes and Alternatives
If you’re looking for alternatives due to allergies or dietary preferences, there are options. For a gluten-free version, you can swap out the cake flour with a gluten-free flour blend, ensuring it has a good structure. If you need a dairy-free option, using almond milk or soy milk in place of buttermilk and a plant-based butter can work well.
Those with egg allergies might consider using an egg replacer or flaxseed meal mixed with water, but note that it might subtly alter the texture. Similarly, for a lower sugar option, you can use a sugar substitute, but check that it measures similarly to granulated sugar.
How to Make Pink Velvet Buttermilk Cake Recipe – Step-by-Step Directions
Step 1 – Prepare Ingredients
Gather all your ingredients and ensure that your butter and egg whites are at room temperature. Pre-measuring will help streamline the baking process, making it easy to add ingredients as you go.
Step 2 – Preheat Oven
Heat your oven to 335º F (168º C) — 350º F (177º C). Choosing a lower temperature can help prevent the cakes from browning too quickly on the sides, allowing them to bake evenly throughout.
Step 3 – Prepare Cake Pans
Prepare two to three 6″x2″ cake pans with your choice of pan spray or cake goop. Make sure to fill the pans about ¾ of the way full with batter. This ensures even rising and baking of the cake layers.
Step 4 – Combine Dry Ingredients
In the bowl of a stand mixer with a paddle attachment, combine your cake flour, sugar, baking powder, baking soda, and salt. Mix on low for about 10 seconds just to combine the dry ingredients before adding the wet ones.
Step 5 – Mix Wet Ingredients
In a separate bowl, mix together about ½ cup of the buttermilk with the vegetable oil and set it aside. In another bowl, whisk together the remaining buttermilk, egg whites, pink food coloring, and vanilla. Mixing these helps to break up the eggs before adding them to the dry mix.
Step 6 – Incorporate Butter
Add your softened butter into the dry ingredients. Mix on a low speed until the mixture resembles coarse sand—a step that helps build structure in the cake.
Step 7 – Add Wet Mixtures
Then, pour in the milk and oil mixture, mixing until the dry ingredients are moistened. Increase the mixer speed to medium (about setting 4 on a KitchenAid) and let it mix for 2 minutes. This is crucial for developing the cake’s structure.
Step 8 – Fold in Egg White Mixture
Scrape down the bowl and reduce the speed to low. Gradually add your egg white mixture in three batches, allowing the batter to mix for 15 seconds after each addition to ensure even mixing.
Step 9 – Prepare for Baking
Once everything is combined, scrape the sides of the bowl again and pour the batter evenly into your prepared cake pans. This ensures that each layer will be equal in size once baked.
Step 10 – Baking Process
Bake for 35-40 minutes, or until a toothpick inserted into the center comes out clean. Watch closely, as you want to avoid over-baking.
Step 11 – Release Steam
As soon as the cakes are done, firmly tap the pans on the countertop to release steam, which can help prevent the cakes from shrinking unnecessarily.
Step 12 – Cool the Cakes
Let the cakes cool in the pans for about 10 minutes. Then flip them onto a cooling rack to cool completely. Allowing them to chill before frosting helps the layers to retain moisture.
Step 13 – Whipped Cream Preparation
For your whipped cream, sprinkle the gelatin over the cold water and let it bloom for about 5 minutes. Melt the gelatin in the microwave for about 5 seconds, stirring until fully dissolved.
Step 14 – Whip Heavy Cream
In a separate cold mixing bowl, whip your heavy cream until you reach soft peaks. Gradually add in the powdered sugar and vanilla extract, mixing until well combined.
Step 15 – Add Gelatin to Cream
Lower the mixer speed and drizzle in the melted gelatin. Continue mixing until the whipped cream forms stiff peaks, careful not to over-mix to prevent it from turning into butter.
Serving Suggestions for Pink Velvet Buttermilk Cake Recipe
Best Occasions to Serve This Dish
The Pink Velvet Buttermilk Cake is ideal for a variety of occasions. Birthdays are a natural fit, especially for those celebrating milestones that call for something uniquely beautiful. Baby showers and bridal showers also lend themselves well to this pastel delight, where its striking appearance can take center stage. Many families love to serve it at holiday gatherings, enjoying vibrant desserts amidst their seasonal feasts.
What to Serve With It
Pair your Pink Velvet Buttermilk Cake with a cup of tea or coffee for a sophisticated touch. If it’s for a special occasion, consider serving it with fresh raspberries scattered on top for an added burst of flavor. Adding a side of vanilla ice cream can elevate your dessert experience, enhancing the creamy texture and adding sweetness that complements the cake perfectly.
How to Store Pink Velvet Buttermilk Cake Recipe Properly
Best Storage Practices
Store any leftover cake in an airtight container in the refrigerator, where it will keep for up to 4-5 days. If you’ve already frosted it with whipped cream, be sure to consume it within a shorter time frame, as whipped cream can begin to lose its stability after a couple of days.
Reheating and Freezing Tips
If you’ve baked the layers but need to freeze them for later use, wrap each cake layer in plastic wrap and place it in a freezer bag. This will keep them fresh for up to three months. To reheat, let the cake thaw in the refrigerator overnight and then bring to room temperature before decorating and serving.
Tips & Tricks for Pink Velvet Buttermilk Cake Recipe
Mistakes to Avoid
1 – Overmixing: Mixing too long after adding egg whites can lead to a denser cake. Mix just until combined.
2 – Skipping the Cooling Time: Don’t frost the cake right away. Allowing it to cool completely is crucial for maintaining structure.
3 – Inaccurate Measurements: Always use a kitchen scale for accuracy, especially with flour and sugar, as this affects texture.
4 – Incorrect Oven Temperature: Ovens vary, so using an oven thermometer ensures your cake bakes properly without burning.
5 – Not Using Room Temperature Ingredients: Cold eggs and butter can lead to improper mixing and uneven texture.
Extra Tips for Better Results
By adding a hint of almond extract, you can provide depth to the flavor. Consider decorating the whipped cream with colored sprinkles or edible glitter for visual appeal. If you want to make it more decadent, layer it with some chocolate or raspberry jam in between the cake layers for an extra surprise.
Recipe Variations of Pink Velvet Buttermilk Cake Recipe
Creative Twists
1 – Chocolate Pink Velvet: Swap out a portion of the flour for cocoa powder to create a chocolate twist. This gives you a unique flavor while keeping that lovely pink hue.
2 – Fruit-Infused: Add pureed strawberries or raspberries to the batter for added flavor and a touch of fruitiness that complements the buttermilk.
3 – Lemon Zest: Incorporating lemon zest into the batter adds a refreshing twist that brightens up the flavor profile.
Dietary Adjustments
For those who are vegan, you can replace the egg whites with aquafaba or a commercial egg replacer, utilizing plant-based milk for the buttermilk. There are gluten-free flours available that can be substituted without compromising the texture. If dairy-free is a must, using coconut cream for the whipped topping can work beautifully.
Conclusion about Pink Velvet Buttermilk Cake Recipe
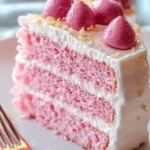
In a culinary world filled with endless cake options, the Pink Velvet Buttermilk Cake Recipe stands out with its striking appearance, tender texture, and delightful flavor combination. This cake isn’t just a dessert; it’s an experience that brings joy to any gathering. Layered with delicious whipped cream and garnished with fresh raspberries, it’s perfect for any celebration or a sweet treat at home. Baking this cake provides an opportunity to create warm memories, whether you are surprising a loved one or treating yourself. So why not gather your ingredients today and make your own Pink Velvet Buttermilk Cake? You won’t regret it!
FAQs about Pink Velvet Buttermilk Cake Recipe
Can I make the cake in advance and freeze it?
Yes, you can bake the cake layers ahead of time and freeze them wrapped in plastic wrap for up to three months.
How long can I store the cake in the fridge?
Once baked and frosted, the cake can be kept in the refrigerator for 4-5 days, but it’s best enjoyed fresh.
What if I don’t have buttermilk?
You can make a substitute by combining one cup of milk with one tablespoon of vinegar or lemon juice. Let it sit for a few minutes before using.
Can I use liquid food coloring instead of gel?
Yes, but gel food coloring is recommended for more vibrant colors without adding extra moisture to the batter.
What’s the best way to frost a cake?
Let the cake cool completely, then apply a crumb coat, refrigerate for 30 minutes, and finish with your final layer of whipped cream.
Can I use a different type of frosting?
Absolutely. Cream cheese frosting or a simple buttercream can provide delicious alternatives to the whipped cream.
What can I do if my cake sinks in the middle?
This usually happens due to overmixing or incorrect oven temperature. Always check that your oven is calibrated correctly and take care to mix just until combined.
Is it possible to make this cake sugar-free?
You can use sugar substitutes that measure similarly to sugar, but keep in mind that it might slightly change the texture and flavor.
How do I know when the cake is done baking?
Insert a toothpick in the center; if it comes out clean or with a few moist crumbs, the cake is done.
Can I add fruit into the cake batter?
Definitely! Fresh raspberries or chopped strawberries can be folded in gently for a delicious fruity flavor.
Pink Velvet Buttermilk Cake
Ingrédients
For the Cake
- 13 oz cake flour
- 12 oz granulated sugar
- 1 teaspoon salt
- 1 tablespoon baking powder
- ½ teaspoon baking soda
- 5 oz egg whites (room temperature)
- 4 oz vegetable oil
- 10 oz buttermilk (room temperature or slightly warm)
- 6 oz unsalted butter (softened)
- 2 teaspoons vanilla extract
- 2 drops electric pink food coloring
For the Whipped Cream
- 24 oz heavy whipping cream
- 4 oz powdered sugar
- 2 teaspoons powdered gelatin
- 1 tablespoon cold water
- 1 teaspoon vanilla extract (for whipped cream)
- 1 teaspoon heavy whipping cream (for gelatin)
Optional Garnish
- 1 cup fresh raspberries optional for garnish
Instructions
Preparation
- Gather all your ingredients and ensure that your butter and egg whites are at room temperature.
- Preheat oven to 335–350º F (168–177º C).
- Prepare two to three 6″x2″ cake pans with pan spray or cake goop.
Mixing
- In a stand mixer, combine cake flour, sugar, baking powder, baking soda, and salt. Mix on low for 10 seconds.
- In a separate bowl, mix together ½ cup of buttermilk with the vegetable oil.
- In another bowl, whisk together the remaining buttermilk, egg whites, pink food coloring, and vanilla.
- Add softened butter to dry ingredients and mix until the mixture resembles coarse sand.
- Pour in the milk and oil mixture and mix until moistened. Then increase speed to medium and mix for 2 minutes.
- Fold in the egg white mixture in three batches, mixing for 15 seconds after each addition.
Baking
- Pour the batter evenly into prepared cake pans.
- Bake for 35-40 minutes, or until a toothpick comes out clean.
- Tap pans to release steam and then cool for 10 minutes before transferring to a cooling rack.
Whipped Cream Preparation
- Sprinkle gelatin over cold water and let bloom for 5 minutes. Then melt in the microwave.
- Whip heavy cream until soft peaks form, then gradually add powdered sugar and vanilla extract.
- Lower the mixer speed and drizzle in the melted gelatin until stiff peaks form.
Serving
- Frost cooled cake layers with whipped cream and garnish with fresh raspberries if desired.