

Table of Contents
Introduction to Loaded Brownie Cheesecake Cups
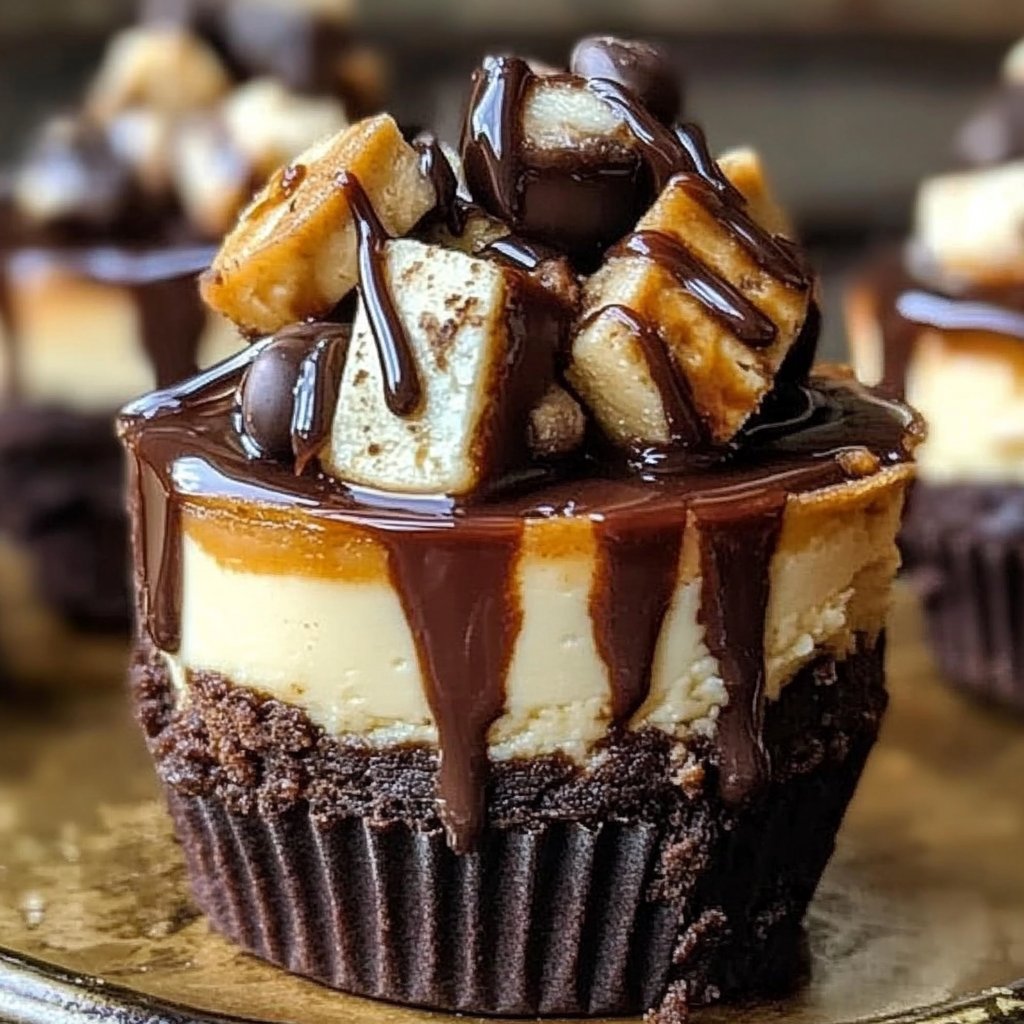
Have you ever experienced the perfect blend of rich chocolate, creamy cheesecake, and indulgent toppings all in one bite? If you haven’t, then you are in for a delightful treat with Loaded Brownie Cheesecake Cups. This recipe combines two beloved desserts, brownies and cheesecake, into adorable, individual servings that are sure to impress friends and family. Imagine biting into a warm brownie base, topped with velvety cheesecake that melts in your mouth—each bite bursting with flavor.
What makes Loaded Brownie Cheesecake Cups so special is not just their taste; it’s how easy they are to prepare. With simple ingredients and straightforward steps, you can whip up these delightful cups without any fuss. Moreover, they are incredibly versatile, allowing for various toppings and mix-ins to suit any occasion or palate. Whether you’re hosting a party or just looking to satisfy a sweet tooth, these cups deliver.
You might be wondering how this recipe stands out from traditional desserts. Unlike a typical cheesecake or a plain brownie, Loaded Brownie Cheesecake Cups offer the best of both worlds in a fun and portable format. They are perfect for sharing, but you might not want to! Each cup holds a perfect serving, making them ideal for any gathering or even a cozy night in. So why not indulge yourself in a little piece of heaven? Let’s dive deeper into why you’ll love this recipe and how to make it your own.
Key Benefits of Loaded Brownie Cheesecake Cups
Why You’ll Love This Recipe
- Decadent Flavor: The marriage of cheesecake and brownie is a match made in dessert heaven.
- Individual Servings: Perfect portions make for easy serving and less mess.
- Versatile Toppings: Customize each cup with your favorite toppings or mix-ins.
- Easy Preparation: Simple ingredients and straightforward steps mean anyone can make them.
- Ideal for Any Occasion: Whether it’s a birthday, holiday, or just a weekend treat, these cups fit the bill.
- Make Ahead: Perfect for prepping in advance, meaning you can enjoy hassle-free entertaining.
What Makes It Stand Out
Loaded Brownie Cheesecake Cups stand out because they combine two beloved desserts into a single dish, providing texture and flavor that delights every palate. The rich, fudgy brownie base serves as the perfect foundation for the creamy cheesecake layer above it. This creative combination offers a unique twist on both classics, turning them into delectable individual servings.
Additionally, these cups allow for personalization. You can mix chocolate chips into the cheesecake, top them with whipped cream, or drizzle chocolate sauce for added indulgence. The options are endless, and this versatility makes Loaded Brownie Cheesecake Cups a go-to recipe for various occasions or moods. From casual family dinners to elegant gatherings, you can tailor them to create a memorable dessert experience.
Ingredients for Loaded Brownie Cheesecake Cups
Complete Ingredient List with Measurements
- 1/2 cup unsalted butter, melted
- 1 cup granulated sugar
- 2 large eggs, room temperature
- 1 teaspoon pure vanilla extract
- 1/2 cup unsweetened cocoa powder
- 1/2 cup all-purpose flour
- 1/4 teaspoon salt
- 1/2 cup semi-sweet chocolate chips
- 16 oz cream cheese, softened
- 2/3 cup granulated sugar
- 2 large eggs, room temperature
- 1 teaspoon pure vanilla extract
- 1/4 cup sour cream
- 1/4 cup mini chocolate chips (optional)
- 2 tablespoons chocolate sauce for drizzling
- Whipped cream
- Fresh berries
Substitutes and Alternatives
If you have dietary restrictions or allergies, there are wonderful alternatives to certain ingredients. For instance, if you’re looking for a gluten-free option, you can substitute all-purpose flour with a gluten-free blend. If dairy is an issue, consider using a dairy-free cream cheese or nut-based yogurt.
For those seeking to reduce sugar, you can opt for a sugar alternative or reduce the sugar amount slightly in both the brownie and cheesecake layers without sacrificing flavor. The beauty of Loaded Brownie Cheesecake Cups lies in their adaptability. You can truly make them fit your needs without compromising on taste!
How to Make Loaded Brownie Cheesecake Cups – Step-by-Step Directions
Step 1 – Prepare Ingredients
Start by preheating your oven to 325°F. Gather all your ingredients and let the butter and cream cheese come to room temperature. This ensures everything mixes smoothly, promoting a delightful texture in your Loaded Brownie Cheesecake Cups.
Step 2 – Cook the Base
In a medium bowl, whisk together the melted butter and granulated sugar until combined. Add the eggs one at a time, whisking thoroughly after each addition. Stir in the vanilla extract. Then, in a separate bowl, combine the cocoa powder, flour, and salt. Slowly fold this dry mix into the wet ingredients just until everything is combined. Gently fold in the semi-sweet chocolate chips before moving on.
Step 3 – Fill the Muffin Tin
Divide the brownie batter evenly among the muffin cups, filling each about one-third full. This ensures there’s enough room for the cheesecake layer on top. Bake the brownie bases for about 10-12 minutes, just until they’re set but not fully baked—this will be important for the layering process.
Step 4 – Prepare the Cheesecake Mixture
While the brownie bases are baking, prepare the cheesecake layer. In a large bowl, beat the softened cream cheese until it’s nice and smooth. Gradually add the sugar, continuing to beat until fully incorporated. Add the eggs one at a time on low speed to maintain a smooth consistency. Finally, fold in the vanilla extract and sour cream to add a hint of tanginess.
Step 5 – Assemble the Cups
Once the brownie bases have partially baked, remove them from the oven. Carefully pour the cheesecake mixture over the brownie layers, filling each cup nearly to the top. If you like, sprinkle mini chocolate chips over the cheesecake layer to add an extra chocolatey flavor and appealing texture.
Step 6 – Create a Water Bath
To ensure even and gentle baking, set the muffin tin inside a larger baking pan. Pour hot water into the larger pan, filling it halfway up the sides of the muffin tin. This water bath helps prevent cracks in your cheesecake layer, resulting in a smooth finish.
Step 7 – Bake to Perfection
Bake the Loaded Brownie Cheesecake Cups for 20-25 minutes. They’re done when the edges are set while the centers still jiggle slightly. This jiggle is important; you’ll want a creamy center once they cool.
Step 8 – Cooling Time
After baking, turn off the oven and crack the door open. Let the cups cool inside the oven for about 30 minutes. This gradual cooling helps avoid sudden temperature changes, which can lead to cracks in the cheesecake.
Step 9 – Chill in the Fridge
Once cooled to room temperature, remove the muffin tin from the oven and the water bath. Let the Loaded Brownie Cheesecake Cups cool completely before refrigerating for at least 4 hours, or ideally overnight. This chilling time allows the flavors to meld and the cheesecake to set perfectly.
Step 10 – Serve and Enjoy
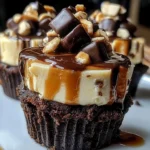
When you’re ready to serve, garnish with chocolate sauce, a dollop of whipped cream, and fresh berries for a pop of color and freshness. Your Loaded Brownie Cheesecake Cups are now ready for everyone to enjoy!
Serving Suggestions for Loaded Brownie Cheesecake Cups
Best Occasions to Serve This Dish
These Loaded Brownie Cheesecake Cups are perfect for various occasions. Whether you’re hosting a birthday party, a holiday gathering, or simply enjoying a family dinner, these cups impress and satisfy. Their individual servings make them great for buffets or potlucks where guests can enjoy them without the hassle.
If you’re looking to make your next get-together stand out, serving these cups will surely be a highlight. Their charming presentation and mouthwatering flavors can elevate any dessert table.
What to Serve With It
Complement your Loaded Brownie Cheesecake Cups with a variety of delicious sides and toppings. Fresh fruit like strawberries, raspberries, or blueberries pairs beautifully, adding a refreshing tartness. You can also serve these cups alongside a scoop of vanilla ice cream for that extra indulgence.
Consider pairing them with coffee or dessert wines for an upscale twist. Whether choosing something fruity or decadent, these cups can fit seamlessly into any dessert spread.
How to Store Loaded Brownie Cheesecake Cups Properly
Best Storage Practices
To store your Loaded Brownie Cheesecake Cups, keep them in an airtight container in the refrigerator. They can last for up to a week, although they may not last that long once you dig in! If you want to enjoy them for longer, consider freezing.
Reheating and Freezing Tips
When reheating, gently warm them in the microwave for a few seconds for the best experience. If freezing, wrap each cup individually in plastic wrap, then place them in a freezer-safe container. They can be stored this way for up to three months. When you’re ready to enjoy, simply let them thaw overnight in the refrigerator before serving.
Tips & Tricks for Loaded Brownie Cheesecake Cups
Mistakes to Avoid
1 – Overmixing the Batter: Overmixing can lead to a tough texture in your brownie base. Mix just until combined to keep it light and fudgy.
2 – Skipping the Water Bath: Forego the water bath at your own risk. It helps prevent cracking and ensures even cooking throughout.
3 – Not Letting Them Cool Gradually: Rapid temperature changes can cause cracking. Make sure to cool them slowly in the oven after baking.
4 – Underbaking: While you want slight jiggle in the center of the cheesecake, underbaking too much can lead to an overly gooey texture.
5 – Not Using Room Temperature Ingredients: Cold ingredients may not incorporate well, resulting in lumps in your cheesecake layer.
6 – Skipping the Chill Time: This dessert demands chilling to enhance texture and flavors; don’t rush this important step!
Extra Tips for Better Results
- For a deeper chocolate flavor, consider using dark chocolate cocoa powder.
- Enhance your filling with extra flavors by adding a touch of lemon zest to the cheesecake layer.
- For easier removal from the muffin tin, line each cup with parchment paper instead of standard liners. This ensures no delicious bites get left behind.
Recipe Variations of Loaded Brownie Cheesecake Cups
Creative Twists
1 – Nutty Surprise: Add some chopped nuts, like walnuts or pecans, to the brownie base for a delightful crunch that pairs well with the creaminess of the cheesecake.
2 – Caramel Drizzle: Introduce a layer of caramel sauce beneath the cheesecake layer for a sweet surprise with every bite.
3 – Flavored Cheesecake: Get creative with flavored extracts, such as almond or hazelnut, to elevate the cheesecake layer into new realms of taste.
4 – Seasonal Spins: In the fall, add a pinch of cinnamon and pumpkin spice to the cheesecake batter for a festive twist.
Dietary Adjustments
For a vegan version, substitute the eggs with a flax egg and opt for plant-based cream cheese and butter. To make it gluten-free, ensure all your ingredients, including chocolate chips, are certified gluten-free. Experimenting with different dietary needs allows you to enjoy Loaded Brownie Cheesecake Cups without losing the joy they bring!
Conclusion about Loaded Brownie Cheesecake Cups
In conclusion, Loaded Brownie Cheesecake Cups are a decadent dessert that perfectly marries the richness of cheesecake with the indulgent taste of brownies. Their charming presentation, combined with their delightful flavors, makes them an ideal choice for any occasion. Easy to make, customizable, and incredibly satisfying, these cups are sure to create lasting memories for you and your guests. So why not give this recipe a try? Indulge in the deliciousness that is Loaded Brownie Cheesecake Cups, and watch them become a staple in your dessert repertoire.
FAQs about Loaded Brownie Cheesecake Cups
Can I make Loaded Brownie Cheesecake Cups ahead of time?
Absolutely! These cups can be prepared a day ahead, making them perfect for entertaining. Just refrigerate them overnight for the best flavor and texture.
How should I store Loaded Brownie Cheesecake Cups?
Store them in an airtight container in the refrigerator for up to a week. For longer storage, you can freeze them.
Can I freeze these cups?
Yes, you can freeze them! Wrap each cup in plastic wrap and place them in a freezer-safe container. They can last for three months frozen.
What can I use instead of cream cheese?
For dairy-free or vegan options, use plant-based cream cheese or nut-based yogurt as a substitute in the cheesecake layer.
How do I prevent the cheesecake from cracking?
Use a water bath while baking, and make sure to cool the cups gradually in the oven after baking to help prevent cracking.
Can I change the flavor of the cheesecake?
Yes! You can add different extracts or flavored ingredients to create unique cheesecake flavors.
What’s the best way to serve them?
They can be served directly from the muffin tin or placed on a dessert platter with toppings like whipped cream, chocolate sauce, and fresh berries.
Can I use a different sweetener?
You can use your favorite sugar alternative for a lower-sugar option; just be sure to check the conversion for baking.
Do these cups need to be refrigerated after baking?
Yes, it’s best to refrigerate them after baking to allow the cheesecake to set and intensify the flavors.
How do I reheat Loaded Brownie Cheesecake Cups?
Reheat them gently in the microwave for a few seconds until warm. Enjoying them warm adds even more comfort to this delicious dessert.
Loaded Brownie Cheesecake Cups
Ingrédients
Brownie Base
- 1/2 cup unsalted butter, melted Ensure butter is melted before mixing.
- 1 cup granulated sugar For sweetness.
- 2 large eggs, room temperature Helps in mixing.
- 1 teaspoon pure vanilla extract Adds flavor.
- 1/2 cup unsweetened cocoa powder For the chocolate flavor.
- 1/2 cup all-purpose flour Can substitute with gluten-free flour.
- 1/4 teaspoon salt
- 1/2 cup semi-sweet chocolate chips Fold into the brownie batter.
Cheesecake Layer
- 16 oz cream cheese, softened Ensure it’s at room temperature for easy mixing.
- 2/3 cup granulated sugar For sweetness.
- 2 large eggs, room temperature Helps in mixing.
- 1 teaspoon pure vanilla extract For flavor.
- 1/4 cup sour cream Adds tanginess.
- 1/4 cup mini chocolate chips Optional, for topping.
Toppings
- 2 tablespoons chocolate sauce for drizzling For decorative and flavor purposes.
- to taste whipped cream For serving.
- to taste fresh berries For serving.
Instructions
Preparation
- Preheat your oven to 325°F (160°C).
- Gather all your ingredients and let the butter and cream cheese come to room temperature.
Cooking the Base
- In a medium bowl, whisk together the melted butter and granulated sugar until combined.
- Add the eggs one at a time, whisking thoroughly after each addition. Stir in the vanilla extract.
- In a separate bowl, combine the cocoa powder, flour, and salt. Slowly fold this dry mix into the wet ingredients just until combined.
- Gently fold in the semi-sweet chocolate chips.
Filling the Muffin Tin
- Divide the brownie batter evenly among the muffin cups, filling each about one-third full.
- Bake the brownie bases for about 10-12 minutes until set but not fully baked.
Preparing the Cheesecake Mixture
- In a large bowl, beat the softened cream cheese until nice and smooth.
- Gradually add the sugar, continuing to beat until fully incorporated.
- Add the eggs one at a time on low speed to maintain a smooth consistency.
- Fold in the vanilla extract and sour cream.
Assembling the Cups
- Once the brownie bases have partially baked, carefully pour the cheesecake mixture over the brownie layers.
- Sprinkle mini chocolate chips over the cheesecake layer if desired.
Creating a Water Bath
- Set the muffin tin inside a larger baking pan, pouring hot water into the larger pan halfway up the muffin tin.
Baking
- Bake the Loaded Brownie Cheesecake Cups for 20-25 minutes until the edges are set while the centers jiggle slightly.
Cooling Off
- Turn off the oven and crack the door open, letting the cups cool inside for about 30 minutes.
- Remove the muffin tin from the oven and water bath, allowing the cups to cool completely before refrigerating.
Serving
- Garnish with chocolate sauce, whipped cream, and fresh berries before serving.