
Table of Contents
Introduction to Japanese Cotton Cheesecake
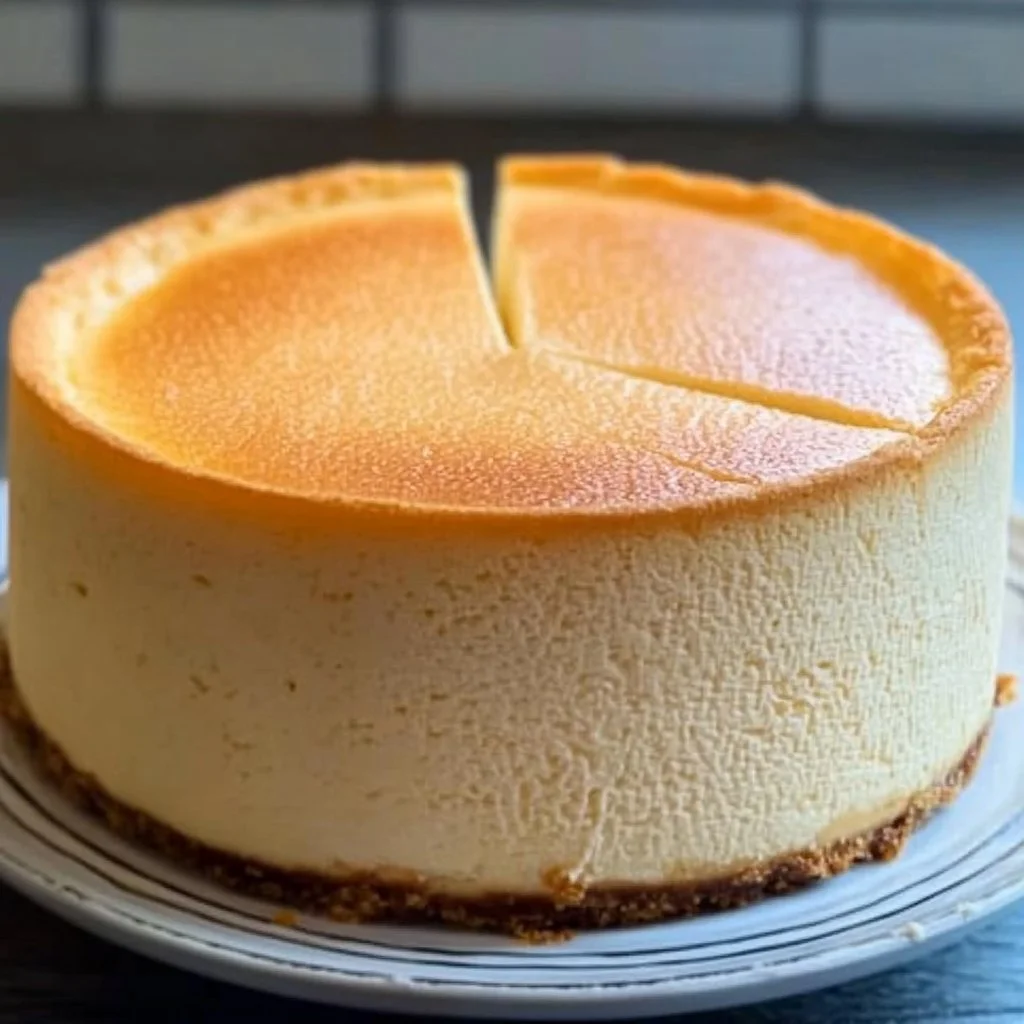
Japanese Cotton Cheesecake is a delightful dessert that perfectly embodies the essence of lightness and fluffiness in every bite. Have you ever dreamt of a cheesecake so airy it feels like biting into a cloud? This recipe accomplishes just that, delivering a heavenly treat that leaves everyone craving more. The unique texture and deliciously subtle flavor make this cheesecake stand out from its denser counterparts.
What truly makes Japanese Cotton Cheesecake special is its simplicity in preparation. Utilizing everyday ingredients, this dessert can be made by anyone, regardless of their baking experience. Each step is straightforward, ensuring that even novice cooks can successfully produce this elegant dessert. It’s a fantastic way to impress guests or elevate a simple family meal.
The lightness of the cake is achieved through the careful folding of beaten egg whites into the cream cheese base, creating a delicate balance that is hard to resist. Unlike traditional cheesecakes, which can often be rich and heavy, this version offers a refreshing alternative, making it suitable for any occasion—be it a birthday party, holiday gathering, or just a sweet indulgence after dinner.
In Japanese culture, food is not just about nourishment but also about aesthetics and texture. This cheesecake not only tastes divine but also presents beautifully, making it a wonderful centerpiece. The unique process and the satisfying outcome of the Japanese Cotton Cheesecake turn baking into a joyful experience, encouraging you to try and share this marvelous recipe with family and friends.
Key Benefits of Japanese Cotton Cheesecake
Why You’ll Love This Recipe
- Light and Airy Texture: Enjoy a cheesecake that melts in your mouth with its fluffy consistency.
- Simple Ingredients: Made with readily available items, making it budget-friendly and easy to source.
- Versatile Flavors: Can be customized with different extracts or toppings to suit your taste.
- Great for All Occasions: Perfect for gatherings, celebrations, or simply an indulgent treat at home.
- Easy to Make: With straightforward steps, anyone can create this impressive dessert.
- Deliciously Balanced Flavor: The gentle sweetness and subtle creaminess make it irresistible.
What Makes It Stand Out
Japanese Cotton Cheesecake is distinct not just because of its unique texture but also due to its cultural significance. Originating from Japan, this cheesecake embodies the artistry of Japanese baking, focusing on the delicate balance of flavors and textures. It celebrates the concept of “umami,” ensuring each bite is a memorable culinary experience.
Another standout feature is its adaptability. While the basic recipe is delicious on its own, you can easily personalize the Japanese Cotton Cheesecake with various toppings like fruits, chocolate, or even flavored creams. This versatility ensures it can be a regular addition to your dessert repertoire while also always being able to impress your guests.
Ingredients for Japanese Cotton Cheesecake
Complete Ingredient List with Measurements
- 8 ounces cream cheese, softened
- 1/2 cup granulated sugar, divided
- 1/4 cup milk
- 3 large eggs, separated
- 1 teaspoon vanilla extract
- 1/4 cup all-purpose flour
- 1 tablespoon corn starch
- 1/4 teaspoon salt
- 1/4 teaspoon cream of tartar
Substitutes and Alternatives
For those with dietary restrictions or preferences, there are several substitutions you can consider. If you’re lactose intolerant, dairy-free cream cheese and alternative milks can create a similar creamy base. For a gluten-free version, substituting all-purpose flour with a gluten-free baking blend works well.
Additionally, if you’re looking to reduce sugar intake, you can opt for sugar alternatives suitable for baking, ensuring they can withstand the baking process. These swaps maintain the integrity of the Japanese Cotton Cheesecake while catering to various dietary needs.
How to Make Japanese Cotton Cheesecake – Step-by-Step Directions
Step 1 – Prepare Ingredients
Begin by gathering all your ingredients. Make sure the cream cheese is softened for easy mixing. Preheat the oven to 320°F (160°C), grease an 8-inch round cake pan, and line the bottom with parchment paper to prevent sticking. Set everything within reach to create a seamless baking experience.
Step 2 – Cook the Base
In a mixing bowl, combine the softened cream cheese, 1/4 cup of granulated sugar, and milk. Place this bowl over a water bath, warming it gently until the mixture is melted and smooth. This method ensures a creamy base without any lumps. Once melted, remove it from the heat and let it cool slightly.
Step 3 – Add Egg Yolks and Flavor
Once your cream cheese mixture has cooled a bit, add the egg yolks and vanilla extract. Mix it well until fully combined, ensuring the yolks are incorporated smoothly into the cream cheese without any visible streaks.
Step 4 – Sift Dry Ingredients
To prevent clumps, sift together the all-purpose flour, corn starch, and salt directly into your cream cheese mixture. Stir gently until the mixture is smooth and well blended. This step is crucial for achieving a light texture in the cheesecake.
Step 5 – Whip Egg Whites
In a clean mixing bowl, begin beating the egg whites with the cream of tartar. Continue to beat until soft peaks form. Gradually add the remaining 1/4 cup of sugar while beating, working until stiff peaks form. This is a critical step for creating the light and fluffy texture of Japanese Cotton Cheesecake.
Step 6 – Fold in Egg Whites
Take one-third of the beaten egg whites and carefully fold them into the cream cheese mixture. This initial folding helps lighten the mixture. Gradually fold in the remaining egg whites in two more additions, being gentle to maintain airiness.
Step 7 – Pour the Batter
Once fully combined, pour the batter into the prepared cake pan. Spread it evenly to ensure a uniform bake. The batter will be light and fluffy, contributing to the whimsical texture of the final product.
Step 8 – Water Bath Baking
Place the cake pan into a larger baking dish filled with hot water, creating a water bath. This method helps regulate the temperature and adds moisture, preventing the cheesecake from cracking. Bake for about 60 minutes, or until the top is golden and a toothpick inserted into the center comes out clean.
Step 9 – Cool the Cheesecake
After baking, turn off the oven and crack the door open, allowing the cheesecake to cool inside for about an hour. This gradual cooling helps maintain the texture and prevents sudden temperature changes that could lead to cracks.
Step 10 – Chill Before Serving
Once cooled, transfer the cheesecake to the refrigerator and chill for at least 4 hours, allowing it to set properly. This waiting period is essential for achieving the perfect slice. When ready to serve, carefully remove the cheesecake from the pan, slice, and enjoy!

Serving Suggestions for Japanese Cotton Cheesecake
Best Occasions to Serve This Dish
Japanese Cotton Cheesecake is incredibly versatile and perfect for various occasions. It makes an elegant dessert for birthday parties, where its light texture can balance out a festive meal. During holidays, its airy nature complements heavier dishes, making it a welcome addition to any spread.
For casual get-togethers, this cheesecake serves as a charming treat alongside coffee or tea, perfect for afternoon gatherings. Its delightful appearance and texture will surely delight your guests, no matter the event.
What to Serve With It
While Japanese Cotton Cheesecake is scrumptious on its own, you can elevate it further with some delicious accompaniments. Consider serving it with fresh berries, whipped cream, or a drizzle of chocolate or caramel sauce. Pairing it with a cup of green tea or espresso enhances the overall experience, making it a delightful culinary pairing.
How to Store Japanese Cotton Cheesecake Properly
Best Storage Practices
To store your Japanese Cotton Cheesecake, place it in an airtight container in the refrigerator. It can typically last up to 3-4 days while retaining its freshness. If you notice it starting to lose moisture, consider wrapping it in plastic wrap to keep it moist and flavorful.
Reheating and Freezing Tips
For best taste and texture, enjoy Japanese Cotton Cheesecake chilled. If you want to freeze it, wrap the cheesecake tightly in plastic wrap and then in aluminum foil. This method protects it from freezer burn. To thaw, move it from the freezer to the refrigerator overnight before serving again.
Tips & Tricks for Japanese Cotton Cheesecake
Mistakes to Avoid
- Overmixing the Batter: Be gentle when folding in the egg whites. Overmixing can deflate the batter.
- Improper Cooling: Skipping the gradual cooling process can lead to cracking.
- Incorrect Oven Temperature: Always use an accurate thermometer to prevent under or overbaking.
- Using Cold Ingredients: Make sure your cream cheese and eggs are at room temperature for optimal mixing.
- Not Using a Water Bath: This step is crucial for even baking, ensuring your cheesecake doesn’t dry out.
Extra Tips for Better Results
For enhanced flavor, you can add a touch of lemon zest or almond extract to the cream cheese mixture. To create a more visually appealing dessert, consider dusting with powdered sugar or serving on a plate with a berry coulis.
Recipe Variations of Japanese Cotton Cheesecake
Creative Twists
- Matcha Japanese Cotton Cheesecake: Incorporate matcha powder into the batter for a beautiful green color and earthy flavor.
- Chocolate Swirl Cheesecake: Add melted chocolate into the cream cheese mixture and swirl it for a chocolatey twist.
- Fruit-Infused Cheesecake: Fold in pureed fruits like mango or strawberry into the batter before baking for a refreshing taste.
Dietary Adjustments
For a vegan version, substitute the eggs with aquafaba (chickpea brine) and use a plant-based cream cheese. For gluten-free needs, a gluten-free flour blend works well. Adjusting the recipe to suit dietary preferences allows everyone to enjoy Japanese Cotton Cheesecake.
Conclusion about Japanese Cotton Cheesecake
Japanese Cotton Cheesecake is more than just a dessert; it’s a delightful experience that brings joy to any occasion. Its unique texture and subtle flavor make it a must-try, no matter your baking skill level. Whether enjoyed at a gathering or as a sweet treat at home, this cheesecake embodies the spirit of lightness and comfort. With simple ingredients and a straightforward process, you can create a beautiful masterpiece that impresses both the eyes and the palate. Indulging in a slice of Japanese Cotton Cheesecake is an invitation to savor life’s simple pleasures, making it a fantastic addition to your baking repertoire.
FAQs about Japanese Cotton Cheesecake
How long can I store Japanese Cotton Cheesecake?
You can store Japanese Cotton Cheesecake in the refrigerator for 3-4 days in an airtight container.
Can I freeze Japanese Cotton Cheesecake?
Yes, wrap it tightly and freeze for up to a month. Thaw it in the refrigerator overnight before serving.
What if I don’t have a water bath?
Using a water bath helps regulate baking temperature. If unavailable, bake in a regular pan but check frequently for doneness.
Can I use low-fat cream cheese?
Yes, low-fat cream cheese can work, but it may alter the texture slightly.
How do I prevent cracking in my cheesecake?
Gradual cooling and avoiding overbaking are key. Always let it cool in the oven before transferring it to the fridge.
Can I make this cheesecake ahead of time?
Absolutely! It’s perfect for making in advance, just store it in the fridge until serving.
Is it normal for Cheesecake to collapse?
Some sinking is normal as it cools. As long as it’s not overly dense or wet, it should be fine.
What’s the best way to slice Japanese Cotton Cheesecake?
Use a sharp knife, warmed in hot water, to make clean edges without tearing the cake.
How can I enhance the flavor of my cheesecake?
Consider adding citrus zest, spices, or extracts like vanilla or almond to the batter for more depth.
Can I substitute the eggs in this recipe?
Yes, you can use aquafaba or commercial egg replacers for a vegan option, but results may vary.

Japanese Cotton Cheesecake
Ingrédients
For the Cheesecake Base
- 8 ounces cream cheese, softened Ensure cream cheese is at room temperature for easy mixing.
- 1/2 cup granulated sugar, divided Use half for the base and half for the egg whites.
- 1/4 cup milk Any milk variety works, including lactose-free.
- 3 large eggs, separated Separate egg yolks and whites carefully.
- 1 teaspoon vanilla extract Can substitute with almond extract for variation.
- 1/4 cup all-purpose flour For gluten-free, use a gluten-free flour blend.
- 1 tablespoon corn starch Helps achieve the light texture.
- 1/4 teaspoon salt Enhances the flavor of the dessert.
- 1/4 teaspoon cream of tartar Stabilizes egg whites while whipping.
Instructions
Preparation
- Gather all ingredients and ensure cream cheese is softened. Preheat the oven to 320°F (160°C). Grease an 8-inch round cake pan and line it with parchment paper.
Prepare the Base
- In a mixing bowl, combine softened cream cheese, 1/4 cup of sugar, and milk over a water bath. Heat gently until melted and smooth.
- Remove from heat and let cool slightly.
Combine Ingredients
- Add egg yolks and vanilla to the cooled cream cheese mixture, mixing until combined.
- Sift together flour, corn starch, and salt into the mixture, stirring gently until smooth.
Prepare Egg Whites
- In a clean bowl, beat egg whites with cream of tartar until soft peaks form. Gradually add remaining sugar while beating until stiff peaks form.
Combine Mixtures
- Fold one-third of whipped egg whites into the cream cheese mixture. Carefully fold in the remaining egg whites in two additions.
Bake
- Pour the batter into the prepared cake pan and spread evenly. Place the pan in a larger baking dish filled with hot water, then bake for about 60 minutes.
- Check for doneness with a toothpick inserted into the center.
Cooling
- Turn off the oven, crack the door, and let the cheesecake cool inside for 1 hour.
Chill Before Serving
- Transfer to the refrigerator to chill for at least 4 hours before serving.
- Carefully remove from the cake pan, slice, and enjoy.