
Table of Contents
Introduction about Halloween Snack Board
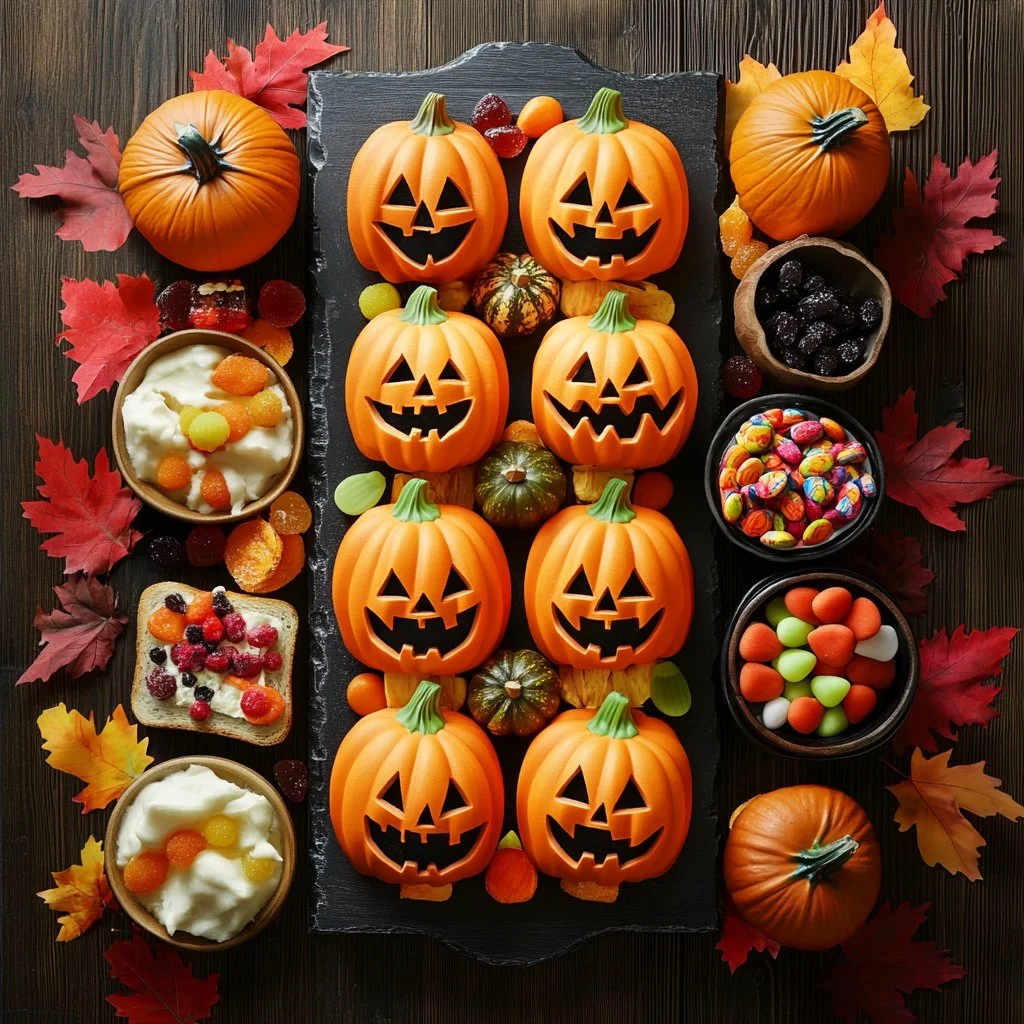
Is there anything more enchanting than the chill in the air and the vibrant colors of autumn? As Halloween approaches, it brings with it a sense of magic and excitement. And what better way to celebrate this spooky season than with a festive Halloween Snack Board? This delightful array of tasty treats is not only visually appealing but also incredibly easy to prepare. Imagine a colorful spread of cheese cubes, crunchy crackers, fresh grapes, and festive sweets that will please both kids and adults alike.
Have you ever hosted a Halloween gathering and found yourself scrambling for snack ideas that everyone would enjoy? Well, look no further! The Halloween Snack Board is here to save the day. You can effortlessly bring this delightful spread to life in just a few simple steps. Not only does it offer a variety of flavors, but it also allows for personalization based on your preferences. Whether you’re throwing a party or just looking for a fun family treat, this snack board is the perfect choice!
Why You’ll Love This Recipe
- Delicious Variety: With different flavors ranging from savory to sweet, there’s something for everyone’s taste.
- Simplicity: No cooking skills required! Just assemble, and you’re ready to go.
- Quick Preparation: Create this fun board in 15-30 minutes.
- Family-Friendly: Great for kids, making it an ideal treat for family gatherings or classroom parties.
- Seasonal & Thematic: The beautiful fall colors and Halloween shapes make it festive and fun.
What Makes It Stand Out
One of the standout features of the Halloween Snack Board is its originality. This isn’t just any snack board; it’s a fun and thematic culinary experience. You can customize it with seasonal touches and whimsical designs that fit into your Halloween theme. Think ghost-shaped cookies, creepy candy corn, and mini pumpkins that create an inviting and playful atmosphere.
Moreover, the Halloween Snack Board is not limited to one specific audience. It’s a universal hit! Perfect for children’s parties, adult Halloween gatherings, or even cozy family movie nights. It opens the door for creativity, allowing for different combinations depending on your flavor preferences or dietary needs.
Ingredients for Halloween Snack Board
Complete Ingredient List with Measurements
Creating an amazing Halloween Snack Board begins with gathering your ingredients. Here’s what you’ll need:
- Cheese Cubes: 1 pound (varied types like cheddar, mozzarella, or pepper jack)
- Crackers: 1 box (your choice—water crackers, whole-grain, or flavored)
- Grapes: 2 cups (red or green)
- Mini Pumpkins (cheese or cookie): 1 cup (for decoration)
- Chocolate-covered Pretzels: 1 cup
- Veggies: 1 cup (carrots and celery sticks)
- Hummus or Dip: 1 cup (any favorite flavor)
- Candy Corn: 1 cup (for a spooky sweet touch)
- Ghost-shaped Cookies: 1 dozen (homemade or store-bought)
Substitutes and Alternatives
You might have guests with dietary restrictions or personal preferences. Here are some common substitutes:
- Cheese Alternatives: Use dairy-free cheese or vegan cheese for a lactose-free option.
- Cracker Alternatives: Gluten-free crackers or vegetable chips can replace traditional crackers.
- Veggies: You can include bell pepper strips, cucumber slices, or cherry tomatoes for variation.
- Dip Choices: Swap out hummus for guacamole or salsa.
- Sweets: Instead of candy corn, use dark chocolate-covered raisins or fruit snacks.
How to Make Halloween Snack Board – Step-by-Step Directions
Creating your Halloween Snack Board is a fun and straightforward process. Follow these simple steps to craft an impressive and festive spread that your guests will love!
Step 1 – Prep Your Workspace and Ingredients
Before diving into assembling your Halloween Snack Board, take a moment to gather all your ingredients. Clear a large surface area where you can lay out everything comfortably. This makes the assembly process smooth and organized.
Step 2 – Arrange Cheese Cubes and Crackers
Start by placing the cheese cubes on the board. Choose different colors and textures to add visual appeal. Next, arrange the crackers around the cheese. You can create a pattern or simply scatter them—whatever looks best to you!
Step 3 – Fill Spaces with Grapes and Mini Pumpkins
In the remaining spaces, add the fresh grapes. Their vibrant colors provide a nice contrast to the cheeses and crackers. Then, scatter the mini pumpkins throughout the board. They not only look festive but also create a seasonal touch that screams Halloween!
Step 4 – Add Chocolate-Covered Pretzels and Veggies with Hummus
Next up, add the chocolate-covered pretzels for a sweet crunch. Place them in a corner or in small mounds to invite people to reach for them. Next, prepare your veggies by cutting them into sticks and arranging them in small bunches. Provide a small bowl of hummus or another dip right next to the veggies for a perfect pairing.
Step 5 – Sprinkle Candy Corn in Between Treats
To give your board that spooky touch, sprinkle candy corn in the gaps throughout the board. This adds a playful element and is sure to delight both kids and adults. Just be mindful of where you place them!
Step 6 – Add Ghost-Shaped Cookies for a Spooky Touch
Finally, tuck in those adorable ghost-shaped cookies. These can either be made from scratch or bought from a store. They will be the finishing touch, making your Halloween Snack Board truly irresistible.
Step 7 – Finalize the Presentation
Stand back and admire your creation! Feel free to adjust the layout if necessary. You want everything to look inviting and attractively scattered. This visual appeal is part of the experience.
Step 8 – Serve and Enjoy with Friends and Family
Once your Halloween Snack Board is complete, gather your friends and family around! Watch as their eyes light up at the sight of this festive feast. Encourage everyone to help themselves, making this a friendly and communal experience.
Timing Tips
From start to finish, expect this assembly to take about 30 minutes, give or take. The more hands you have, the quicker it can be done, especially when you let guests pitch in!
Visual and Textural Cues
Be mindful of mixing textures—crispy crackers against smooth cheeses, and crunchy veggies alongside sweet treats. The contrast will enhance both the visual appeal and the dining experience.
Serving Suggestions for Halloween Snack Board
Best Occasions to Serve This Dish
The Halloween Snack Board is versatile, making it appropriate for various occasions:
- Halloween Parties: Whether they’re themed costume parties or casual get-togethers, this snack board is a hit.
- Family Gatherings: It’s a festive way to bring the family together, creating fun memories.
- Classroom Celebrations: Share this board during school events or Halloween parties—kids will definitely enjoy it!
- Movie Nights: Cozy up with friends or family for a Halloween-themed movie marathon with tasty treats at hand.
What to Serve with It
Enhance your Halloween Snack Board experience with these pairing ideas:
Beverages:
- Apple cider (cold or warm)
- Halloween-themed cocktails or mocktails
- Sparkling water with orange slices
Toppings/Sauces:
- Extra dips (ranch, guacamole)
- Spiced nuts or trail mix
- Fresh herbs for garnish
Storing Halloween Snack Board Properly
Best Storage Practices
If you have leftovers, storing them correctly is vital to maintain freshness:
- Fridge: Place leftover cheese, crackers, veggies, and dips in airtight containers in the fridge. Most will last for about 3-4 days.
- Separate Containers: Keeping items separate will avoid sogginess, especially for crackers and veggies.
Reheating and Freezing Tips
- Freezing: Generally, it’s not recommended to freeze the entire board since some ingredients don’t thaw well. However, you can freeze homemade cookies or dip if you prefer.
- Reheating: If you want to serve again, just reassemble the fresh items but avoid reheating already prepped items.
Tips & Tricks for Halloween Snack Board
Mistakes to Avoid
- Ordering Too Much: Start small; it’s easy to get carried away. You can always add more!
- Mixing Flavors Inappropriately: Make sure the flavors are complementary—avoid overly strong flavors on the board.
- Neglecting Presentation: Take your time to make it visually appealing; it leads to everyone being more excited to dig in!
Extra Tips for Better Results
- Consider the Season: Incorporate seasonal veggies and fruits to keep it fresh.
- Mix it Up: Use different cheeses and crackers to provide variety in taste and texture.
- Interactive Elements: Allow guests to build their own mini snack boards; kids particularly enjoy customization!
Recipe Variations of Halloween Snack Board
Creative Twists
Elevate your Halloween Snack Board experience with these creative add-ons:
- Nuts: Consider including seasoned nuts or candy-coated nuts for extra crunch.
- Spices: Sprinkle a few pumpkin spice items for a seasonal touch.
- Seasonal Flavors: Introduce autumn flavors like caramel apples or cinnamon chips.
Dietary Adjustments
Understanding your guests’ dietary needs is essential. Here are a few adjustments you can make:
- Gluten-Free: Use gluten-free crackers or plain veggies to maintain flavor.
- Dairy-Free: Opt for vegan cheese and dairy-free dips to cater to lactose intolerant guests.
- Vegan Options: Stick to plant-based items for a completely vegan-friendly arrangement.
Conclusion about Halloween Snack Board
The Halloween Snack Board stands out as a delightful way to celebrate this festive season. With its easy preparation and vibrant assortment of flavors, it’s perfect for various gatherings or family fun. Each step of creating this board fills the room with excitement and warmth, engaging your guests in a shared culinary experience.
So why not take a moment to try this fantastic Halloween Snack Board for your next event? Your friends and family will surely be impressed, and you may find it becomes an annual tradition. Share your creations and feedback—you might inspire others to join in the fun of creating their Halloween Snack Boards!
FAQs about Halloween Snack Board
What if it doesn’t turn out right?
Don’t worry! Snack boards are all about creativity. If something doesn’t look great, adjust the layout or try different ingredients. Remember, it’s the taste that counts!
Can I prepare it ahead of time?
Absolutely! You can prep some items 1-2 days before. Just keep the ingredients stored separately to maintain freshness, and assemble right before serving.
What are the best ingredient substitutions?
Common substitutions can include gluten-free crackers, dairy-free cheese, or a variety of veggies based on personal preferences. Research suitable options that fit your dietary needs!
How long can it be stored?
Most items can last in the fridge for about 3-4 days. However, it’s best to enjoy your Halloween Snack Board fresh on the day it’s made.
Can I use store-bought dough or crust?
While this recipe doesn’t require baking, if you plan to add baked items, feel free to use store-bought options to save time.
Is this recipe kid-friendly or family-appropriate?
Absolutely! The Halloween Snack Board is designed for all ages, making it a fantastic treat for your family gatherings or children’s events.
Can I make this recipe allergen-free?
Yes! You can easily substitute all allergens—just opt for dairy-free, gluten-free, and nut-free options based on your guests’ needs.
This Halloween Snack Board is ready to become your seasonal go-to, offering joy, flavor, and a splash of creativity all in one. Happy snacking, and may your Halloween be filled with delicious treats!
Halloween Snack Board
Ingrédients
Main ingredients
- 1 pound Cheese Cubes (varied types like cheddar, mozzarella, or pepper jack)
- 1 box Crackers (your choice—water crackers, whole-grain, or flavored)
- 2 cups Grapes (red or green)
- 1 cup Mini Pumpkins (for decoration) Can be cheese or cookie shaped
- 1 cup Chocolate-covered Pretzels
- 1 cup Veggies (carrots and celery sticks) Cut into sticks
- 1 cup Hummus or Dip (any favorite flavor)
- 1 cup Candy Corn For a spooky sweet touch
- 12 pieces Ghost-shaped Cookies (homemade or store-bought)
Instructions
Preparation
- Gather all your ingredients and clear a large surface area for assembly.
- Start by placing the cheese cubes on the board, arranging different colors and textures.
- Arrange the crackers around the cheese, either in a pattern or scattered.
- Add the fresh grapes to the remaining spaces, followed by scattering the mini pumpkins.
- Add chocolate-covered pretzels in small mounds and prepare veggies in sticks, placing them next to a bowl of hummus.
- Sprinkle candy corn throughout the board for a playful touch.
- Finish with the ghost-shaped cookies tucked in for decoration.
- Final adjustments to the layout for visual appeal.
- Serve and enjoy with friends and family around!