
Table of Contents
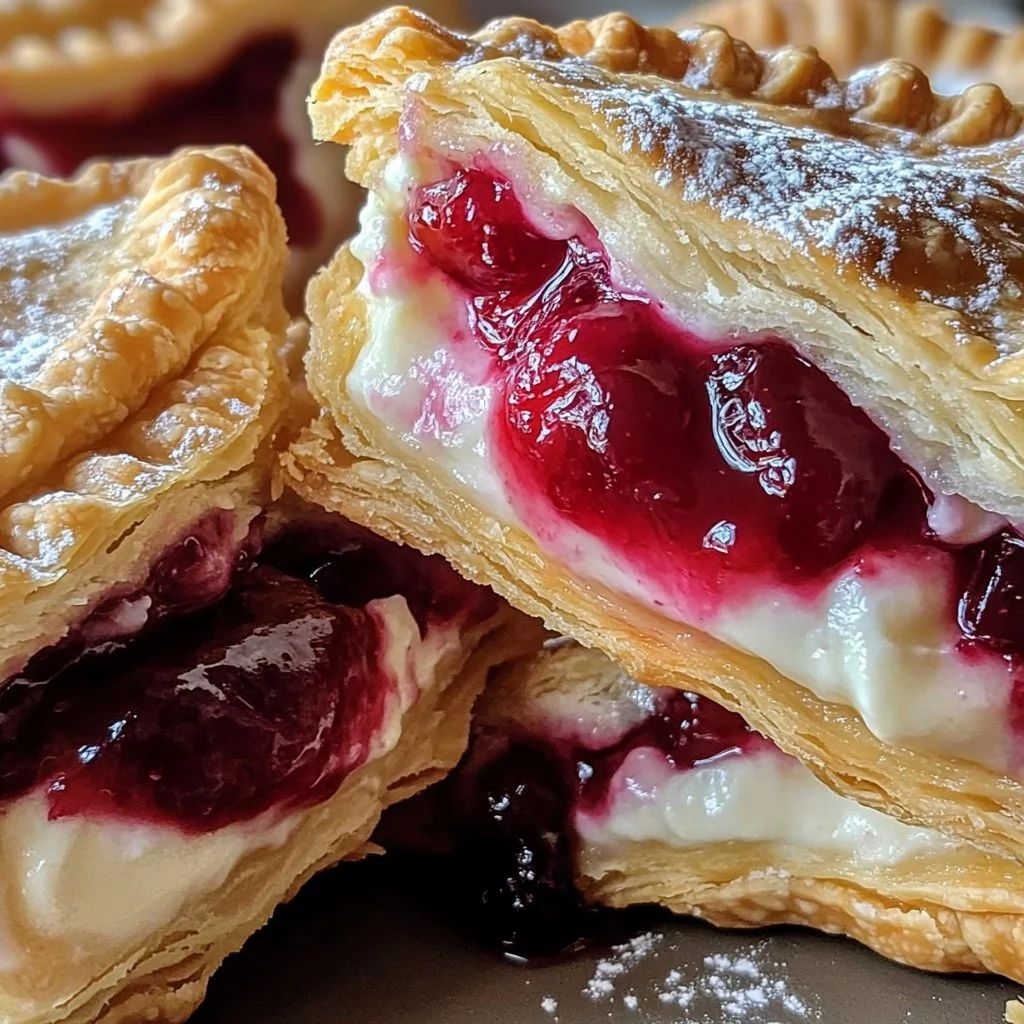
When it comes to desserts, few things evoke as much nostalgia as a good pie. And if you’re someone who adores cherries and cheesecake, then Cherry Cheesecake Hand Pies are likely to become your new favorite treat. Imagine biting into a warm, flaky crust that gives way to a creamy, luscious filling, topped with sweet, tangy cherry pie filling. Doesn’t that sound delightful? These hand pies are not only simple to make, but they are also incredibly delicious, making them perfect for any occasion.
What makes this recipe truly special is how portable it is. You can enjoy Cherry Cheesecake Hand Pies at a picnic, a family gathering, or even as a quick snack at home. The flavors are vibrant, and the texture is just right—crispy on the outside, soft and sweet on the inside. Whether you’re serving them for a special occasion or just because you want to indulge your sweet tooth, these hand pies are sure to impress.
Have you ever struggled with making an entire cheesecake but desired that same creamy goodness? This recipe simplifies that craving into bite-sized portions. Plus, you can customize each pie to suit personal tastes, ensuring that everyone gets their favorite flavor profile. With these Cherry Cheesecake Hand Pies, get ready to experience the joy of simple baking with a fun twist.
Key Benefits of Cherry Cheesecake Hand Pies
Why You’ll Love This Recipe
- Delicious Flavor: The combination of sweet cherry and creamy cheesecake is irresistible.
- Easy to Make: With simple ingredients and straightforward steps, anyone can tackle this recipe.
- Portable Treat: Perfect for parties or picnics, these hand pies are mess-free and easy to share.
- Versatile: Customize with different fillings like blueberries or chocolate for variety.
- Family-Friendly: Great for kids and adults alike, making them a hit with everyone.
- Fun to Make: Rolling, filling, and frying adds a fun twist to baking.
What Makes It Stand Out
What truly sets these Cherry Cheesecake Hand Pies apart is their originality. Hand-held pies offer a unique, portable way to enjoy a traditional dessert. Each pie packs an explosion of flavor in every bite, making it a delightful treat for both kids and adults. You can whip up a batch in no time, which means they are ideal for spontaneous gatherings or planned events.
Customization is another standout feature. You can modify the filling to suit dietary preferences or simply mix it up so that each person gets a pie flavor they adore. Whether you’re making these for a birthday party or a holiday gathering, Cherry Cheesecake Hand Pies bring a fresh twist to your usual dessert routine.
Ingredients for Cherry Cheesecake Hand Pies
Complete Ingredient List with Measurements
- 60 g granulated sugar
- 113 g cream cheese, softened
- 595 g cherry pie filling (canned)
- Refrigerated pie crusts, sufficient for 6 hand pies
- 60 g powdered sugar
- 5 ml corn syrup
- 15 ml water
- Vegetable oil, for deep frying
Substitutes and Alternatives
If you have dietary restrictions or preferences, you can easily swap out certain ingredients. For those who are lactose intolerant, look for dairy-free cream cheese. If you want a gluten-free option, substituting traditional pie crust with gluten-free dough is a great alternative. Vegan enthusiasts can opt for plant-based cream cheese and ensure the pie crust is dairy-free.
You can also switch out the cherry pie filling for other fruits. Blueberries, raspberries, or even a chocolate hazelnut spread can make for delicious variations. This flexibility ensures that you can always find a combination that works for you and your loved ones.
How to Make Cherry Cheesecake Hand Pies – Step-by-Step Directions
Step 1 – Prepare Ingredients
Start by gathering all your ingredients. It makes the process smoother if everything is within arm’s reach. Ensure your cream cheese is softened to room temperature for easy mixing.
Step 2 – Cook the Base
In a medium mixing bowl, combine the granulated sugar with the softened cream cheese. Use a hand mixer to blend these ingredients until they are smooth and homogeneous.
Step 3 – Prepare the Dough
Unroll your refrigerated pie crust onto a lightly floured surface. To create six equal circles, use a 13- to 15-cm bowl as your guide. If needed, gently roll out the dough to make more rounds.
Step 4 – Assemble the Pies
On each pie crust round, spread a heaping tablespoon (about 20 g) of your cream cheese filling. Top it with 30 g of cherry pie filling. This combination of creamy and fruity ensures each bite is delightfully satisfying.
Step 5 – Seal the Pies
Lightly brush the edges of each dough round with water. Fold the dough over the filling to create a half-moon shape. Be sure to pinch and crimp along the edge to secure everything tightly.
Step 6 – Prepare for Frying
In a deep, heavy-bottomed pot or Dutch oven, fill it with vegetable oil to a depth of 10–12 cm. Attach a cooking thermometer and heat the oil to 190°C. Maintaining precise temperature control is crucial for even frying.
Step 7 – Fry the Pies
Once the oil is preheated, carefully lower one assembled pie into the oil. Fry for about 2 to 3 minutes, turning occasionally for even browning until they are golden and crispy.
Step 8 – Drain and Glaze
Using a slotted utensil, carefully remove the fried pie and place it on paper towels to drain excess oil. While still warm, brush both sides with the glaze made from powdered sugar, corn syrup, and water.
Step 9 – Set and Serve
Place the glazed pies on a wire rack or a parchment-lined tray to set allowing the glaze to firm up. Repeat the frying and glazing process for the remaining pies.
Step 10 – Enjoy!
Serve the Cherry Cheesecake Hand Pies warm for the best texture and flavor. These delightful treats are best enjoyed fresh but can also be stored for later.
Serving Suggestions for Cherry Cheesecake Hand Pies
Best Occasions to Serve This Dish
Cherry Cheesecake Hand Pies are incredibly versatile and fit various occasions. Serve them as a delightful dessert after dinner, take them to potlucks, or enjoy them at casual gatherings. They are also perfect for birthday parties, holiday celebrations, or picnics in the park, where guests will appreciate the fun and portable nature of these sweet treats.
What to Serve With It
- Ice Cream: A scoop of vanilla or cherry ice cream pairs wonderfully.
- Whipped Cream: Extra whipped cream adds a delightful touch.
- Fresh Berries: Serve with a side of fresh berries for added texture.
- Coffee or Tea: Complement the hand pies with a warm beverage.
- Milk: A classic pairing that enhances the dessert experience.
How to Store Cherry Cheesecake Hand Pies Properly
Best Storage Practices
If you happen to have leftovers, store them in an airtight container. They can be kept at room temperature for a day or two. However, for longer storage, it’s best to refrigerate them where they can last up to a week.
Reheating and Freezing Tips
If you want to freeze your Cherry Cheesecake Hand Pies, wrap them individually in plastic wrap, then place them in a freezer-safe bag. They will keep well for up to three months. To reheat, bake them in a preheated oven at 180°C for about 10-15 minutes, or until warmed through.
Tips & Tricks for Cherry Cheesecake Hand Pies
Mistakes to Avoid
- Overfilling: Avoid adding too much filling to prevent spills during frying.
- Not Sealing Properly: Ensure edges are crimped well; otherwise, the filling may leak.
- Oil Temperature: Frying at too low a temperature can result in greasy pies.
- Skipping Glaze: Glazing adds flavor and shine; don’t skip this step!
- Using Cold Cream Cheese: Make sure it’s softened for the best creamy consistency.
Extra Tips for Better Results
- Experiment with flavored creams, like adding vanilla extract for an extra layer of flavor.
- Try brushing the crust with egg wash before frying for a golden finish.
- For a unique twist, sprinkle a cinnamon-sugar mixture on top of the glaze for added crunch and flavor.
Recipe Variations of Cherry Cheesecake Hand Pies
Creative Twists
- Berry Medley: Swap out the cherry filling for a blend of blueberries, raspberries, and strawberries for a summer twist.
- Chocolate Hazelnut: Replace the cream cheese filling with chocolate hazelnut spread and pair with banana slices for a decadent option.
- Spiced Apple: For fall, use spiced apple filling and complement it with a coconut cream for a unique flavor profile.
Dietary Adjustments
You can easily adapt this recipe for vegan, gluten-free, or dairy-free diets. Use a vegan cream cheese alternative and ensure your crust is made from gluten-free ingredients. For those who are dairy-free, simply choose a cream cheese alternative and check the crust label for dairy content.
Conclusion about Cherry Cheesecake Hand Pies
In summary, Cherry Cheesecake Hand Pies are a delicious, easy-to-prepare dessert that’s perfect for any occasion. Their delightful combination of flavors and textures makes them an instant hit, while the flexibility of ingredients allows for countless variations. These hand pies not only satisfy sweet cravings but also evoke warm memories and moments spent with loved ones. Whether enjoyed fresh from your kitchen or as a delightful addition to a gathering, you won’t regret making these. So what are you waiting for? Dive into the world of homemade bliss with these Cherry Cheesecake Hand Pies!
FAQs about Cherry Cheesecake Hand Pies
Can I prepare it ahead of time? Yes, you can assemble the pies a few hours in advance and keep them covered in the fridge until ready to fry.
Can I freeze it? Absolutely! Individually wrap each hand pie before freezing for the best results.
How long does it last? In the fridge, they can last up to a week; at room temperature, enjoy them within a couple of days for the best taste.
What are the best substitutions? You can use different fruits for filling, such as blueberries or apple pie filling.
Is this recipe family-friendly? Yes! Kids typically love the sweet flavors and fun hand-held format.
Can I bake them instead of frying? Yes, you can brush them with oil and bake at 180°C until golden, but frying offers the best texture.
What’s the best way to reheat them? Pop them in the oven at 180°C for about 10-15 minutes until warmed through.
Can I make mini versions? Yes! Simply cut smaller circles and adjust the filling amount accordingly.
Is it messy to make? A little, but the joy of biting into a fresh, warm hand pie is worth it!
How can I enhance the flavor? Adding spices like cinnamon or nutmeg to the filling can elevate the taste further.

Cherry Cheesecake Hand Pies
Ingrédients
For the Filling
- 113 g cream cheese, softened Ensure it’s at room temperature for mixing.
- 60 g granulated sugar
- 595 g cherry pie filling (canned) Can substitute with other fruit fillings.
For the Dough
- 1 package Refrigerated pie crusts, sufficient for 6 hand pies Use gluten-free crust for gluten-free option.
For Frying
- 10-12 cm Vegetable oil For deep frying
For the Glaze
- 60 g powdered sugar
- 5 ml corn syrup
- 15 ml water
Instructions
Preparation
- Gather all your ingredients and ensure your cream cheese is softened.
Mixing
- In a medium mixing bowl, combine the granulated sugar with the softened cream cheese using a hand mixer until smooth.
Prepare the Dough
- Unroll the refrigerated pie crust onto a lightly floured surface. Use a 13- to 15-cm bowl to cut six equal circles, if necessary, gently roll out the dough.
Assemble the Pies
- On each pie crust round, spread about 20 g of cream cheese filling and top with 30 g of cherry pie filling.
Seal the Pies
- Lightly brush the edges of each dough round with water, fold over to create a half-moon shape, and pinch the edges securely.
Fry the Pies
- Heat vegetable oil in a deep pot to 190°C. Fry each pie for about 2-3 minutes until golden and crispy.
Glaze the Pies
- Remove the fried pies and place them on paper towels to drain excess oil. Brush warm pies with the glaze.
Serving
- Place the pies on a wire rack to set. Serve warm for best flavor.