
Table of Contents
Introduction about Spooky Baked Halloween Chips
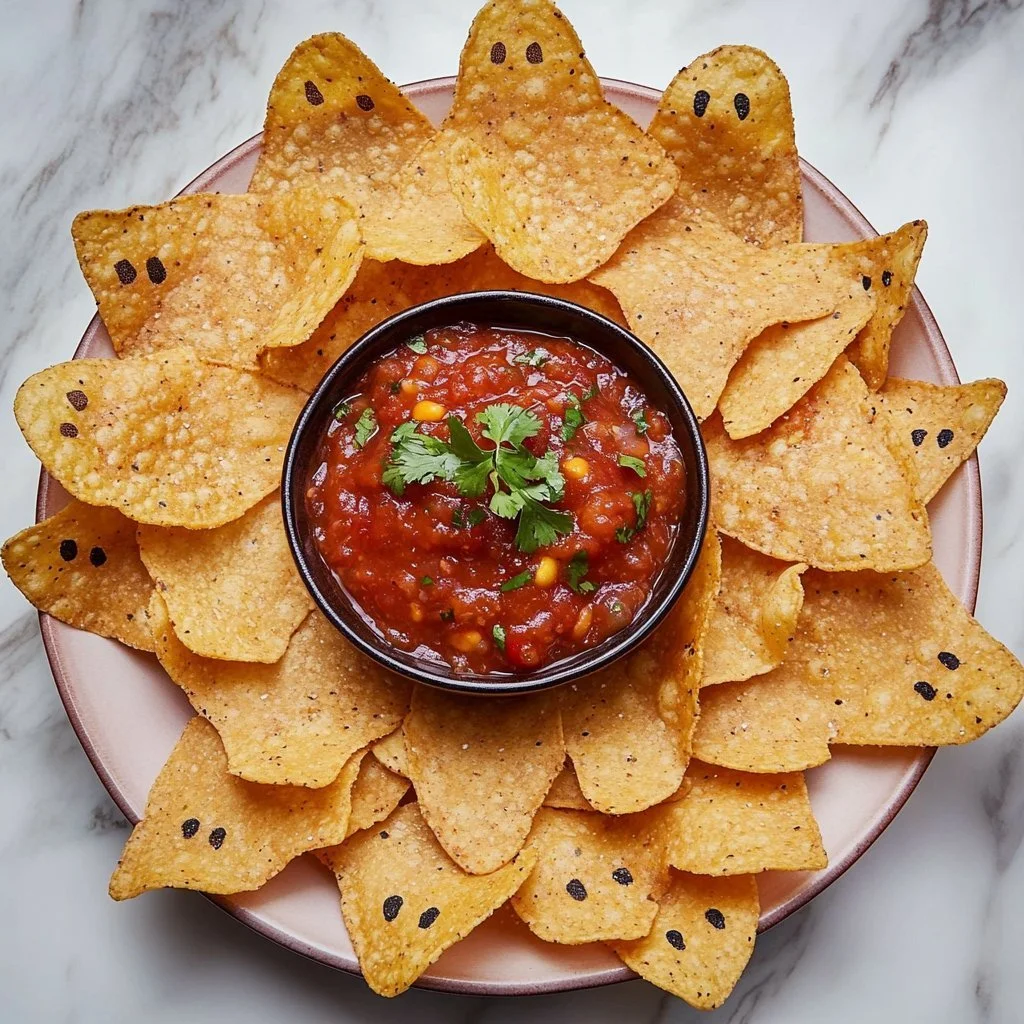
As the leaves turn and the air gets crisp, there’s a sense of excitement that fills the atmosphere—Halloween is right around the corner! One of the most delightful aspects of the spooky season is the food that complements the festivities. Have you ever thought about whipping up a simple, yet utterly delicious treat that can dazzle both kids and adults alike? Let me introduce you to Spooky Baked Halloween Chips!
These aren’t just any ordinary chips; they’re dressed up with a Halloween twist that makes them perfect for parties, family gatherings, or simply enjoying on a cozy movie night. Imagine crunchy, seasoned tortilla chips that are sure to bring smiles and create a spirit of festivity. With just a few ingredients and minimal prep time, you’ll have a snack that not only satisfies your cravings but also adds a fun element to your Halloween fun.
What makes this recipe truly special is its simplicity and flexibility. You can easily adapt the flavors to suit your taste or dietary preferences. Plus, kids love participating in the process—from tossing the chips to sprinkling the spooky seasoning. So why not dive in and see just how easy it is to make these Spooky Baked Halloween Chips? I promise you’ll be eager to share them with everyone!
Key Benefits of Spooky Baked Halloween Chips
Why you’ll love this recipe
- Deliciously Flavorful: The combination of olive oil and Halloween-themed seasoning gives these chips a delightful taste that will have everyone coming back for more.
- Quick and Easy: With just a few simple steps, you can whip up a batch in no time—perfect for last-minute snacks!
- Family-Friendly: Both kids and adults can enjoy these chips, making them perfect for Halloween parties or family gatherings.
- Customizable: You can easily switch up the flavors and toppings to suit your taste, making every batch a unique creation.
- Healthy Alternative: Baked instead of fried, these chips offer a healthier snack option without sacrificing flavor.
- Fun Activity: Involve the kids in the preparation process and make a memorable family tradition during Halloween.
What makes it stand out
What sets Spooky Baked Halloween Chips apart from regular nachos or chips is its thematic approach. Halloween is all about fun and creativity, and these chips embody that spirit perfectly. The idea of adding a Halloween-themed seasoning—be it paprika, garlic powder, or ranch seasoning—makes the recipe not just a dish, but a festive experience.
Additionally, you can customize your chips to match the theme of your Halloween party. Think of adding pumpkin spice seasoning or a sprinkle of cheese for a more adventurous twist! This versatility makes it a go-to snack for any occasion throughout the fall season, not just on Halloween.
Ingredients for Spooky Baked Halloween Chips
Complete ingredient list with measurements
- 1 bag (about 12 ounces) tortilla chips
- 2 tablespoons olive oil
- 1 tablespoon Halloween-themed seasoning (choices: paprika, garlic powder, or ranch seasoning)
Substitutes and alternatives
- Tortilla Chips: If you’re looking for a healthier option, consider using baked tortilla chips or even vegetable chips.
- Olive Oil: Feel free to replace olive oil with avocado oil or coconut oil for a different flavor profile.
- Halloween-Themed Seasoning: If you want a spicier kick, use taco seasoning, or for a milder flavor, stick with a classic like salt or herb seasoning.
How to Make Spooky Baked Halloween Chips – Step-by-Step Directions
Step 1 – Prep your workspace and ingredients
Start by gathering all your ingredients on the countertop. Clear some space and ensure you have a mixing bowl, a baking sheet, and parchment paper handy. Preheating your oven to 350°F (175°C) is also a crucial step to get the chips nice and crispy.
Step 2 – Toss the tortilla chips with olive oil
In a large bowl, combine the tortilla chips with the olive oil. Use your hands or a spatula to gently toss the chips until they are evenly coated in oil. This step is essential as it will ensure that the seasoning adheres well, giving each chip a delicious flavor.
Step 3 – Add the Halloween-themed seasoning
Sprinkle the Halloween-themed seasoning over the chips. Choose whichever seasoning excites you the most—paprika for smokiness, garlic powder for an extra kick, or ranch seasoning for creamy goodness! Toss the chips again to make sure each chip is evenly coated in the seasoning.
Step 4 – Prepare the baking sheet
Line a baking sheet with parchment paper or a silicone baking mat. This prevents the chips from sticking and ensures easy cleanup later. Spread the seasoned chips in a single layer on the baking sheet. Make sure they’re not piled on top of each other, as this will help them bake evenly.
Step 5 – Bake the chips
Place the baking sheet in the preheated oven. Bake the chips for 10 to 15 minutes, keeping a close eye on them. You want them to crisp up and turn a light golden color—this adds to the flavor and crunchy texture.
Step 6 – Allow to cool
Once they’re baked to perfection, remove the chips from the oven, and let them cool slightly on a wire rack. Allowing them to cool is essential; it helps the chips become extra crispy.
Step 7 – Serve in a festive bowl
Transfer the cooled chips to a festive bowl—this could be a pumpkin-shaped bowl, a classic black dish, or anything that screams Halloween! Presentation adds charm to your snacks and enhances the Halloween spirit.
Step 8 – Enjoy with dips!
Now your Spooky Baked Halloween Chips are ready to be served! Pair them with dips like guacamole, salsa, or even queso. The options are endless, and these chips will surely please all your munching guests.
Serving Suggestions for Spooky Baked Halloween Chips
Best occasions to serve this dish
- Halloween Parties: These spooky chips make a perfect addition to any Halloween gathering, adding a fun and festive touch to your snack table.
- Movie Nights: Pair these chips with your favorite scary or classic Halloween movies for a cozy at-home night with friends or family.
- Game Day: Whether it’s celebrating Halloween or watching your team, these chips are the perfect snack for cheering on your favorites.
What to serve with it
- Dips: Guacamole, salsa, queso, or even a creamy ranch dressing.
- Beverages: Pair with seasonal drinks like apple cider, pumpkin spice lattes, or spooky-themed cocktails.
- Toppings: Shredded cheese, chopped cilantro, or hot sauce can elevate the chips and add more flavors.
Storing Spooky Baked Halloween Chips Properly
Best storage practices
To keep your Spooky Baked Halloween Chips fresh, store them in an airtight container. They do best at room temperature and can last for up to 3 days. If you keep them in the fridge, they may lose their crunchiness.
Reheating and freezing tips
- Reheating: To regain their crispiness, pop the chips back in the oven at 350°F for about 5 minutes. Avoid the microwave, as it can make them soggy.
- Freezing: For longer-term storage, you can freeze the chips but keep in mind that they may lose their crunch. Thaw them in the refrigerator before reheating.
Tips & Tricks for Spooky Baked Halloween Chips
Mistakes to avoid
- Not coating evenly: Make sure the chips are evenly coated with olive oil and seasoning for the best flavor; otherwise, some may be bland.
- Overcrowding the baking sheet: Spread chips out in a single layer to help each one cook evenly and prevent sogginess.
- Overbaking: Keep an eye on the chips to avoid burning them, as baking times may vary based on your oven.
Extra tips for better results
- Experiment with flavors: Feel free to add additional spices or herbs for a personal touch. You can also mix seasonal flavors like cinnamon or chili powder.
- Involve the kids: Let children help with tossing the chips and sprinkling the seasonings. It gives them a sense of contribution and makes cooking more fun!
Recipe Variations of Spooky Baked Halloween Chips
Creative twists
- Loaded Halloween Chips: Add shredded cheese, jalapeños, and other toppings for a loaded chip experience. If using cheese, add it on top halfway through baking to melt perfectly.
- Flavored Chips: Try various seasonings such as ranch, taco, or a mix of spices to see what unique flavor profile you can create.
Dietary adjustments
- Gluten-Free Option: Use certified gluten-free tortilla chips to keep this recipe suitable for those with gluten sensitivity.
- Vegan Variation: If you’re looking to keep it vegan-friendly, all ingredients listed are vegan! Just make sure to use dips that fit the same dietary restrictions.
Conclusion about Spooky Baked Halloween Chips
In summary, Spooky Baked Halloween Chips truly encapsulate the spirit of Halloween with their fun presentation and delicious flavors. Easy to make, customizable for family preferences, and perfect for any gathering, they embody everything that makes Halloween special.
Why not give these chips a try this season? Involving the whole family in creating these delightful snacks can bring you all together, creating sweet memories along with tasty treats. I encourage you to experiment, enjoy the process, and share your feedback with friends and family!
FAQs about Spooky Baked Halloween Chips
What if it doesn’t turn out right?
Don’t worry if your chips don’t turn out perfect the first time. You can adjust cooking times based on your oven’s quirks, and sometimes, refining your seasoning mix will help too. Remember, cooking is all about practice and adjusting to find your perfect flavor!
Can I prepare it ahead of time?
Absolutely! You can prepare the seasoned chips in advance and store them in an airtight container. When you’re ready to serve, simply bake them fresh for a few minutes to regain that crispiness.
What are the best ingredient substitutions?
If you have allergies or dietary restrictions, you can easily swap out the ingredients. Use different oils, chips, or seasoning according to your needs—there are always alternatives to explore!
How long can it be stored?
Properly stored in an airtight container, these chips can last for about 3 days at room temperature. If you need to keep them longer, consider freezing them, keeping in mind they might lose some crunch.
Can I use store-bought dough or crust?
For this specific recipe, we are using tortillas, but if you want to get creative with dough, feel free! Just remember to adjust baking times for any different ingredients you try.
Is this recipe kid-friendly or family-appropriate?
Definitely! Kids can help with various steps, making it fun for the whole family. It’s also a great way to introduce them to cooking and experimenting with flavors.
Can I make this recipe allergen-free?
Yes, absolutely! You can choose gluten-free chips, and with the right seasoning, you can make it suitable for most dietary needs. Always check labels to ensure that every ingredient fits your dietary requirements.

Spooky Baked Halloween Chips
Ingrédients
For the Chips
- 1 bag tortilla chips (about 12 ounces) Substitute with baked or vegetable chips for a healthier option.
- 2 tablespoons olive oil Can be replaced with avocado oil or coconut oil.
- 1 tablespoon Halloween-themed seasoning (choices: paprika, garlic powder, or ranch seasoning) Use taco seasoning for a spicier kick or salt for a milder flavor.
Instructions
Preparation
- Gather all your ingredients on the countertop, including a mixing bowl, baking sheet, and parchment paper. Preheat your oven to 350°F (175°C).
- In a large bowl, combine the tortilla chips with the olive oil. Toss gently to ensure the chips are evenly coated.
- Sprinkle the Halloween-themed seasoning over the chips and toss again to coat.
- Line a baking sheet with parchment paper and spread the seasoned chips in a single layer.
Baking
- Bake the chips in the preheated oven for 10 to 15 minutes until they are light golden and crispy.
- Remove the chips from the oven and let them cool slightly on a wire rack.
- Transfer the cooled chips to a festive bowl for serving.
Serving
- Enjoy the chips with your choice of dips such as guacamole, salsa, or queso.