
Table of Contents
Introduction to Homemade Chocolates
Have you ever craved the rich, velvety taste of chocolate, only to realize that you want to create something truly special? If so, Homemade Chocolates might just be the answer. This delightful recipe offers the chance to indulge in a sweet treat without leaving the comfort of your kitchen. The blend of chocolate chips, heavy cream, and butter creates a luscious base that can be customized to suit any palate.
What makes this recipe for Homemade Chocolates standout is its simplicity. You don’t need to be a professional chocolatier to whip up these delectable bites. With just a few ingredients, you’re on your way to crafting chocolate confections that taste like they came from a fancy candy shop. Imagine the satisfaction of gifting a box of Homemade Chocolates, knowing you made them with your own hands.
Whether you’re looking for a sweet treat for yourself or a personalized gift for someone dear, Homemade Chocolates are the way to go. They can be made for special occasions like birthdays, anniversaries, or even just as a delightful surprise for a friend. The versatility of this recipe allows you to add your favorite toppings, making them truly irresistible.
So, ready to dive into the world of chocolate-making? Let’s explore the many benefits of creating your own Homemade Chocolates and how to do it step-by-step.
Key Benefits of Homemade Chocolates
Why You’ll Love This Recipe
- Delicious Flavor: The rich combination of chocolate and cream creates a heavenly taste.
- Easy to Make: With just a few ingredients and simple steps, anyone can make it.
- Customizable: Add your favorite nuts or sprinkles to tailor your chocolates to your liking.
- Perfect for Gifting: Homemade Chocolates make thoughtful gifts for friends and family.
- Budget-Friendly: Enjoy gourmet chocolates without the hefty price tag.
- Fun Activity: Great for cooking with kids or hosting a chocolate-making party.
What Makes It Stand Out
Homemade Chocolates are genuinely unique. Unlike store-bought versions, you have complete control over what goes into the mix—from the type of chocolate to the toppings. If you’re a fan of dark chocolate, this recipe allows you to use that exclusively, making it a versatile chocolate creation.
Another standout feature is the ability to personalize the chocolates for different occasions. Add festive sprinkles for a birthday celebration, or chop up some nuts for a nice crunch. This customization makes your Homemade Chocolates not just a dessert but a canvas for creativity.
Ingredients for Homemade Chocolates
Complete Ingredient List with Measurements
- 1 cup chocolate chips (dark or milk)
- 1/2 cup heavy cream
- 1/4 cup butter
- 1 teaspoon vanilla extract
- Sprinkles or nuts for toppings (optional)
Substitutes and Alternatives
If you have allergies or dietary preferences, swapping out some ingredients can make this recipe work for you. For a dairy-free option, you can replace the butter with coconut oil and use dairy-free chocolate chips. This still keeps the indulgent flavor while accommodating dietary needs.
For those looking to make it sugar-free, opt for sugar-free chocolate chips or add a natural sweetener like stevia to taste. The beauty of Homemade Chocolates is that you can adapt it however you see fit.
How to Make Homemade Chocolates – Step-by-Step Directions
Step 1 – Prepare Ingredients
Begin by gathering all your ingredients. Measure out 1 cup of chocolate chips, 1/2 cup of heavy cream, 1/4 cup of butter, and 1 teaspoon of vanilla extract. If you’re going to use toppings, have those ready as well.
Step 2 – Cook the Base
In a saucepan, combine the chocolate chips, heavy cream, and butter. Place it over low heat to melt. Stir continuously until everything is smooth and fully combined, about 5-7 minutes. Be patient; you want to avoid burning it.
Step 3 – Add Flavor
Once the chocolate mixture is smooth and creamy, take it off the heat. Allow it to cool for a minute before adding the vanilla extract. Stir well to combine; the vanilla adds depth and enhances the chocolate flavor.
Step 4 – Prepare the Molds
While the chocolate mixture cools, prepare your molds or line a baking dish with parchment paper. This will make it easier to remove your Homemade Chocolates once they’ve set.
Step 5 – Pour the Mixture
Carefully pour the chocolate mixture into the molds or the lined baking dish. Make sure to fill them evenly, leaving a little room at the top in case the mixture expands as it sets.
Step 6 – Add Toppings
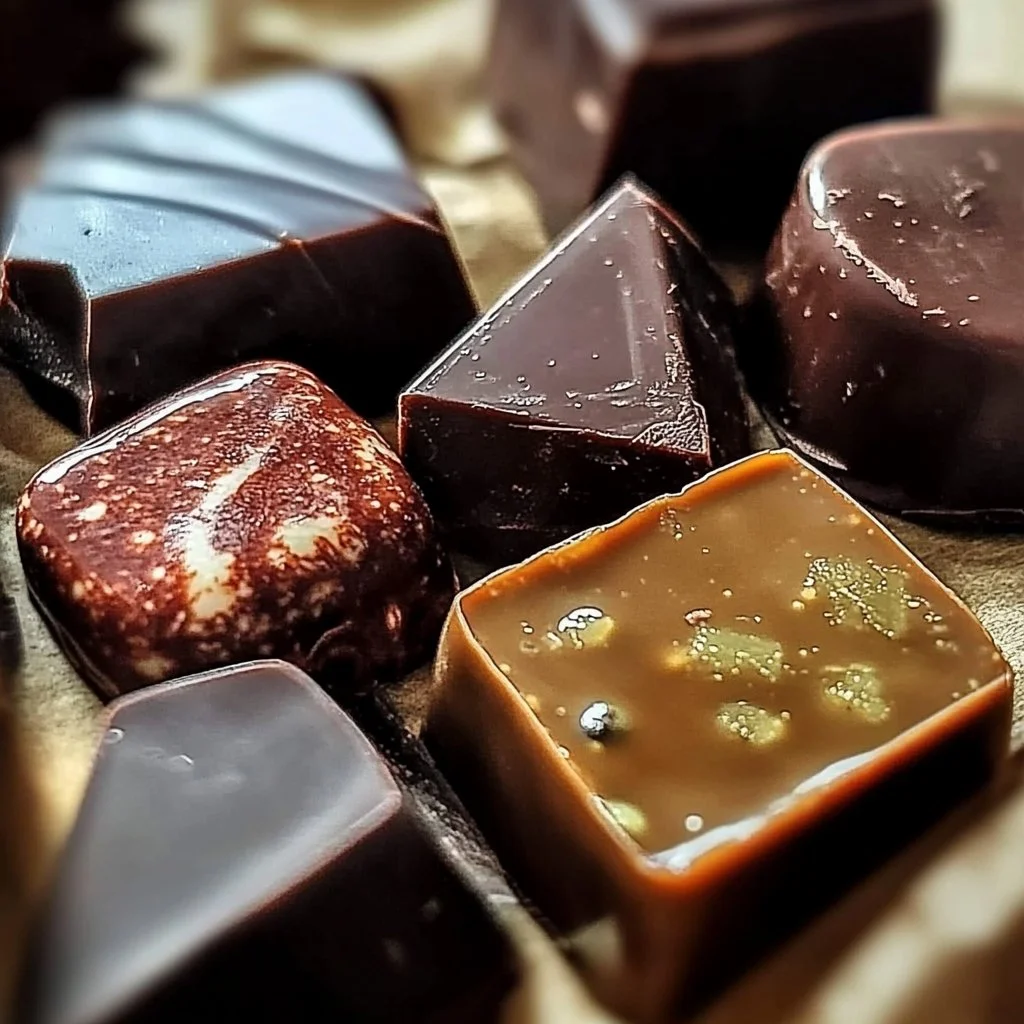
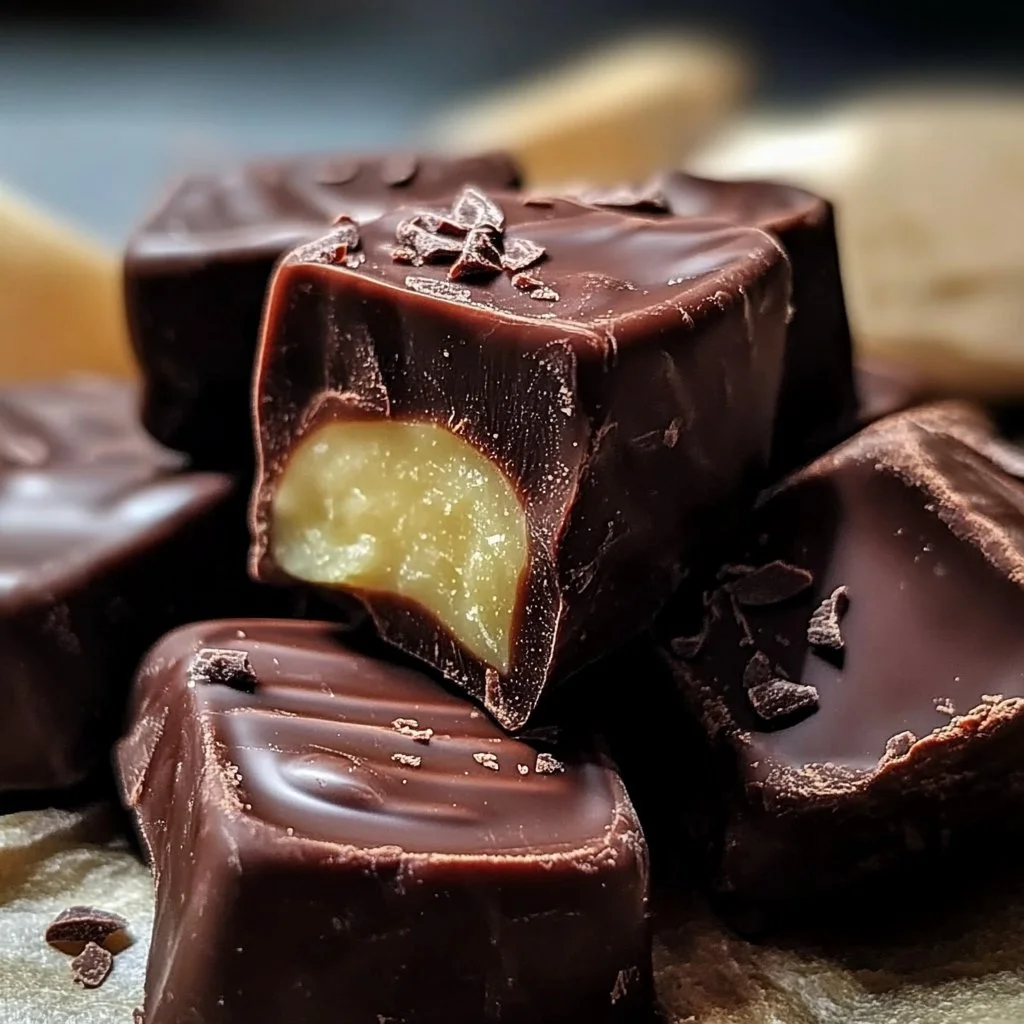
If desired, sprinkle your chosen toppings over the poured chocolate. You might opt for colorful sprinkles for a festive touch or chopped nuts for some added crunch.
Step 7 – Refrigerate
Place the molds or baking dish in the refrigerator. Allow the chocolates to set for about 25 minutes. You’ll know they are ready when firm to the touch.
Step 8 – Remove from Molds
Once fully set, take your Homemade Chocolates out of the refrigerator. Carefully remove them from the molds. If you used a baking dish, cut into squares or rectangles.
Step 9 – Enjoy and Share
Your Homemade Chocolates are now ready to be enjoyed! Whether you’re indulging yourself or sharing with loved ones, celebrate the joy of creating something delicious.
Serving Suggestions for Homemade Chocolates
Best Occasions to Serve This Dish
Homemade Chocolates are perfect for a variety of occasions. They shine during birthday parties as a sweet treat for guests. If you’re hosting a dinner party, having a box of these on the dessert table will certainly please your guests.
Holidays are another fantastic time to serve Homemade Chocolates, especially during Valentine’s Day or Christmas. Gifting homemade treats conveys thoughtfulness, making them more memorable.
What to Serve With It
Consider pairing your Homemade Chocolates with a fresh pot of coffee or a rich glass of red wine. For more festive occasions, a sparkling drink may enhance the chocolate experience. You can also serve them alongside some fresh fruits for a touch of freshness.
How to Store Homemade Chocolates Properly
Best Storage Practices
To keep your Homemade Chocolates fresh, store them in an airtight container. Placing them in the refrigerator is ideal, as it extends their shelf life while retaining their texture. They should stay fresh for up to two weeks, making them perfect for those who want to enjoy a sweet treat over time.
Reheating and Freezing Tips
If you find yourself with leftovers, you can freeze your Homemade Chocolates. Just ensure they are individually wrapped or stored in an airtight container to prevent freezer burn. To enjoy them later, let them thaw in the fridge overnight rather than at room temperature to maintain their consistency.
Tips & Tricks for Homemade Chocolates
Mistakes to Avoid
- Overheating the Chocolate: Melting chocolate should be done slowly. High heat can burn it and ruin the texture.
- Not Stirring Enough: Failing to stir continuously can lead to uneven melting, creating a grainy texture.
- Using Wet Tools: Always ensure your mixing tools are dry; moisture can cause chocolate to seize up.
- Skipping the Cooling Time: Don’t rush the cooling process. Allowing it to set properly ensures a great texture.
- Using Poor Quality Ingredients: Cheap chocolate chips can result in a less flavorful chocolate; choose quality products for the best results.
Extra Tips for Better Results
For a more refined chocolate flavor, consider adding a pinch of sea salt over the top. You can also infuse your cream with flavors like mint or coffee before combining. Additionally, use silicone molds for easier releases, and consider drizzling melted white chocolate over your finished chocolates for a decorative touch.
Recipe Variations of Homemade Chocolates
Creative Twists
- Nutty Delight: Mix in crushed nuts, such as almonds or hazelnuts, into the chocolate base for a nutty flavor.
- Mint Chocolate: Add a few drops of peppermint extract to the mixture before setting for a refreshing twist.
- Spicy Chocolates: Incorporate a pinch of cayenne pepper or chili powder for a surprising kick.
- Fruit Infusion: Fold in dried fruits like cranberries, cherries, or raisins before pouring the chocolate mixture into molds for added texture and flavor.
Dietary Adjustments
For vegan Homemade Chocolates, swap the butter with coconut oil and use dairy-free chocolate chips. For gluten-free options, ensure the chocolate chips are labeled as gluten-free.
Conclusion about Homemade Chocolates
Making Homemade Chocolates is not just about enjoying a sweet treat; it’s an experience filled with joy, creativity, and deliciousness. With this easy recipe, you are equipped to impress friends and family with your confectionary skills. The ability to customize flavors and toppings allows you to adapt the recipe to suit various preferences, ensuring everyone can enjoy them. Remember, the next time you have a craving for chocolate, creating your own prevents you from compromising on quality and taste. So grab your ingredients and start crafting your batch of Homemade Chocolates today!
FAQs about Homemade Chocolates
How long do Homemade Chocolates last?
Stored in an airtight container in the fridge, Homemade Chocolates can last up to two weeks.
Can I make these chocolates ahead of time?
Absolutely! Homemade Chocolates can be made a few days in advance, making them perfect for prepping for events.
What kind of chocolate chips should I use?
You can use dark, milk, or even white chocolate chips based on preference. Just ensure they are quality brands for the best flavor.
Can I freeze Homemade Chocolates?
Yes, you can freeze Homemade Chocolates. Just be sure they’re stored in an airtight container, and they can last up to three months.
How do I thaw frozen Homemade Chocolate?
To thaw, place them in the refrigerator overnight instead of at room temperature to maintain their texture.
What can I use instead of heavy cream?
For a lighter option, you can try canned coconut milk or evaporated milk as substitutes for heavy cream.
Are there alternatives for those with nut allergies?
Absolutely! You can skip nuts altogether or use seeds like sunflower seeds to give a similar crunch without the nuts.
How can I make Homemade Chocolate more festive?
Add colorful sprinkles or edible glitter on top before they set, or use themed molds for special occasions.
Can I use liquid sweeteners in this recipe?
While you can incorporate liquid sweeteners, it may affect the texture. It’s best to use powdered sweeteners for better results.
What should I do if my chocolate seizes?
If chocolate seizes, you can try adding a small amount of warm cream or vegetable oil to rescue the mixture. Stir it well until it smooths out.

Homemade Chocolates
Ingrédients
Main Ingredients
- 1 cup chocolate chips (dark or milk) Use quality chocolate for the best flavor.
- 1/2 cup heavy cream For a lighter option, substitute with canned coconut milk.
- 1/4 cup butter Can be replaced with coconut oil for a dairy-free option.
- 1 teaspoon vanilla extract Adds depth of flavor to the chocolate.
- to taste sprinkles or nuts for toppings Optional toppings can be customized.
Instructions
Preparation
- Gather all your ingredients: 1 cup of chocolate chips, 1/2 cup of heavy cream, 1/4 cup of butter, and 1 teaspoon of vanilla extract. Prepare any toppings you plan to use.
Cooking the Base
- In a saucepan, combine the chocolate chips, heavy cream, and butter. Melt over low heat, stirring continuously for about 5-7 minutes until smooth.
Flavoring
- Remove the mixture from heat and let it cool for a minute before stirring in the vanilla extract.
Molding
- Prepare molds or line a baking dish with parchment paper.
- Pour the chocolate mixture into molds or the lined dish, filling them evenly.
Adding Toppings
- Sprinkle your desired toppings over the poured chocolate.
Setting
- Refrigerate the molds or dish for about 25 minutes until the chocolates are firm to the touch.
Serving
- Once set, remove the chocolates from the molds. If using a dish, cut into squares or rectangles.
- Enjoy your homemade chocolates or share them with friends!